Do you have a question about the SATO WS408DT and is the answer not in the manual?
Lists the key features of the SATO WS printer, including interfaces, print speed, and connectivity options.
Provides a checklist of all items that should be included in the printer package upon delivery.
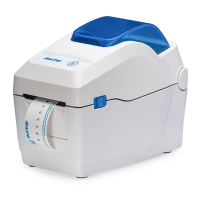
Details printer components for DT and TT models, including internal views, printhead, sensors, and labels.
Explains the meaning of different LED status lights and blinking patterns on the DT model, including system modes.
Step-by-step instructions for connecting the printer's power supply and AC power cord.
Guidance on the correct procedure for powering the printer on and off.
Instructions for preparing, installing, and testing media rolls for DT and TT models.
Instructions for correctly installing a ribbon roll into the Thermal Transfer (TT) model.
Description and illustration of various supported media types, including continuous and fanfold.
Procedure for calibrating the transmissive and reflective media sensors for optimal performance.
How to perform a self-test to print a configuration label and check printer status.
Instructions to return the printer to its factory default settings to resolve issues.
Explanation of the transmissive sensor's function and placement for detecting gaps.
Explanation of the reflective sensor's function for detecting gaps, notches, and black marks.
General guidelines for routine maintenance, emphasizing safety before cleaning.
Instructions for cleaning the printer's printhead to ensure optimal print quality.
Steps for cleaning the media roll holders, guides, and media path.
Procedure for cleaning the media sensors to ensure accurate media detection.
Instructions for cleaning the platen roller to maintain print quality and prevent printhead damage.
Covers common problems like printer not turning on, media feed issues, and printing position errors.
Addresses problems related to media loading, paper jams, and incorrect printing positions.
Troubleshooting steps for ribbon-related issues such as ribbon out, broken, or wrinkled.
Resolves other printing problems like broken lines, USB errors, cutter issues, and printhead problems.
Introduction to the SATO WS4 Printer Utility software for configuration and setup.
Step-by-step guide for downloading and installing the SATO WS4 Printer Utility.
Overview of the utility interface, including menu bar, toolbar, navigation pane, and properties pane.
Details the File, Setting, and Help menus available in the utility's menu bar.
Explains the function of toolbar items for printer model, emulation, DPI, and status.
Describes the Navigation pane's items: Parameter Setting, Download, Tool, Font, and their functions.
Instructions for configuring IPv6 settings for network connectivity.
Steps to establish a wireless LAN connection, including network name and password configuration.
Guide on setting up a Bluetooth connection between the printer and a computer or device.
Detailed specifications for the printer, including print method, resolution, sensors, and memory.
Specifications related to media types, sizes, ribbon sizes, and ribbon types supported by the printer.
Lists the supported one-dimensional, two-dimensional, and composite barcode symbologies.
Technical specifications for the printer's Bluetooth interface, including standard and operating parameters.
Technical specifications for the printer's Wireless LAN interface, including protocols and security.
Specifications for the Ethernet port, including speed, protocol, and technology.
Details on power supply requirements, power consumption, operating temperature, and humidity.
Information on the printer's physical dimensions, size, and weight.
Explanation of pictographic symbols used in the manual and on printer labels for safe operation.
Warning against placing the printer on unstable surfaces or in areas prone to vibration.
Caution against placing liquids or foreign objects near or inside the printer to prevent hazards.
Warning against using voltages other than those specified to avoid fire or electric shock.
Instructions on grounding the printer's ground wire to prevent electric shock.
Precautions for handling the power cord to prevent damage, fire, or electric shock.
Procedure to follow if the printer is dropped or broken, emphasizing immediate power off.
Warning against using the printer if it exhibits abnormal behavior like smoke or unusual smells.
Prohibition against disassembling or modifying the printer, advising professional service.
Safety advice concerning the printer's cutter mechanism, advising against touching it.
Safety precautions when using head cleaning fluid, including avoiding heat and keeping out of reach of children.
Warning that the print head is hot after printing and caution against touching it.
Caution against operating the printer in high humidity areas to prevent electric shock.
Guidelines for safely carrying the printer, including unplugging wires and not carrying with media loaded.
Safety advice regarding the power supply and cord, warning against wet hands and hot devices.
Caution regarding pinching fingers when opening/closing the top cover and preventing it from slipping.
Warning about pinching fingers when loading media rolls into the printer.
Recommendation to unplug the power cord when the printer is not in use for an extended period.
Instruction to unplug the power cord before performing maintenance or cleaning tasks.