009-1839-04 | Savant IP Audio Products with Integrated Host Deployment Guide 45 Perseverance Way, Hyannis, MA 02601
200207 | © 2020 Savant Systems, LLC
5 of 25
Savant.com | 508.683.2500
3. Wiring and Connections
The control connections on the Savant IP Audio Products with Integrated Host are used to send control data to component devices, and/or receive data
from devices to display current status information within a user interface, or to trigger a system action. Each port type may support multiple protocols that
are determined by the logical connection within Blueprint.
3.1. IR Wiring
IR connections are made using a 6-pin screw down plug-in
connector supplied with the controller. The stripped wire slips into
the rear of the connector and the screws are used to lock the wire
in the hole.
IMPORTANT!
Read precautions below before proceeding!
– All IR emitters must be installed 15 feet (4.6 meters) or less
from the chassis or receiver being controlled.
– Use of 3rd party flashing IR emitters with Talk Back is not
recommended. These types of emitters can draw voltage away
from the IR signal which degrades the IR performance.
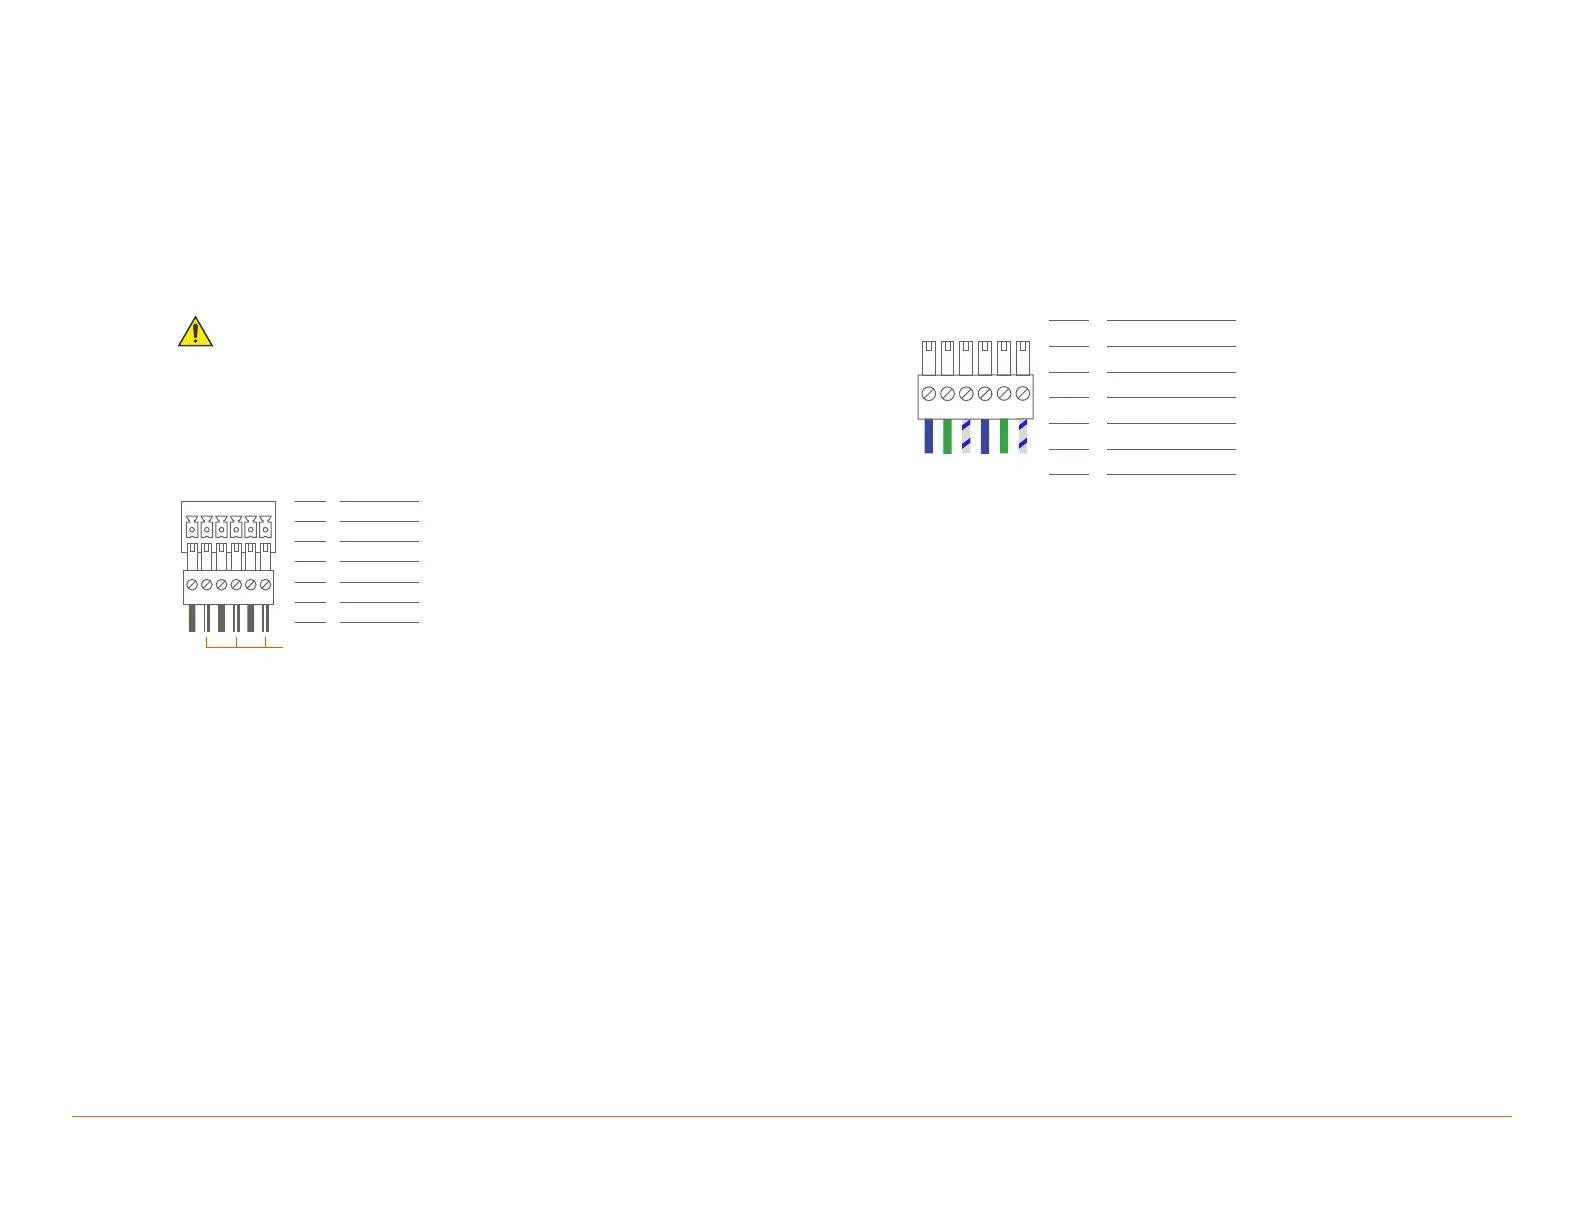
Use white stripe
432
1
Pin 1 IR 1
-
Pin 2 IR 1 +
Pin 3 IR 2
-
Pin 4 IR 2 +
-
1 +
-
2 +
Pin 5 IR 3
-
Pin 6 IR 3 +
65
-
3 +
To connect wires into terminal block connector:
1. Remove power if power is applied.
2. Pull to remove the connector from the rear of the controller.
3. With a small flat bladed screwdriver, turn the screws on the
top of connector counterclockwise until the silver crimps in
the front open enough to slide the wire into the square slot.
4. Strip the ends of each wire to ¼ inch. Using the diagram to the
left, insert the stripped wires into the proper slots.
5. Turn the screws clockwise until the screw tightens around
each wire. Tug on the wire a bit to verify it is installed securely.
There should no bare wires protruding from the rear of the
connector.
6. Plug terminal block back into the rear of the controller.
3.2. RS-232 Wiring
RS-232 connections are made using a 6-pin screw down plug-in
connector supplied with the controller. The stripped wire slips into
the rear of the connector and the screws are used to lock the wire
in hole.
Pin RS-232 1 Ground
Pin RS-232 1 Transmit
Pin RS-232 1 Receive
Pin RS-232 2 Ground
432
1
65
Pin RS-232 2 Transmit
Pin RS-232 2 Receive
1
2
3
4
5
6
NOTES:
– Wire colors shown do not represent any standard.
– CTS/RTS handshaking for flow control is not supported.
– For further details on RS-232 serial control adapters,
conversion, and wiring, refer to the RS-232 Conversion to DB-9
and RS-422/485 Pinout Reference Guide and/or the RS-232
Serial Communication Troubleshooting Guide on the Savant
Customer Community.
To connect wires into the terminal block connector:
1. Remove power if power is applied
2. Pull to remove the terminal block from rear of the controller.
3. With a small flat bladed screwdriver, turn the screws on the
top of the terminal block counterclockwise until the silver
crimps in the front open enough to slide the stripped wires
into the square slots.
4. Insert one of the stripped wires from the device being
controlled into its respective slot on the terminal block. Refer
to the diagram.
5. Turn the screw clockwise until the silver crimp tightens around
the wire. Tug on the wire a bit to verify the wires are installed
securely. Make sure a minimal amount of bare wire is exposed
to prevent contact between adjacent wires.
6. Repeat for each wire till all wires are installed and plug
terminal block back into the rear of the controller.
7. Reapply power.

 Loading...