Cooling system
OPM 360 en-GB 46
© Scania CV AB 2017, Sweden
Cleaning the charge air cooler
The charge air cooler must be removed if there is
no space behind it to take out the cooler cores.
See previous section.
1. Remove the sea water pipes to and from the
charge air cooler. Remove flanges and
charge air pipe from the charge air cooler.
Remove the old gaskets and scrape off any
gasket residue.
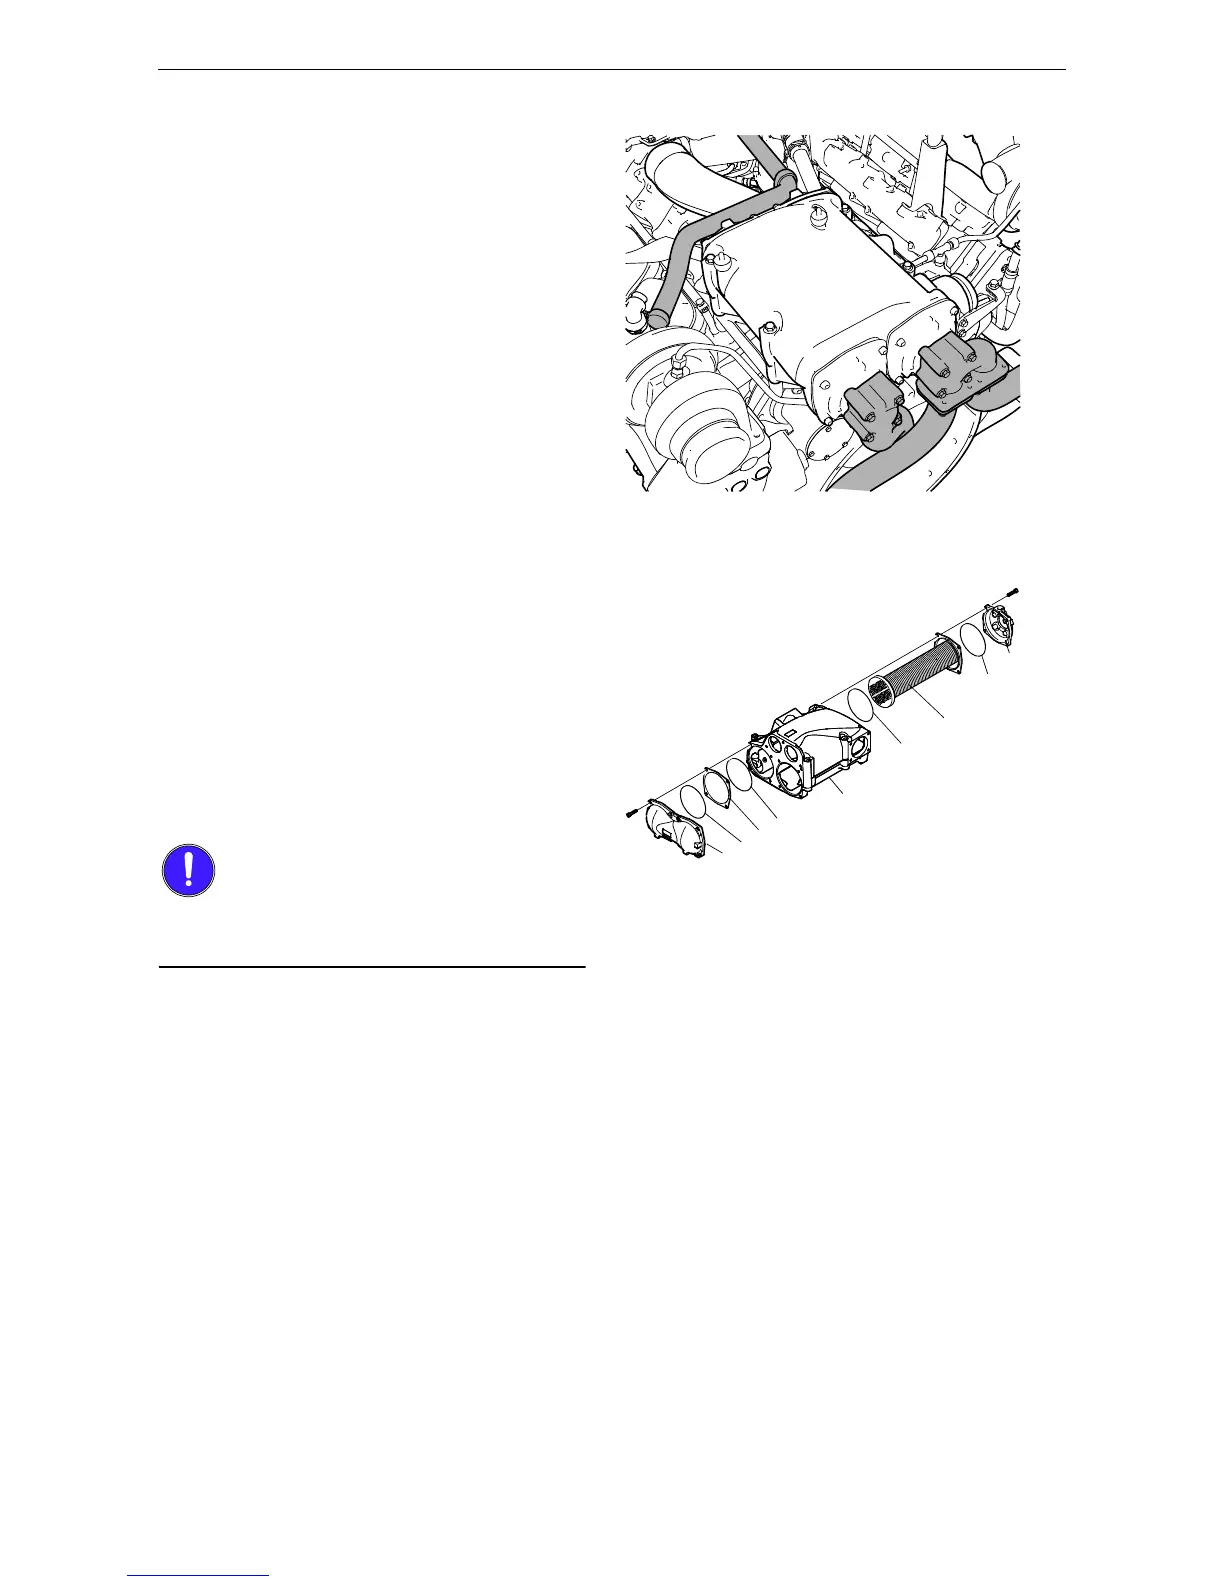
2. Remove the screws on the charge air cooler
covers (1) and remove the covers. Mark the
covers so that you can put them back on the
correct side.
3. Press in the cooler core (5) slightly on one
side and pull it out from the other side.
4. Clean the cooler core on the outside with par-
affin-based engine detergent. Remove any
internal deposits using a round rod. Renew
the cooler core if it is damaged.
Do not use caustic soda as this could damage the
aluminium.
5. Renew damaged or hard O-rings (2).
6. Assemble the charge air cooler. Tighten the
M8 screws on the cover to 15 Nm (11 lb-ft).
 Loading...