Zhejiang Sealand Technology Co.,Ltd.
7.4 Pulse equivalent setting
1. On main interface, sweep over screen as Pic. 7-1 until comes interface ;
2. Sweep over SET/SELECT as Pic. 7-2 until cursor points to ;
3. Press SET until indicator light turns red & blinks, comes the password input interface;
4. Input password:
a. Sweep over SET/SELECT to set the value, SET=Decrease, SELECT=Increase.
b. Sweep over screen to move to nearby digit, from SET to SELECT=Move right,
SELECT to SET=Move left.
c. Press SET until indicator light turns red & blinks, to confirm password( or press
SELECT until indicator light turns red & blinks, to cancel operation).
5. Comes interface ; sweep over SET/SELECT until cursor points
to PE(Pulse equivalent); press SET until indicator light turns red & blinks; input new
PE( refer to Step 4); done;
6. Press SELECT until comes pop-up menu, asking whether to return to main interface;
sweep over SET for yes, SELECT for no, and sweep over SET/SELECT again to confirm.
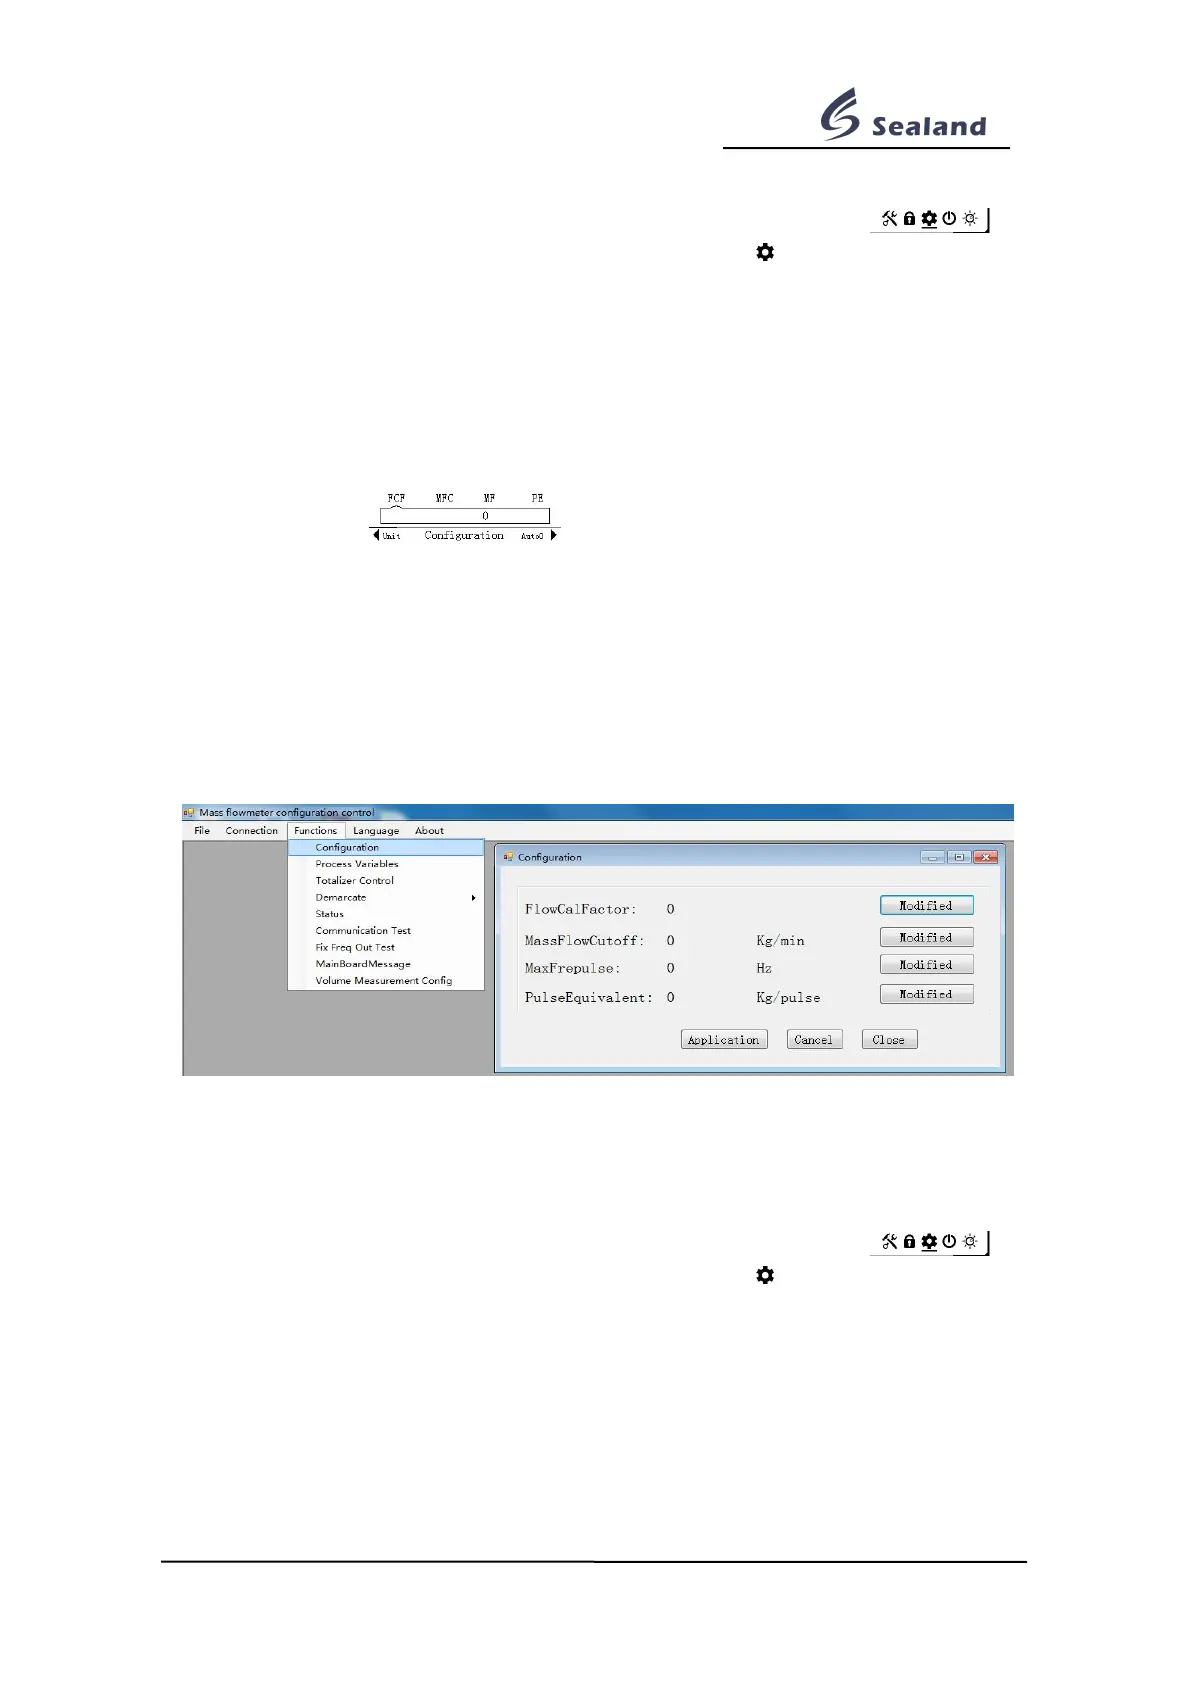
● By software
Start the software; check tool bar on the top; click Functions --> Configuration; comes setting
interface; click Modified on the right of PulseEquivalent; input new PE; click OK to confirm;
click Application; done.
7.5 Zero calibration setting
Please refer to Chapter 3.2.4 before zero calibration.
1. On main interface, sweep over screen as Pic. 7-1 until comes interface ;
2. Sweep over SET/SELECT as Pic. 7-2 until cursor points to ;
3. Press SET until indicator light turns red & blinks, comes the password input interface;
4. Input password:
a. Sweep over SET/SELECT to set the value, SET=Decrease, SELECT=Increase.
b. Sweep over screen to move to nearby digit, from SET to SELECT=Move right,
SELECT to SET=Move left.
c. Press SET until indicator light turns red & blinks, to confirm password( or press
SELECT until indicator light turns red & blinks, to cancel operation).
 Loading...