Zhejiang Sealand Technology Co.,Ltd.
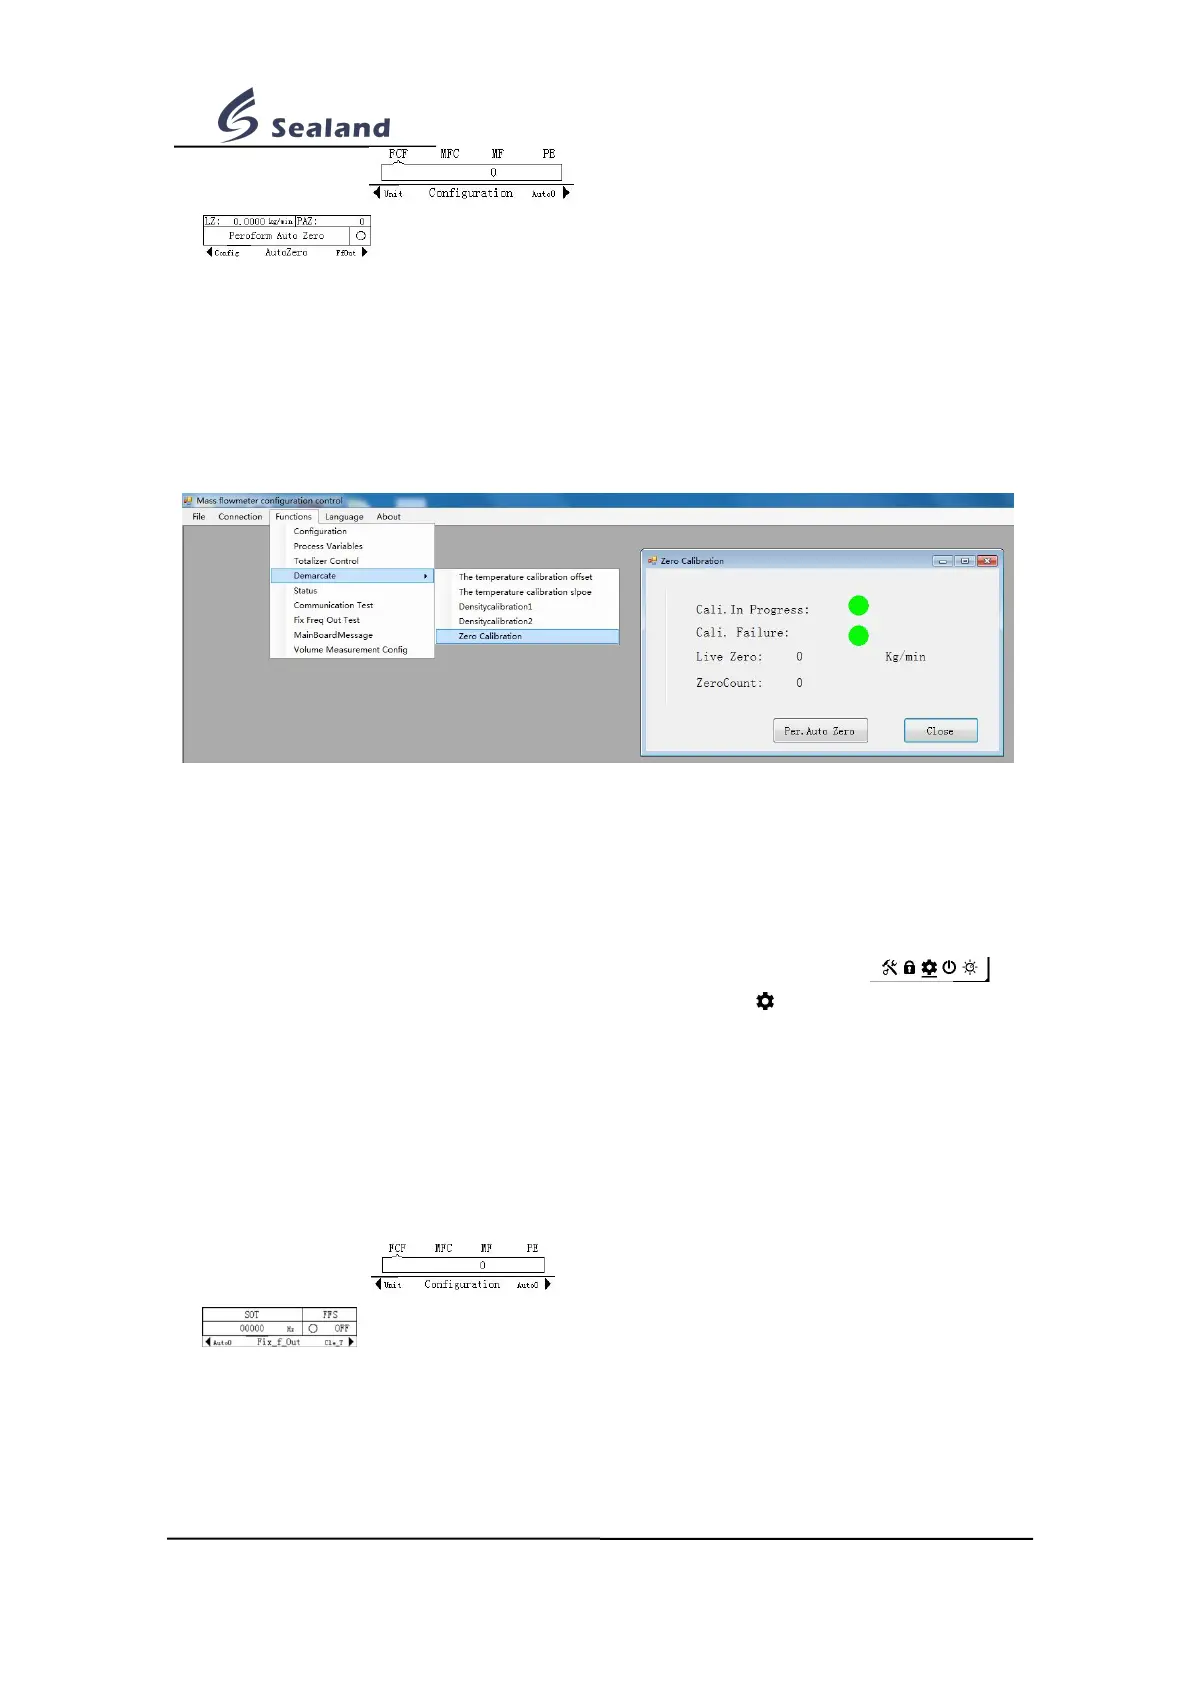
5. Comes interface ; sweep over screen until comes interface
; sweep SELECT until cursor points to Peroform Auto Zero; press SET
until indicator light turns red & blinks; zero calibration begins; it takes about 2 min, and
shows Peroform Auto Zero again when over; done;
6. Press SELECT until comes pop-up menu, asking whether to return to main interface; sweep
over SET for yes, SELECT for no, and sweep over SET/SELECT again to confirm.
● By software
Start the software; check tool bar on the top; click Functions --> Demarcate --> Zero
Calibration; comes setting interface; click Per. Aoto Zero; done.
7.6 Fix frequency output setting
This function is to simulate a fix frequency output, to help test counting accuracy and max.
frequency input of the pulse receiver(generally, it is an electronic controller). This output will
disappear in about 1 min automatically.
1. On main interface, sweep over screen as Pic. 7-1 until comes interface ;
2. Sweep over SET/SELECT as Pic. 7-2 until cursor points to ;
3. Press SET until indicator light turns red & blinks, comes the password input interface;
4. Input password:
a. Sweep over SET/SELECT to set the value, SET=Decrease, SELECT=Increase.
b. Sweep over screen to move to nearby digit, from SET to SELECT=Move right,
SELECT to SET=Move left.
c. Press SET until indicator light turns red & blinks, to confirm password( or press
SELECT until indicator light turns red & blinks, to cancel operation).
5. Comes interface ; sweep over screen until comes interface
; sweep over SELECT until cursor points to FFS; press SET until
indicator light turns red & blinks; the screen shows ON instead of OFF; sweep over
SELECT until cursor points to SOT; press SET until indicator lights turns red & blinks;
input new frequency output( refer to Step 4); done;
6.Press SELECT until comes pop-up menu, asking whether to return to main interface;
sweep over SET for yes, SELECT for no, and sweep over SET/SELECT again to confirm.
 Loading...