Starting up device • 19
English
17-10-07-651-100a/07-2019S
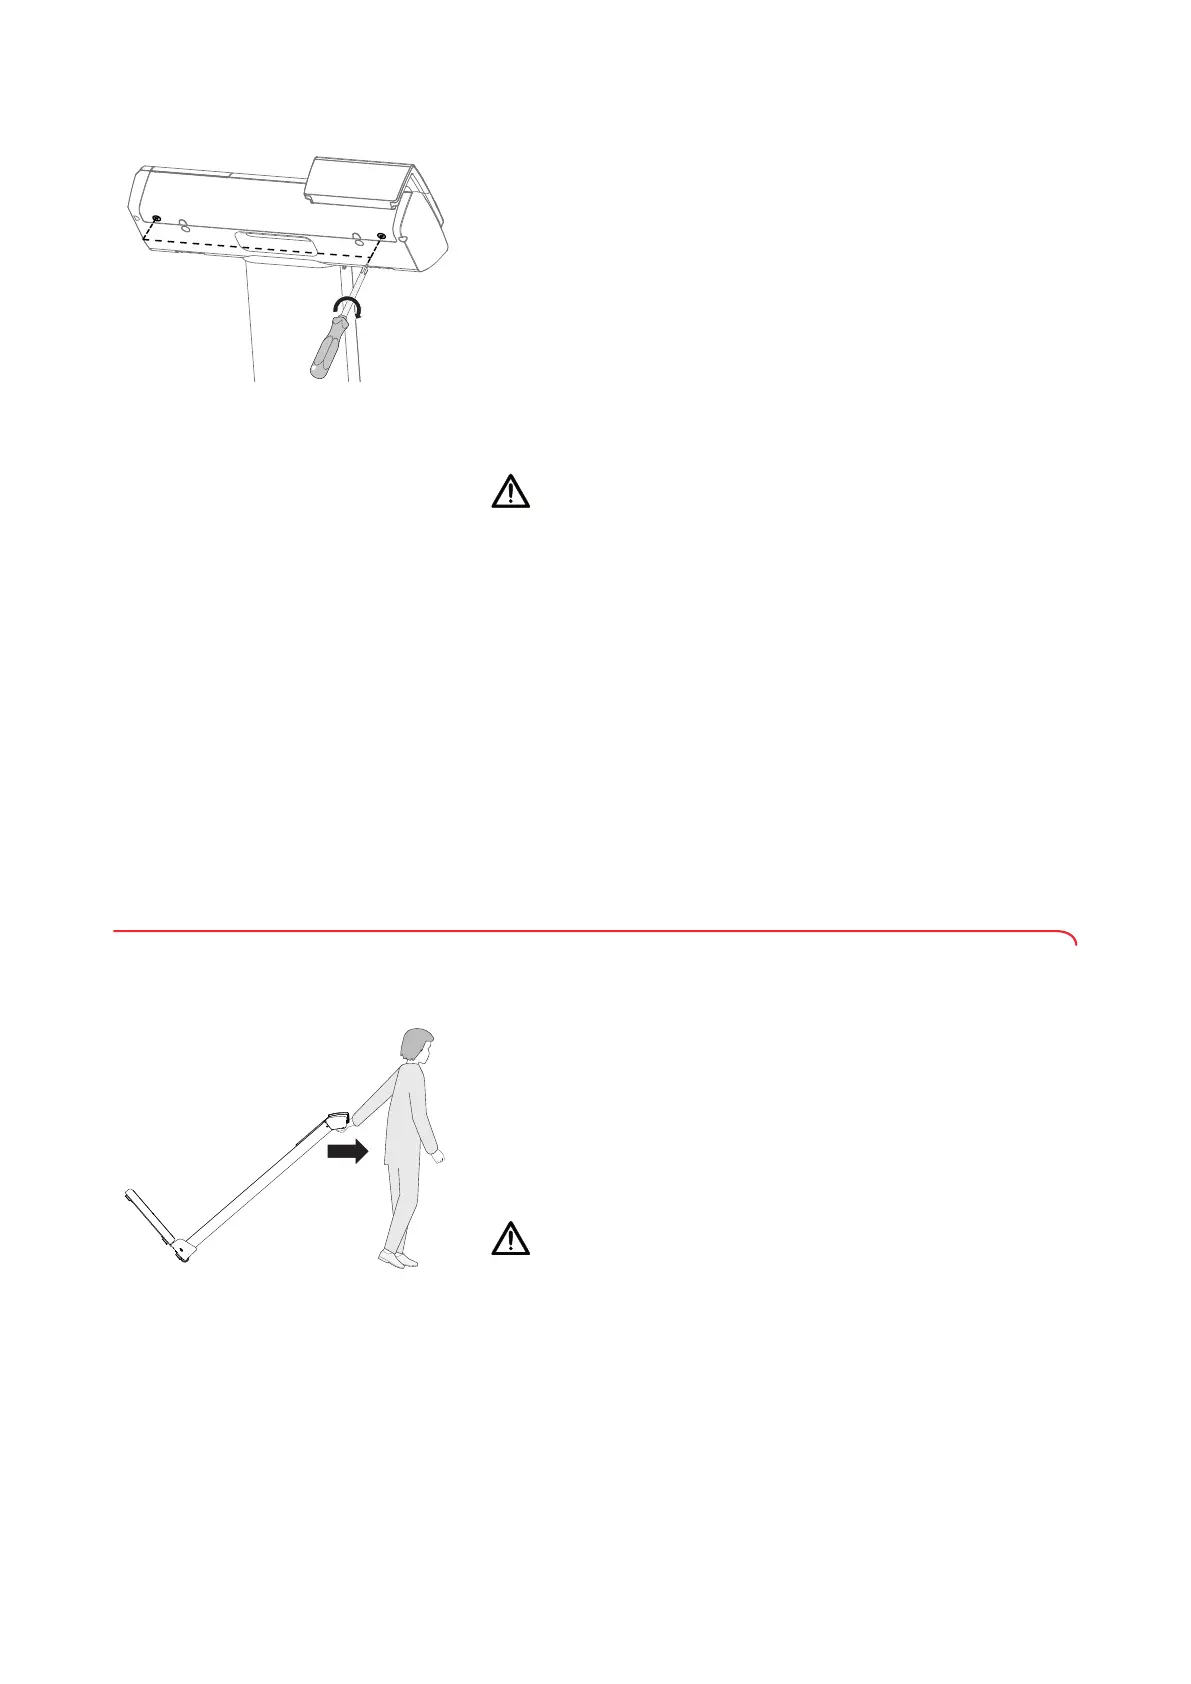
8. Fit the cover panel:
a) Insert cover panel
b) Place and tighten two cross-head screws
Setting up the device 1. Place the device on a firm, level surface.
CAUTION!
Incorrect measurement as a result of incorrect setup location and
incorrect ambient conditions
Soft floors such as wooden hallways, for example, give under the
patient's weight and falsify the measuring result. Incorrect ambient
conditions lead to measuring faults.
► Select a setup location with a level, stable floor in order to achieve
precise measuring results.
► Use the device only in the intended ambient conditions
(➔ “Technical data”, page 29).
2. Remove the protective film from the display.
Disinfecting the device ► Disinfect the following components before initial commissioning
(➔ “Disinfecting”, page 26):
– Column and recessed handle
– Display head and display unit
– Measuring rod, head slide with measuring flap
– Weighing platform
4.3 Transporting the device
The device is equipped with two casters to facilitate transport over short
distances.
1. If necessary, remove the plug-in power supply unit from the power socket
and from the device.
2. Fold down the measuring flap and push the upper telescopic element of
the measuring rod into its lowest position.
3. Take hold of the recessed handle of the device.
4. Tilt the device until it can be moved freely on the casters.
5. Move the device slowly and carefully over door sills.
CAUTION!
Incorrect measurement as a result of incorrect setup location and
incorrect ambient conditions
Soft floors such as wooden hallways, for example, give under the
patient's weight and falsify the measuring result. Incorrect ambient
conditions lead to measurement errors.
► Select a setup location with a level, stable floor in order to achieve
precise measuring results.
► Use the device only in the intended ambient conditions
(➔ “Technical data”, page 29).
6. Transport the device to its new setup location.
7. Set the device in an upright position.