ADN Digital Conference System | 153
Using the “Conference Manager” software
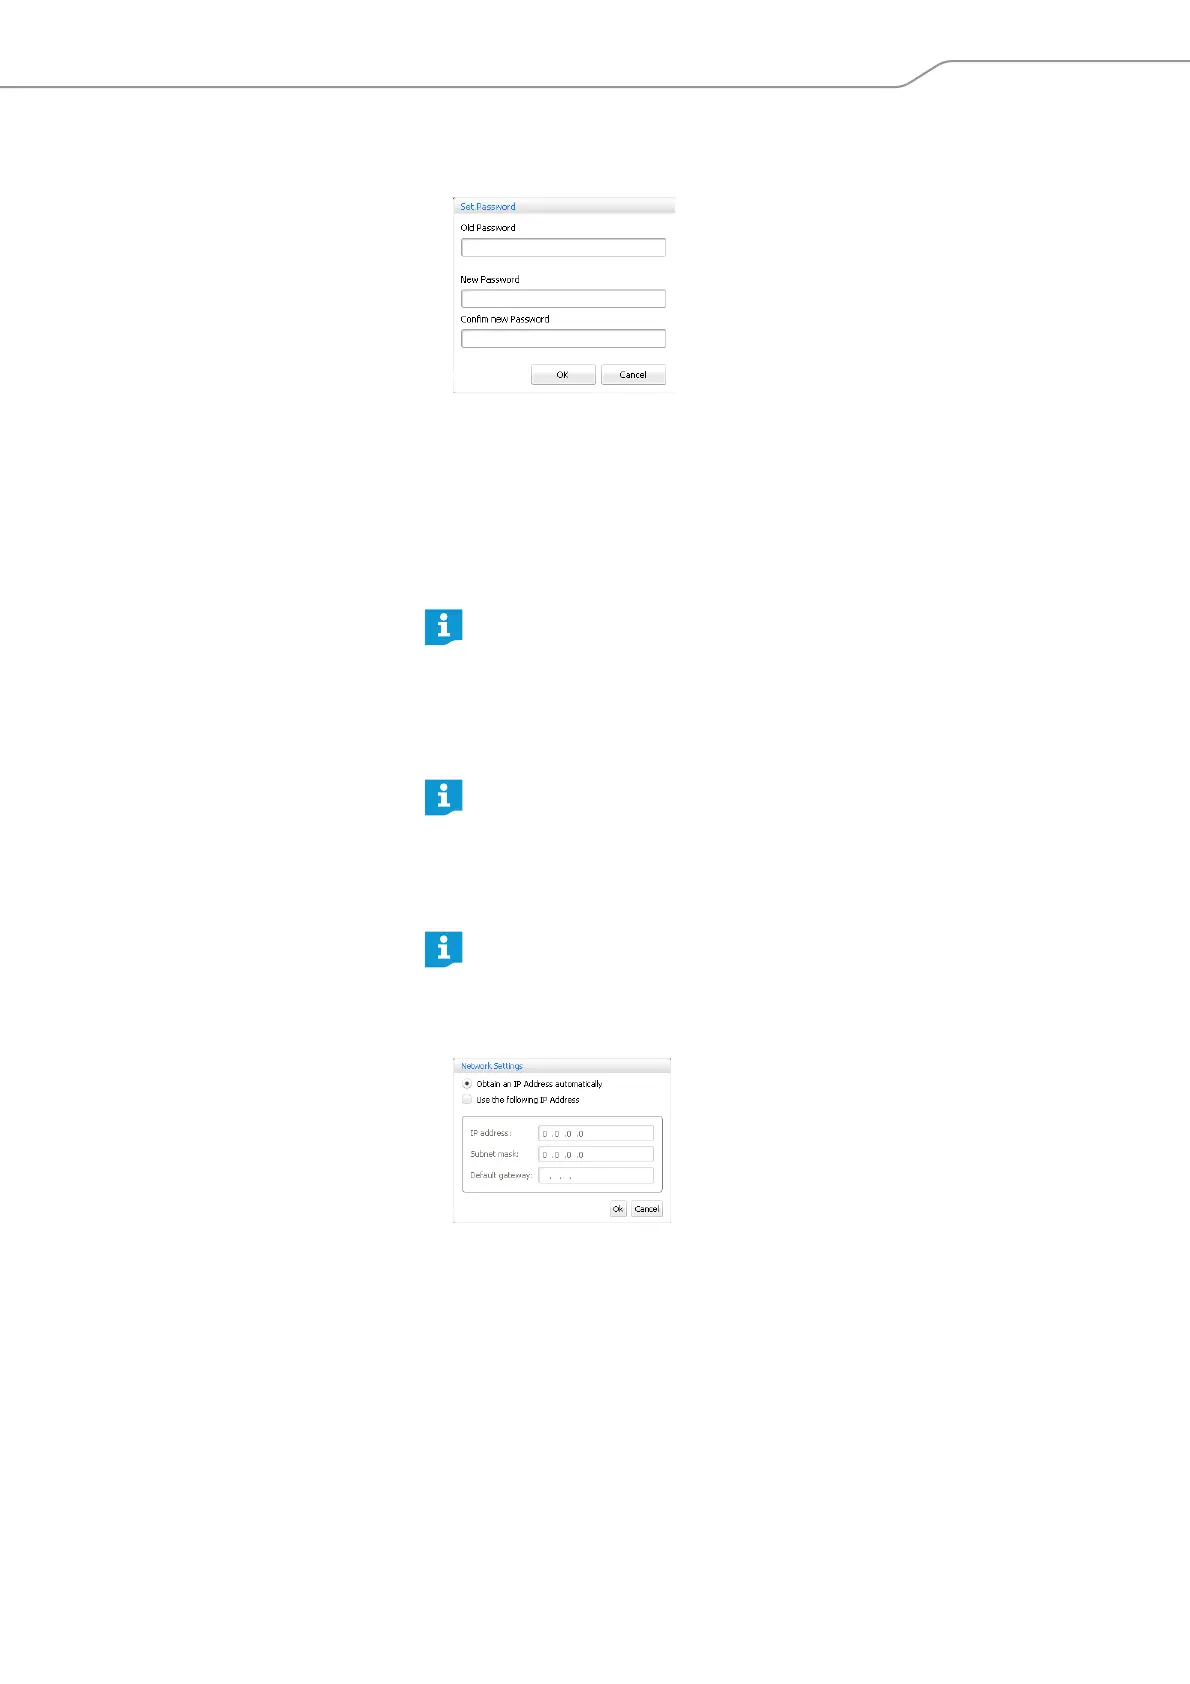
Protecting configurations with a
password and changing a password
왘 In the menu bar, click “Settings” > “Set Password...”.
The “Set Password” window appears.
To create a new password:
왘 Leave the “Old Password” field empty.
To change an existing password:
왘 Enter the existing password into the “Old Password” field.
왘 Enter the new passwo
rd into the “New Password” and “Confirm new Password”
fields.
The password can consist of up to 16 characters.
왘 Click “OK”.
The new password is saved and the configuration is password-protected.
Before any changes to the configuration are accepted, you are prompted to
enter the password set.
Adjusting network settings
왘 In the menu bar, click “Settings” > “Network...”.
The “Network Settings” window appears.
To
automatically integrate the central unit into a network using a dynamic IP
address:
왘 Sele
ct the “Obtain an IP Address automatically” option button.
왘 Click “OK”.
The settin
g
is applied and the “IP Address” and “Subnet mask” fields display
th
e automatically assigned addresses.
To manually integrate the central unit in a network using a static IP address, subnet
mask and d
efault gateway:
왘 Select the “Use the following IP Address” option button.
왘 Enter the desired IP address into the “IP address” field.
If you do not wa
nt to use a password, lea
ve the “New Password” and
“Confirm new Password” fields empty.
The master
key combination allows you to unlock password-protected
configurations:
왘 Press the key combination “CTRL” + “SHIFT” + “F10”.
An
exi
sting password is deleted.
If you make changes to the settings in the “Network Settings” window, an
existing network connection can be lost!