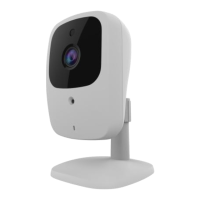
10
• Select the desired Camera from the list on the left. The current settings for
the selected Camera will be displayed in the table on the right.
• Click Next to continue.
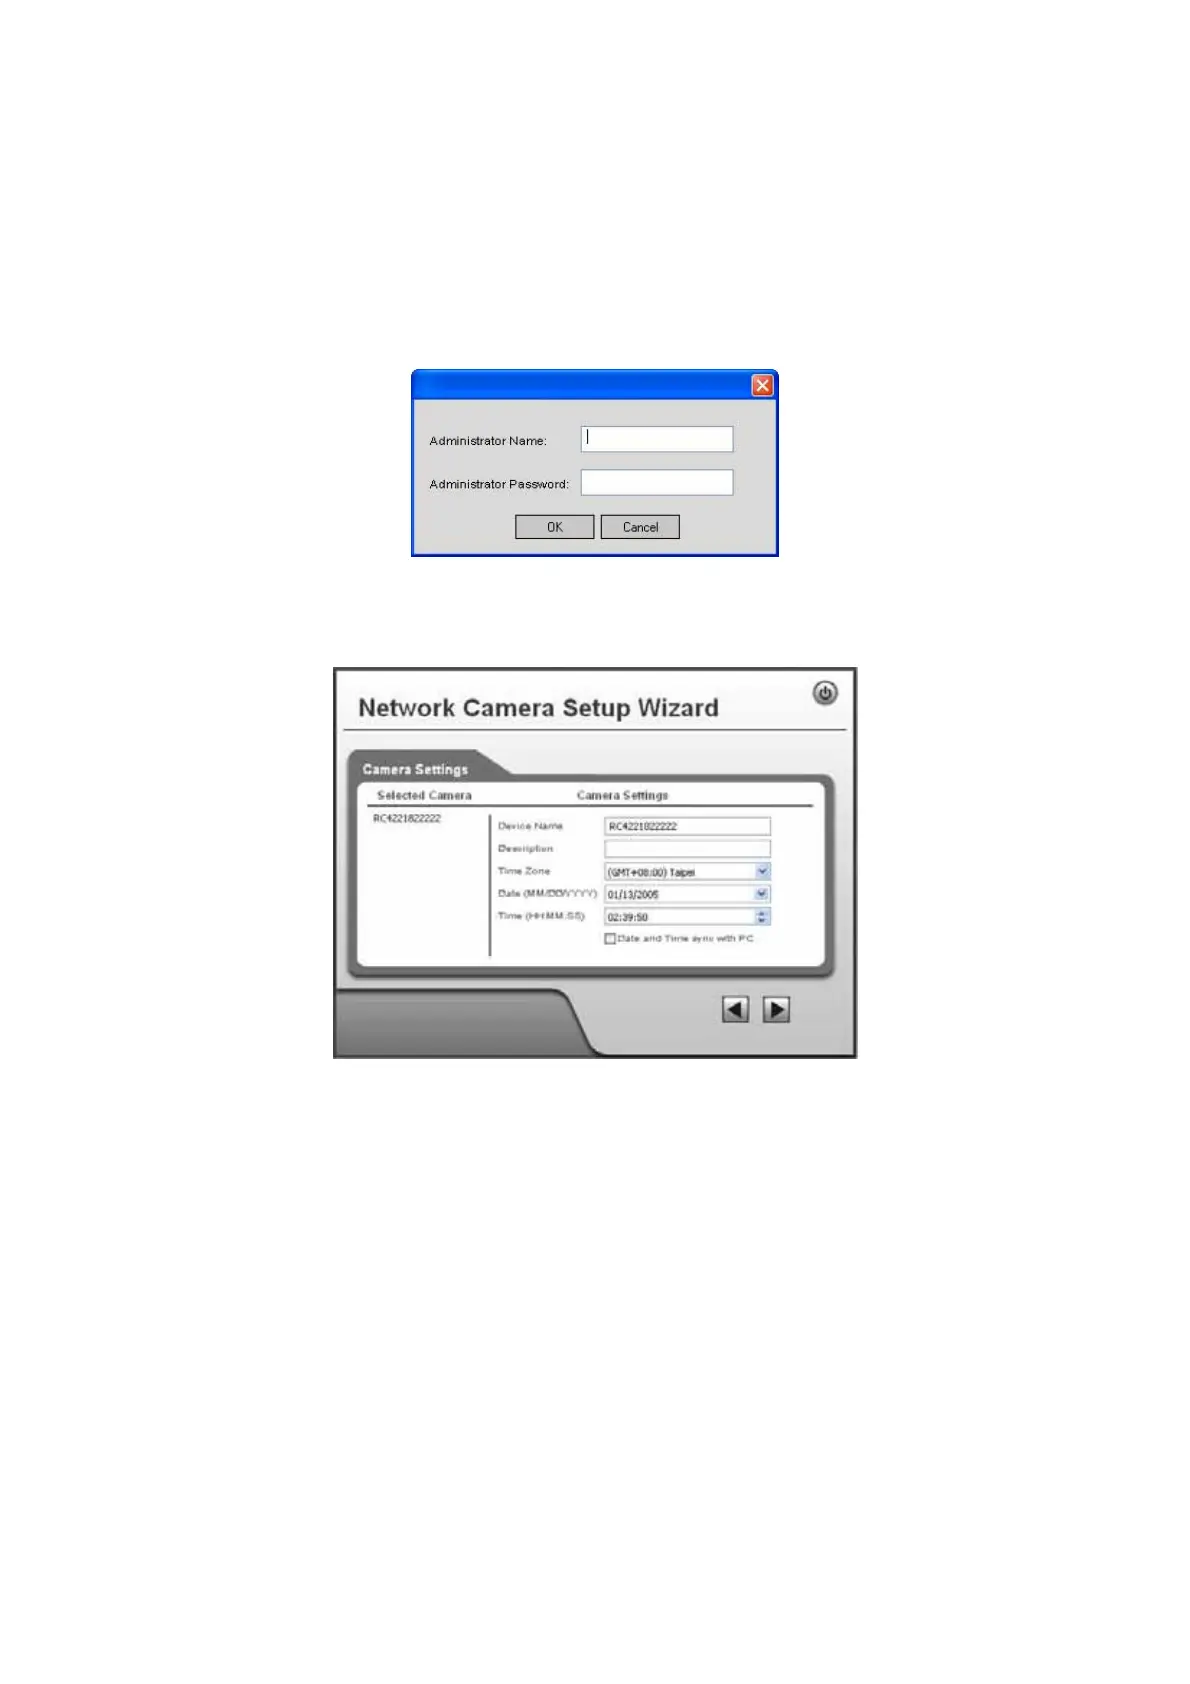
3. You will be prompted to enter the Administrator Name and Administrator
Password, as shown below.
• If using the default values, enter administrator for the name, and
leave the password blank.
• Otherwise, enter the Administrator Name and Administrator Password set
on the Maintenance screen.
Figure 6: Password Dialog
4. This screen allows you to enter a suitable Description, and set the correct Time
Zone, Date, and Time. Make any desired changes, then click Next to continue.
Figure 7: Camera Settings
5. On the following IP Address Settings screen, shown below, choose Fixed IP
Address, Dynamic IP Address or PPPoE.