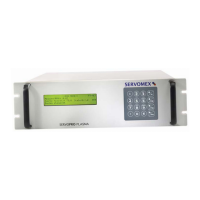
User Manual SERVOPRO PLASMA Trace N
2
Analyzer
APPENDIX 6
80
LEAK FINDING PROCEDURE (AN-05)
Experience has shown that bad analysis results often come from inboard contamination following from
leaks in the tubing bringing the sample to the analyzer’s detector.
Using the right procedure, the trace Nitrogen analyzer SERVOPRO PLASMA
can self diagnose the
presence or absence of contaminating leaks.
We first have to understand that the gas circuit is divided in two major zones. The proportional valve
located inside the flow module is the boundary separating these two zones. So the first zone is constituted
of all the tubing, valves, sampling system, pressure regulators etc. located between the gas source (gas
cylinder, gas tank, truck tank, etc) and the inlet off the flow module located inside the analyzer. The second
zone is constituted of everything located between the flow module outlet and the detector (the cell module)
inlet, including the gas conditioning module. There is a specific procedure for checking leaks of each zone.
The main difference between our two zones is that the gas pressure in the first zone (upstream the flow
module) is pretty high (usually 5 to 15 PSIG) while the gas pressure in the second zone is just a little bit
higher than atmospheric pressure (0.1 or 0.2 PSIG).
The main difference between the two leaks finding procedure will be the following one:
- In zone 1, we will play with the gas pressure (generally with a gas regulator) and check changes in
analyzer reading.
- In zone 2, we will play with the analyzer flow and watch for changes in the analyzer reading.
We recommend doing both tests before trying to fix leaks.
To run both tests, we will watch the changes in ppm value. Of course, the results will be reliable providing
that the analyzer already has a reliable calibration. New analyzers are shipped pre-calibrated so we can use
this pre-calibration to run the tests. If the calibration has been fouled up by calibrating with contaminated
calibration gas, we will need to watch the raw signal from the detector i.e. the cell counts in the diagnostic
menu.
TEST FOR ZONE 1
This test will mainly consist in changing the line pressure from normal operating pressure (usually
somewhere between 5 to 15 PSIG) to a pretty low pressure i.e. < 1 PSIG. To achieve this, you drop the
pressure low enough in such a way that the analyzer flow will slightly drop from its normal 75 cc flow to,
let’s say 70 cc. The analyzer flow should stay that much low, ≈ 70 cc, due to the fact that the inlet pressure
is not high enough to supply the whole normal flow. We know at that moment that the line pressure is well
below 1 psi, usually around 0.6 psi. If there is no leak, there will be no noticeable change in analyzer
reading or cell counts. If the signal (ppm or cell counts) goes high and after a while resumes to a value
close to the one we had before dropping the pressure, this is symptomatic of a dead leg or dead volume. If
the signal goes high (could be a 5 or 10 ppm step or many thousand cell counts) and stays high, there is a
leak for sure.