6- Insert arm extension (Fig.14 part.A) on the shaft and tight screw (Fig.14 part.C) until arm extension is well fixed to gear motor
shaft.
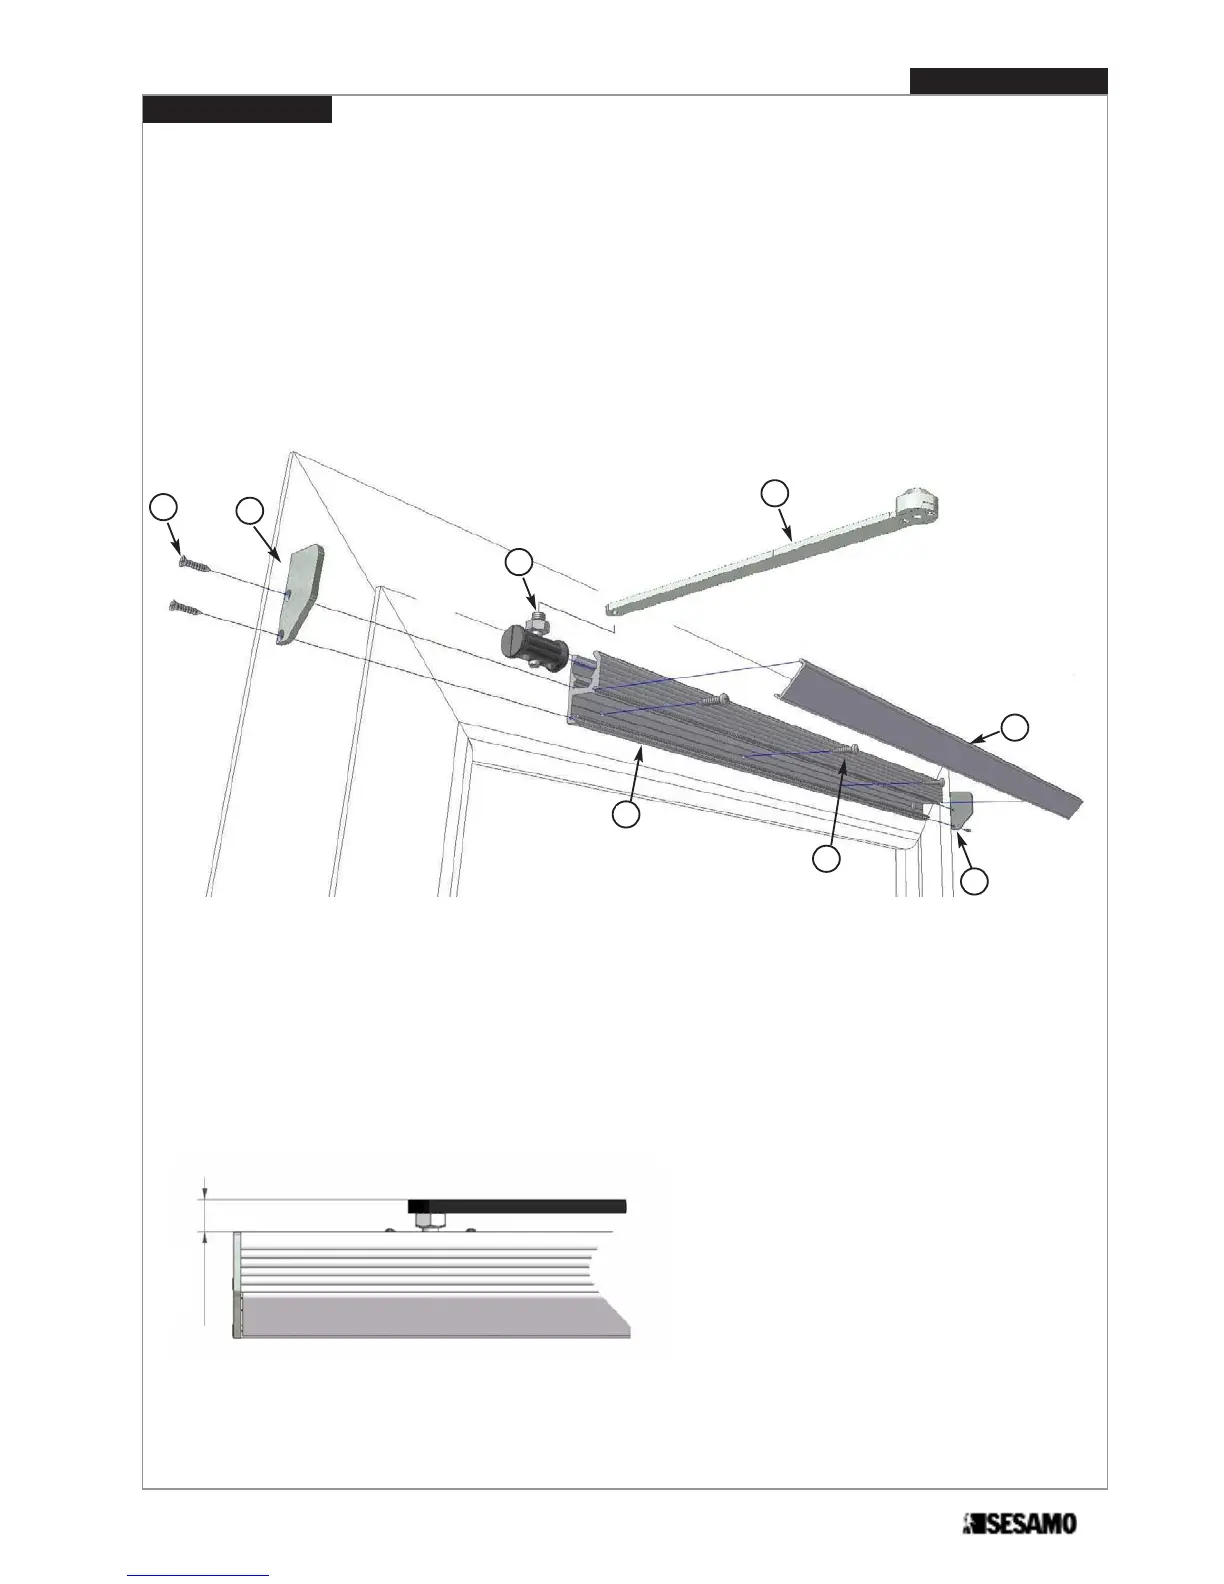
7- Insert skid (Fig.15 part.G) inside the guide (Fig.15 part.O) and slightly open door.
8- Rotate arm until reaching skid (Fig 15 part. F).
9- Screw skid shaft (Fig.15 part.F) into the arm (Fig.15 part.Q).
10-Insert guide cover profile (Fig.15 part. I)
11-Insert right end cap (Fig.15 part.M) and the left end cap (Fig.15 part.N) onto the guide with their screws (Fig.15 part.L).
I
F
L
N
O
P
M
Fig. 15
Q
Verify the dimension about 15 mm (Fig. 16)
Fig. 16
15 mm
17
PROSWING (M)
Operating instruction