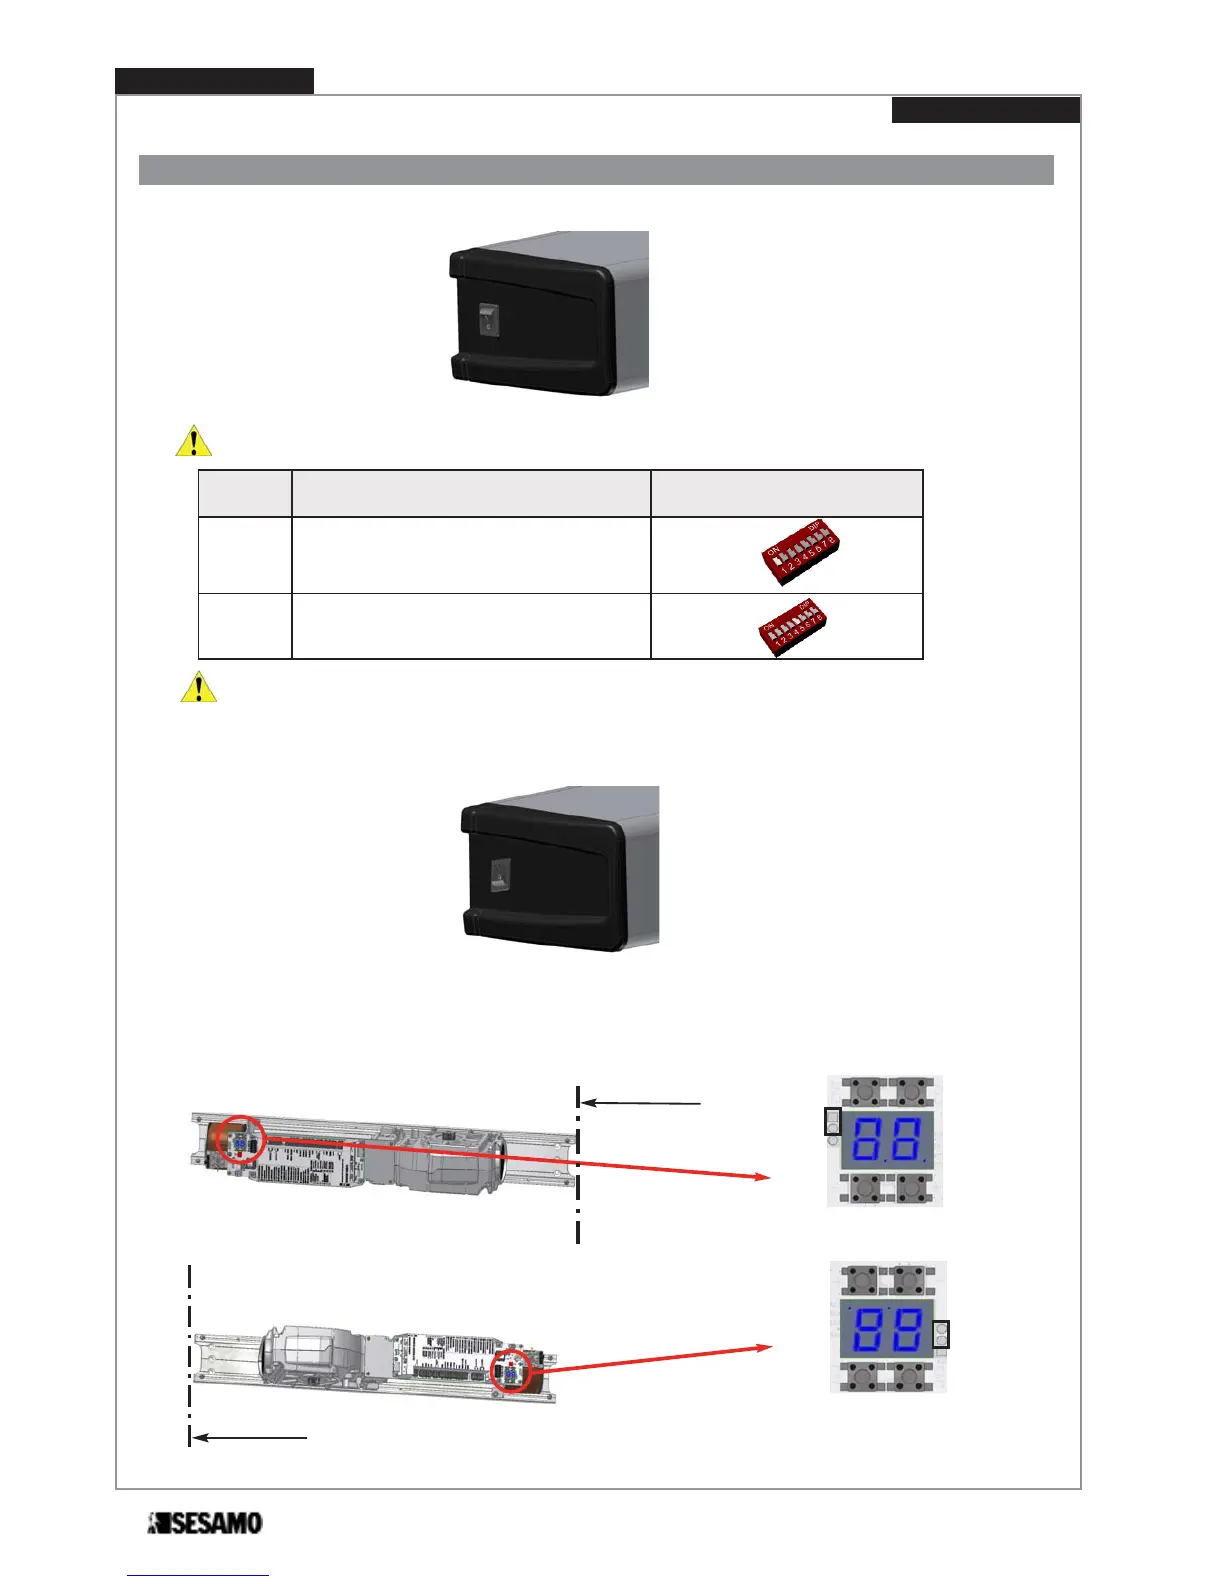
1- Switch in “OFF” (position 0).
Check again DipSwitch, expecially Dip n° 1 e 5.
Check again that KEY and SAFE CLOSE are regulary connected or, if not used, connected to COM.
2- Switch power ON from main switch (230 V).
3- Switch in “ON” (position 1).
4- Check display is lit and that
E1
is shown on dislay; if
E2
appears check arm setting.
5- If necessary set jumper to correctly see diplay (see Fig. 31).
Start up
Fig. 29
Fig. 30
DipSwitch Parameter Setting
1
ARM SELECTION:
OFF=push arm,
ON=Pull arm
5 OFF
AUTOMATISM FOR RIGHT OPENING
AUTOMATISM FOR LEFT OPENING
Hinge axis
Hinge axis
jumper
jumper
Fig. 31
PROSWING(M)
Operating instruction
30