Do you have a question about the Sesamo PROSWING and is the answer not in the manual?
Manufacturer details and statement of product compliance with CE directives.
Details on Low-Energy mode for applications conforming to DIN 18650 or BS 7036-4.
Important safety instructions for installation personnel and general product use.
Guidelines for recycling and disposing of the product and its packaging materials.
Specifies the device is for automating pedestrian swinging doors only.
Defines operational limits including door weight, width, and environmental conditions.
Description of the pull arm for automatism installation on the same side of the door opening.
Description of the standard push arm for installation on the opposite side of the door opening.
Description of the long push arm for installation on the opposite side of the door opening.
Information on various arm extension lengths and their corresponding dimensions.
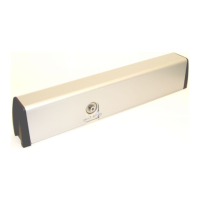
Technical drawing showing the overall dimensions of the PROSWING unit.
Essential checks before proceeding with the installation of the automatism.
Detailed steps and components for securely fixing the automatism unit.
Instructions for drilling and positioning the aluminum base plate for mounting.
Step-by-step guide for installing the pull arm mechanism.
Guidance on correctly positioning the pull arm relative to the hinge and motor axes.
Guidance on correctly positioning the push arm relative to the hinge and motor axes.
Final checks for electrical wiring integrity and component security before powering up.
Instructions for connecting the main power supply to the control board safely.
Identification of main electronic components and connection terminals on the control board.
Detailed steps for connecting various terminal boards to the control board.
Explanation of input signals and their functions for external devices like sensors and keys.
Description of auxiliary output signals and their possible configurations for monitoring.
Guide to configuring the automatism's functionality using the 8-position dip-switches.
How to adjust and display various operating parameters using buttons and the digital display.
Procedures for initial system setup, including dip-switch checks and learning cycles.
List of display codes indicating messages or operational errors for troubleshooting.
Explanation of different operational modes like Low-Energy and Push & Go.
Details on safety sensor inputs and radar logic configurations.
Description of manual operation and stop logic functionalities.
Information on how the system handles obstacles during opening and closing cycles.
Guidance on choosing and configuring electric locks for the system.
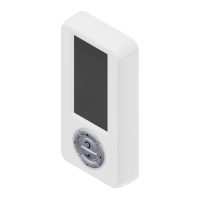
Information on connecting advanced and base selectors to the terminal board.
Details on connecting external power sources and polarity considerations.
Instructions for wiring and configuring two Proswing units for double door operation.
How to wire and configure two Proswing units for synchronized operation.
Step-by-step guide for installing the optional battery power kit.
Connecting logic switches and PC interface for advanced control and diagnostics.
Instructions regarding the final steps for product delivery and documentation handover.
| Brand | Sesamo |
|---|---|
| Model | PROSWING |
| Category | Door Opening System |
| Language | English |