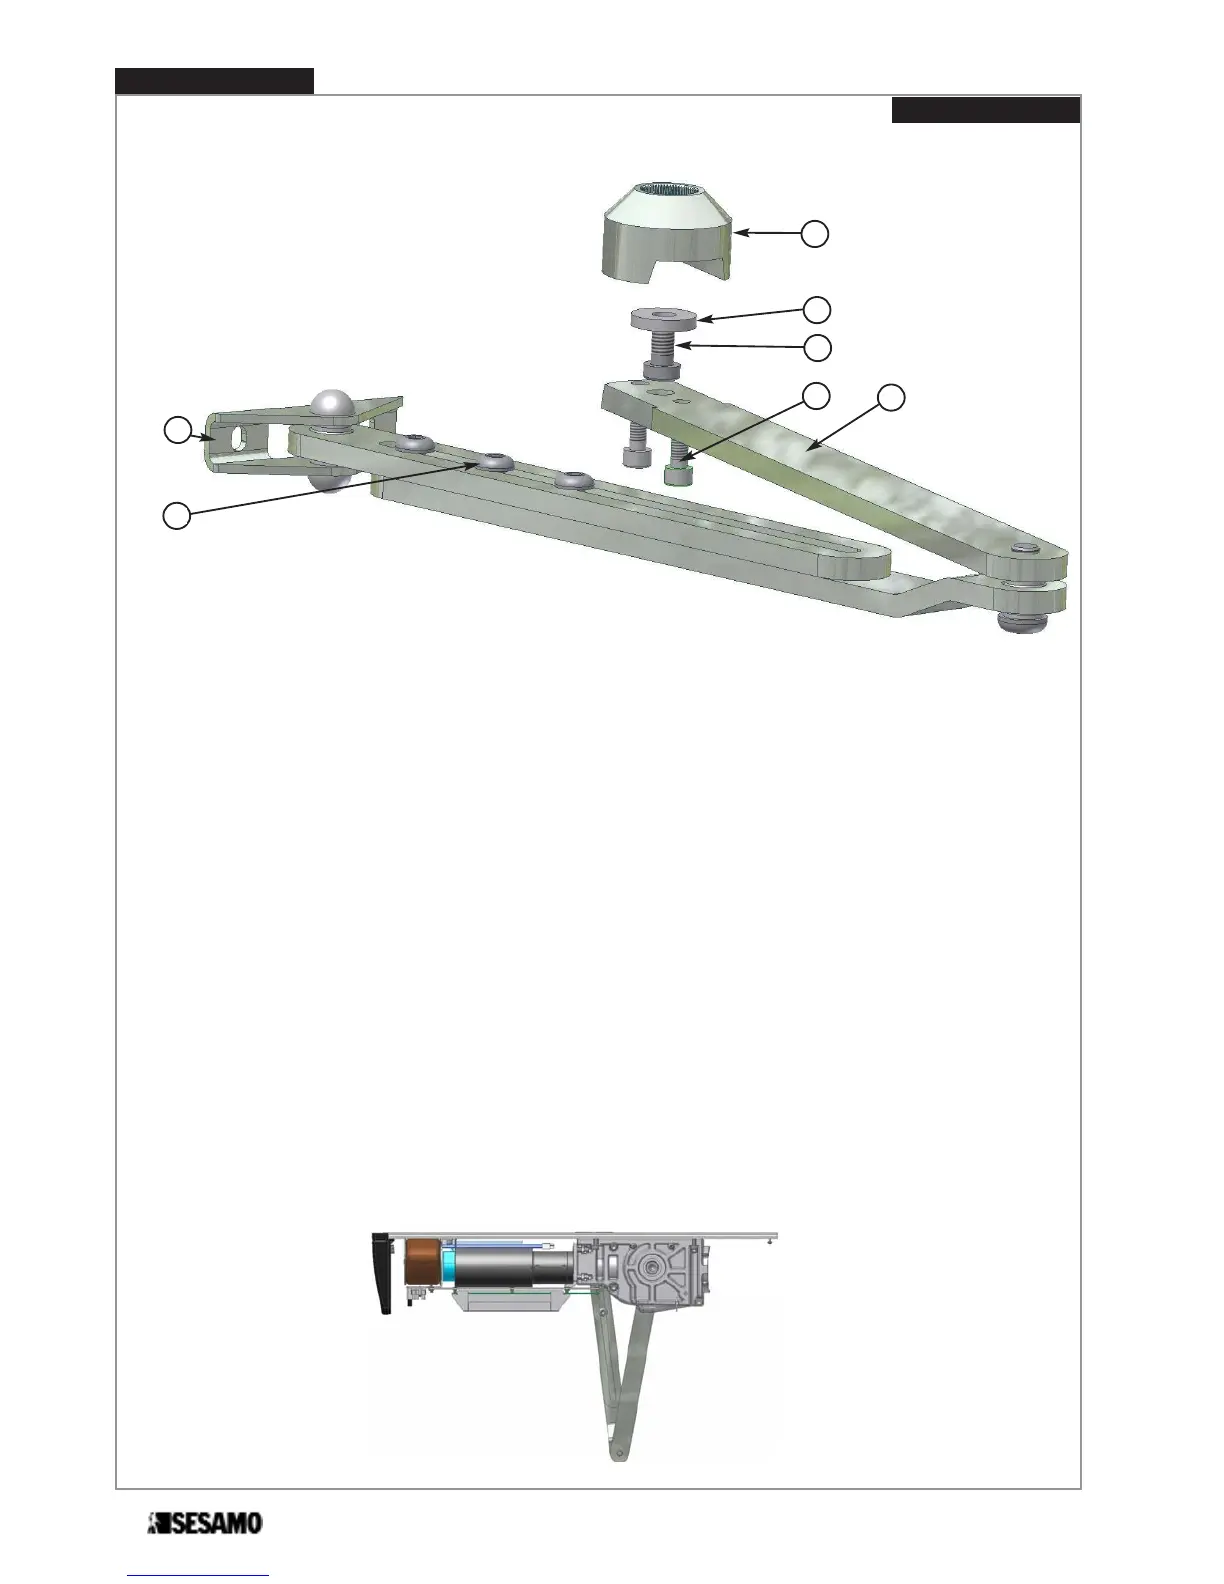
For PUSH ARM proceed as follows:
1- Insert washer (Fig.21 part.B) and screw (Fig.21 part.C) into arm extension (Fig.21 part.A).
2- Insert arm (Fig.21 part.D) in the arm extension slot, as show in Fig. 21 and tighten screws (Fig.24 part.E).
3- Unscrew screws M8 x 16 (Fig.21 part.G).
4- Fix door bracket (Fig.24 part.F) to the door following dimension shown in Fig. 19 e 20.
5- Insert arm extension (Fig.21 part.A) into gear motor shaft.
6- Tight screw (Fig.21 part.C) until arm extension (part 1) is well fixed to gear motor shaft.
7- Keeping door closed, rotate arm as show in Fig. 22 and tight screws M8 x 16 (Fig. 21 Part. G).
Fig. 21
A
B
C
E
D
F
G
Fig. 22
Fix PUSH ARM to the door
PROSWING(M)
Operating instruction
20