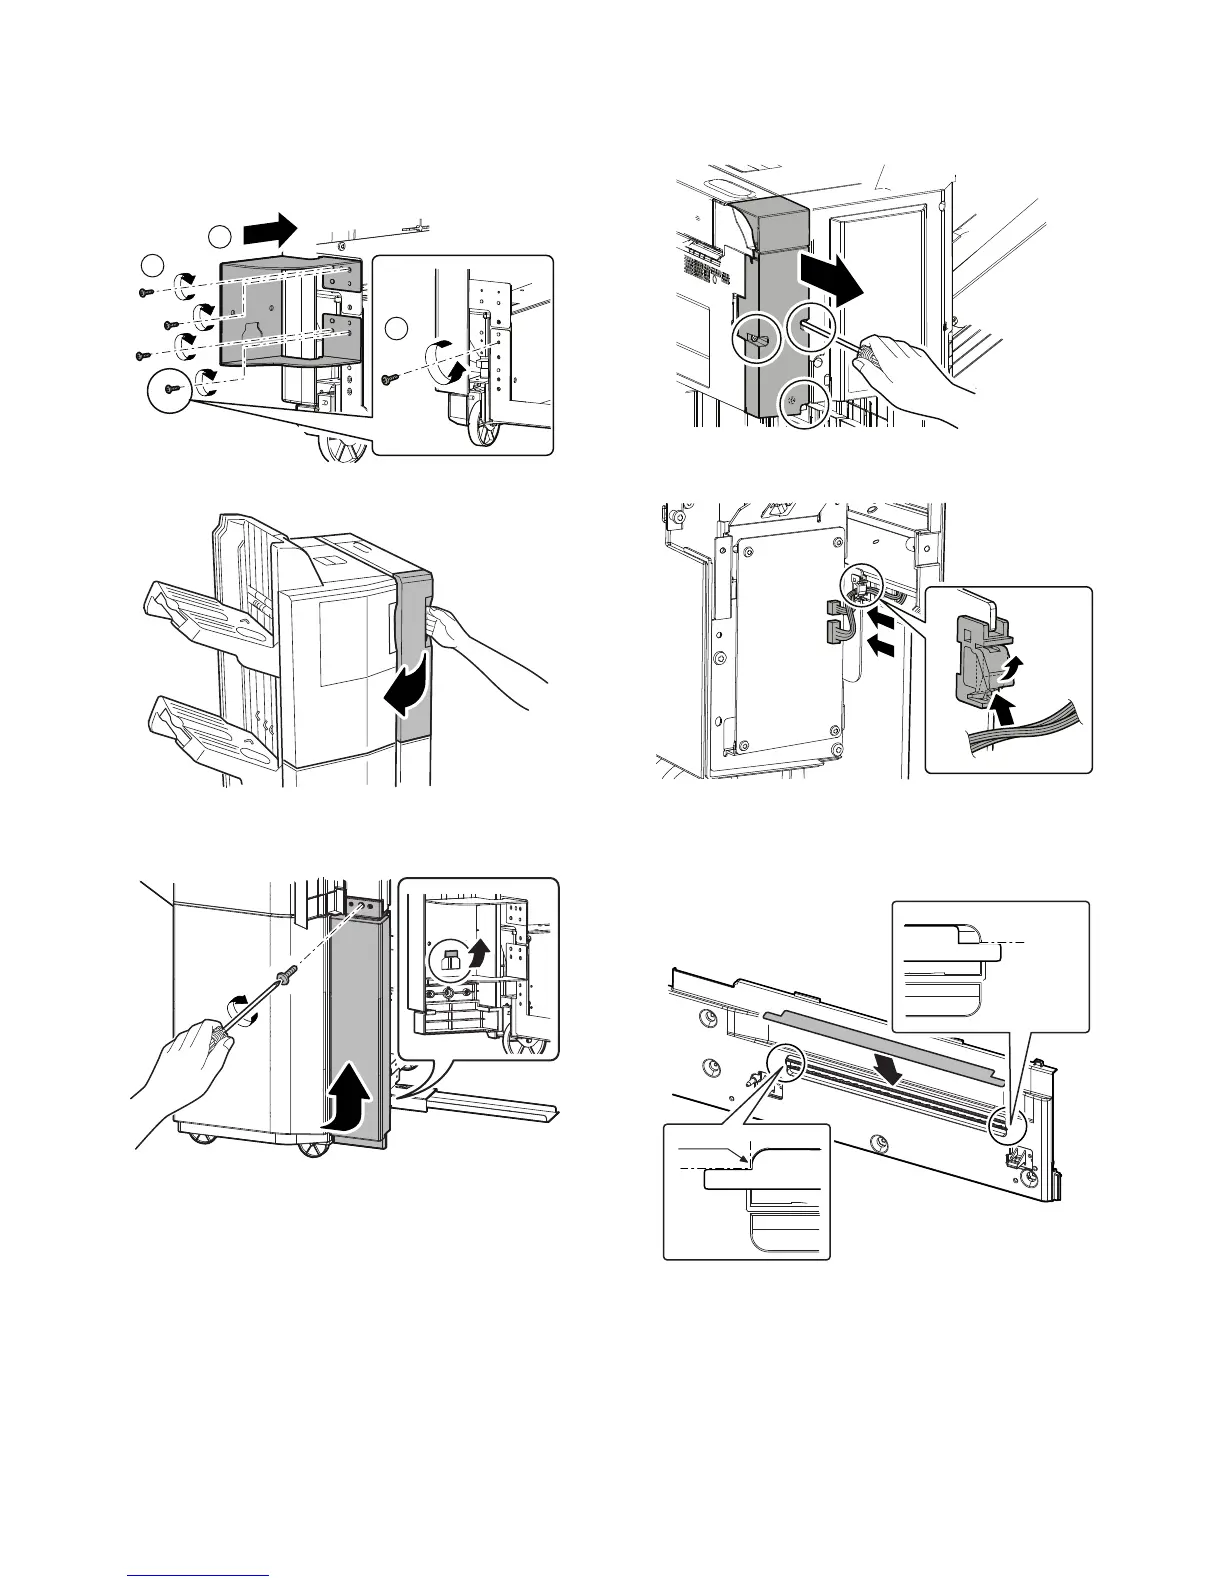
MX-5111N MX-PNX6A/B/C/D (PUNCH MODULE) 16 – 3
5) Attach the front cover mounting fixture (Packed items) with the
fixing screws (Packed items).
Remove the screw of the finisher, and reuse it. Install it using
the reuse screw, and three fixing screws (Packed items) bun-
dled to punch unit.
6) Open the front door of punch unit.
7) Engage the pawls of the rear side of front cover (Packed
items), attach the front cover with the fixing screw (Packed
items).
B. Connection of connector of the finisher and
punch unit
1) Remove the fixing screws, and remove the rear cover.
2) Connect two connectors of the finisher to the PWB of punch
unit, and fix the harness to the clamp.
C. Attaching the mylar
1) Attach the guide mylar upper (Packed items) to the position
indicated in the figure.