MX-M503N MX-PNX1 5 – 4
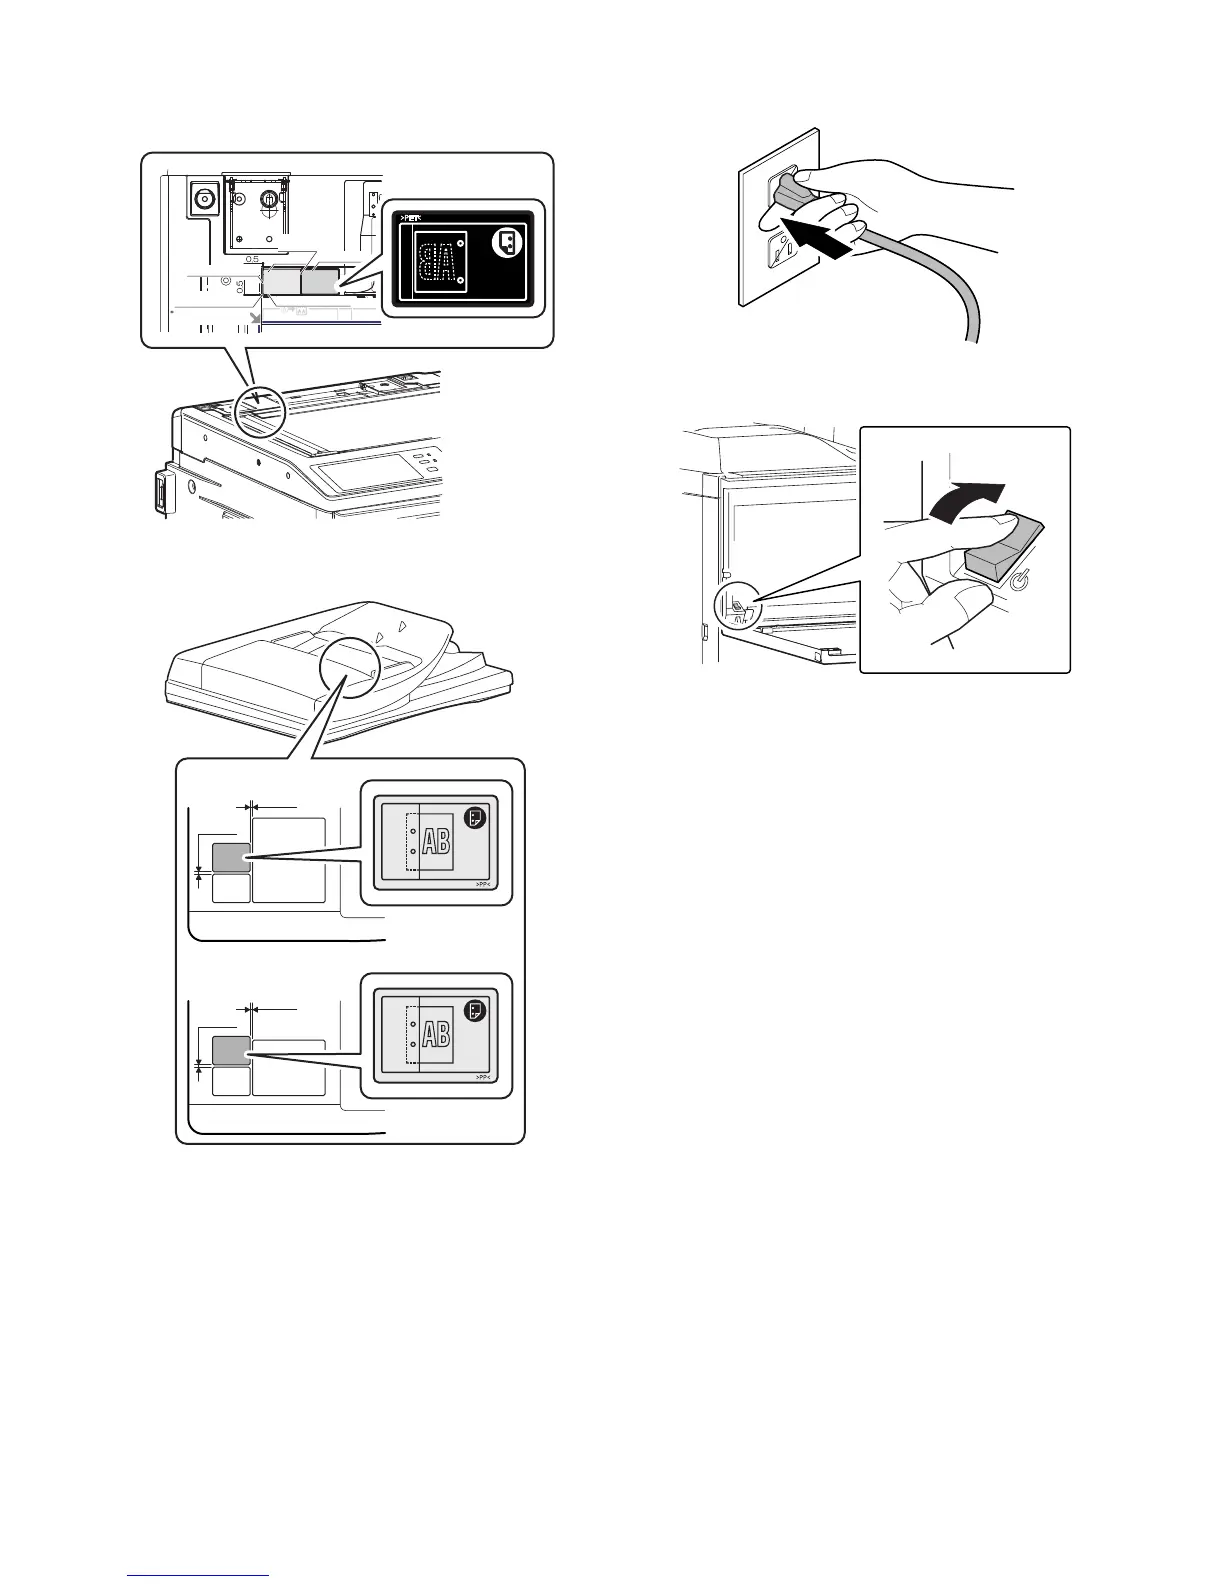
C. Punch position label attachment
1) Attach the label to the position indicated in the figure.
[For scanner] (Part No. 13 in the package of the MX-FNX9)
[For DSPF/RSPF] (Part No. 14 in the package of the MX-
FNX9)
D. Turn on the power of the main unit
1) Insert the power plug of the main unit into the power outlet.
2) Open the front cabinet.
Turn ON the power switch in the front cabinet of the main unit.
3) Turn ON the power switch on the operation panel.
Second label
Corner R end fitting
Lose the
clearance.
First label
Label attachment
reference
Corner of the "upper
cabinet rear"
Corner R end fitting
1mm
1mm
1mm
1mm
DSPF
RSPF
ON
 Loading...