MX-M753N MX-M623N/M623U/M753N/M753U 1 – 6
C. Press the fusing section (upper and lower heat
rollers) and remove the process separation
pawl fixing block.
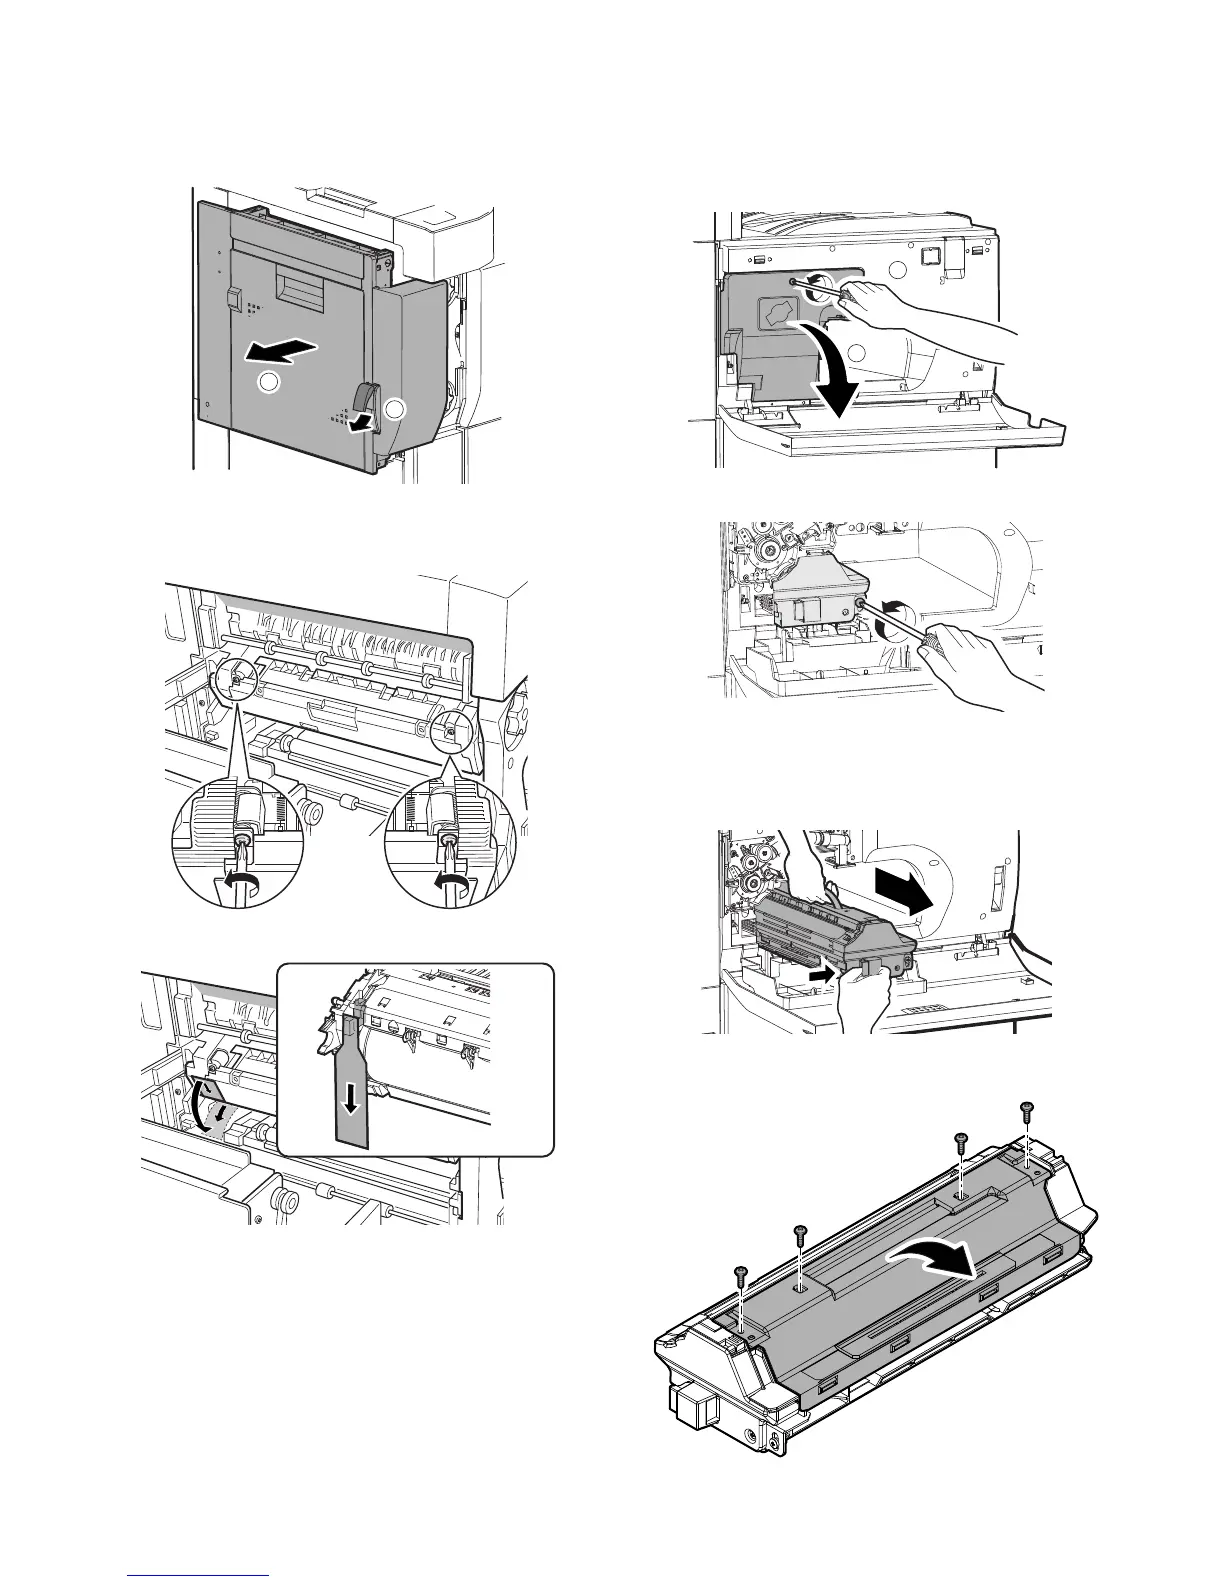
1) Pull the knob on the left door to pull out the left door.
2) Turn the pressing screw in the fusing section as shown in the
figure below (fully loosen them) to press the heat rollers
together.
3) Remove the separation pawl fixing block from the process unit.
4) Replace the left door.
D. Set developer
(1) Supply developer
1) Open the front cabinet.
2) Loosen the blue screw of the process cover, and tilt down the
process cover toward you.
3) Loosen the blue screw which is fixing the developing unit.
4) While pressing the developing unit lock lever, pull out the
developing unit.
Hold the strap of the developing unit and remove the develop-
ing unit.
5) Remove the screws and remove the DV cover.
 Loading...


