MX-M753N MX-LCX3N 3 – 2
B. Fixing material removal
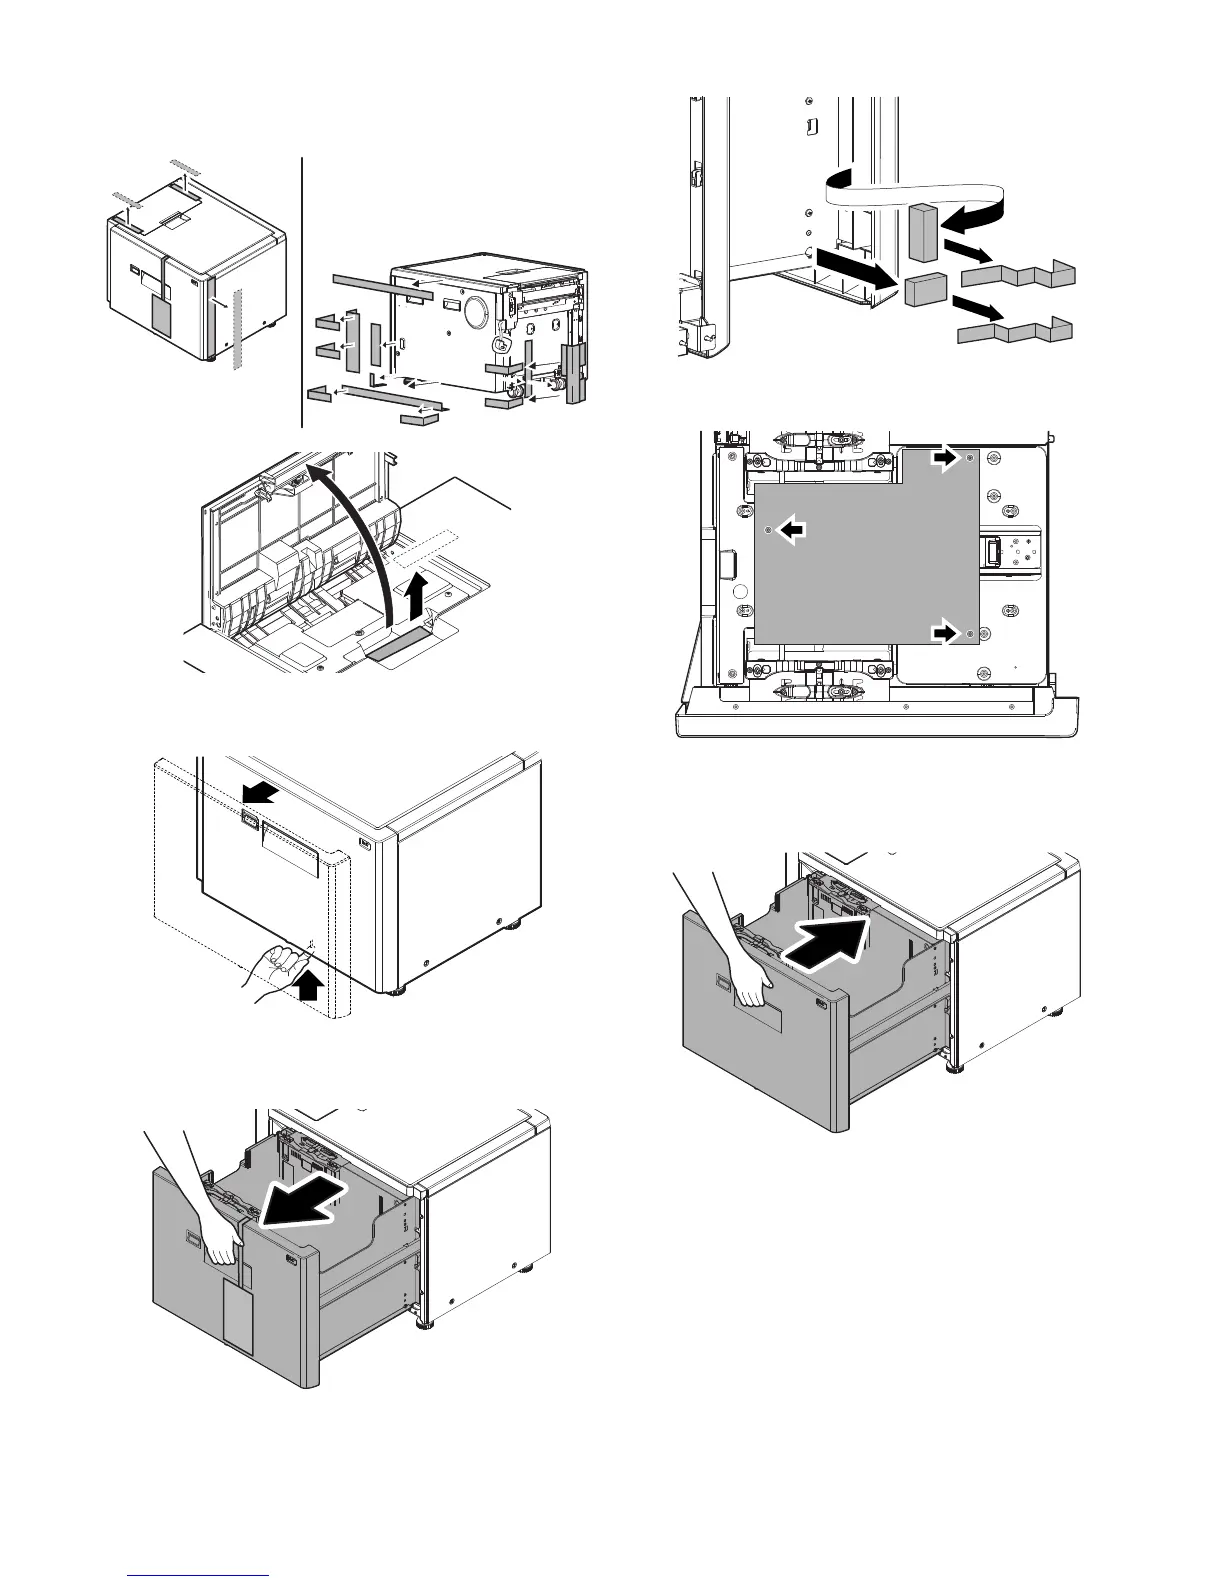
1) Remove the fixing material from the large capacity paper feed
tray.
2) Manually pull out the cassette
Push the shaft at the rear side of the front cabinet to release
the lock. (About 5mm)
* When the lock is released, the spring will push out the cas-
sette about 50mm. Be careful of that.
3) Slowly pull out the paper feed base tray until it stops.
4) Remove the fixing material inside the large capacity tray.
5) Remove three fixing screws (3 pcs.) of the paper feed table of
the LCC.
NOTE: When the power is turned on without removing the fixing
screw, remove the fixing screw and execute SIM 15.
This will reset any possible error code.
6) Push the large capacity tray slowly into the original position.
 Loading...


