17Installation manual – NewMotion Home Advanced 2.1 / 2.2 - 071NMEN13
e
2 . Place the casing on the wall mount and mark the locations for the bottom fasteners (see gure 12 ).
3 . Remove the casing from the mount and drill two holes for the bottom fasteners.
NOTICE Check the fastener package for the correct diameter and depth.
4 . Insert two wall plugs into the holes (if applicable).
T20
Ø10 - 13 mm
Ø13 - 15.5 mm
Ø15.5 - 18 mm
Ø18 - 21 mm
Ø21 - 22.5 mm
r
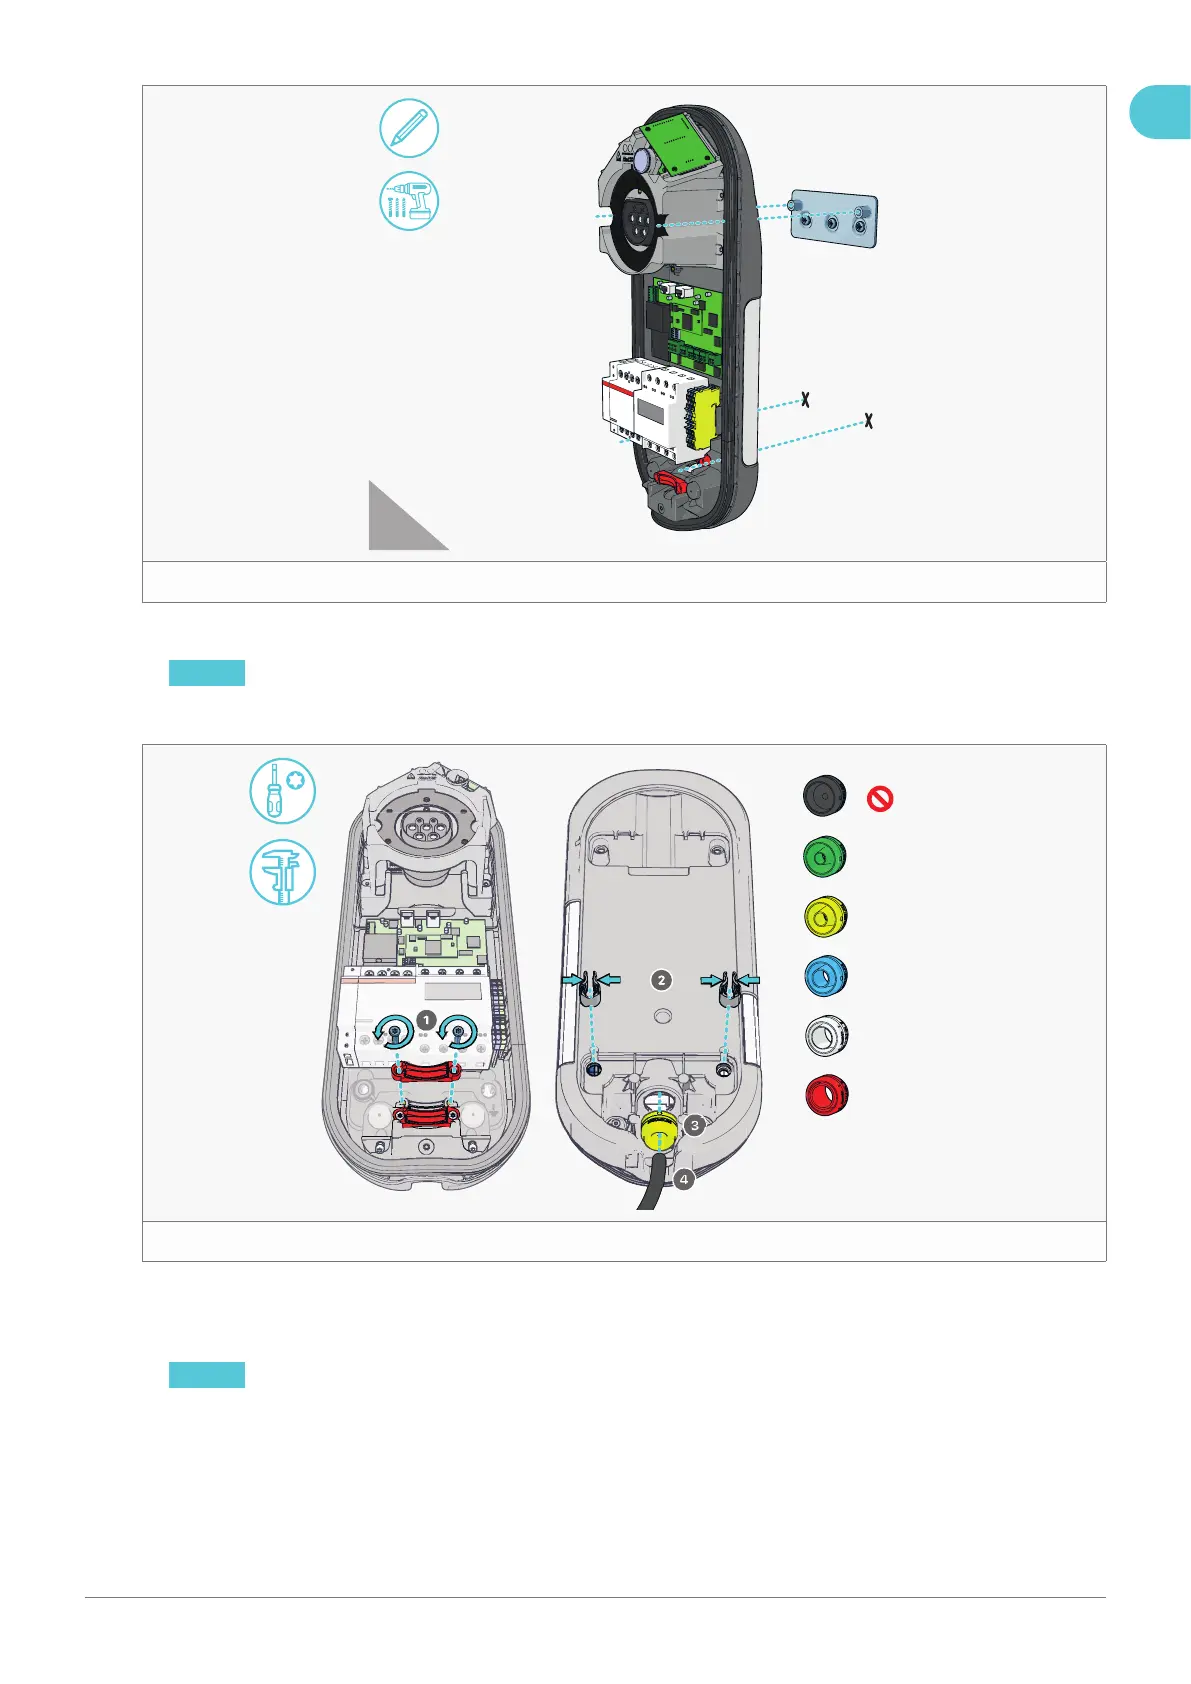
5 . Remove the rear cable clamp (see gure 131 ).
6 . Place the plastic spacers on the back of the casing (see gure 132 ).
7 . Insert the coloured grommet matching the power cable thickness into the rear input hole (see gure 133 ).
NOTICE Use a caliper to measure the thickness of the power cable and determine the correct coloured grommet.
8 . Feed the power cable approx. 15 cm through the coloured grommet. Lubricate if necessary (see gure 134 ).
EN
 Loading...