SECTION 3 – LUBRICATION AND MAINTENANCE
3-24
INSTRUMENT LIGHTS
To change a burned out instrument panel bulb:
1.
Disconnect the negative (-) battery cable from
the negative (-) battery terminal before
replace the fuses.
2.
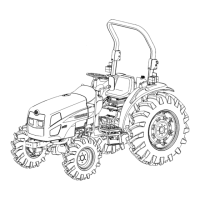
Remove right rear hood (1) In Figure 3-38,
and left rear hood (2) in Figure 3-38, by
removing retaining bolts (3), (4), and (5) in
Figure 3-38.
3.
Remove the two front retaining bolts (6) in
Figure 3-39.
4.
Remove the left and right underside retaining
screw (7) in Figure 3-39 from dash panel.
5.
Tilt steering wheel rearward to ease tilting of
dash panel.
6.
Tilt dash panel rearward to gain access to
underside of instrument panel.
7.
Rotate bulb 1/4 turn and remove from back of
instrument panel.
8.
Inspect bulb mating surface of instrument
panel for corrosion and clean if necessary.
Install correct size bulb and assemble the
dash panel and rear hoods.
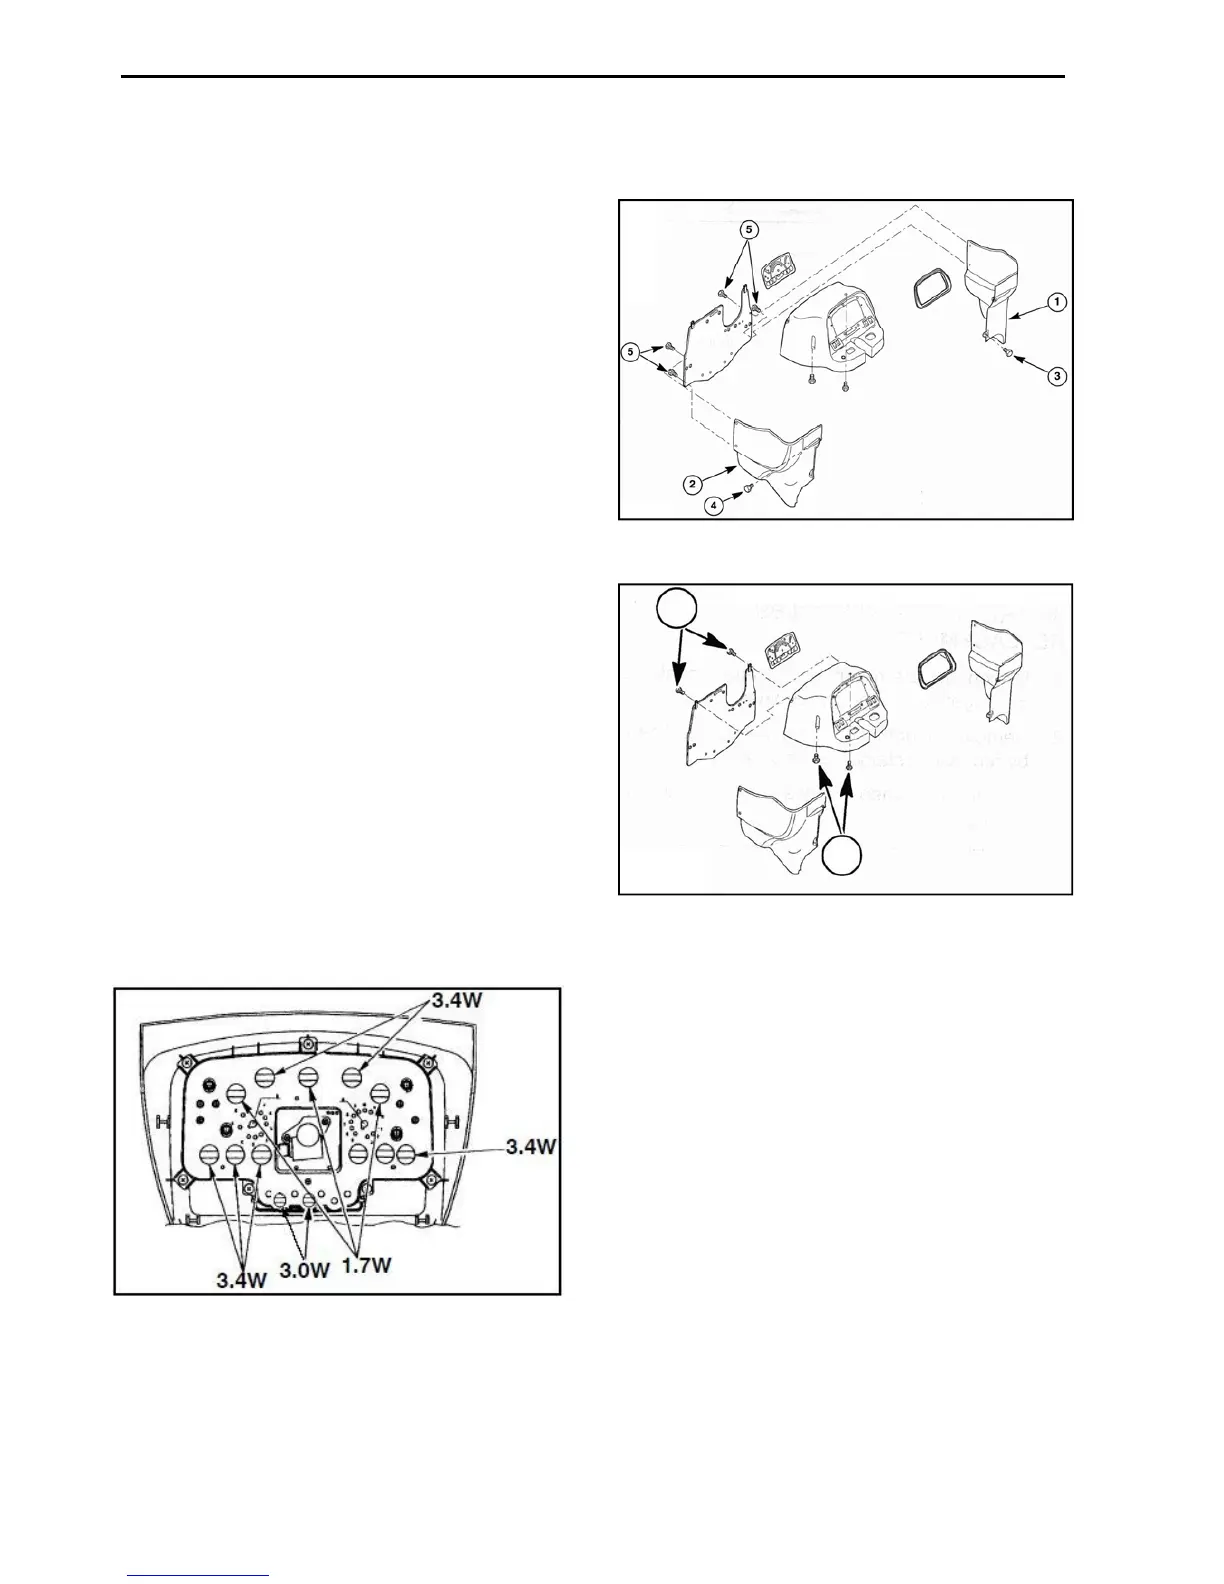
NOTE:
Replace with the appropriate bulb: either
a 1.7W bulb for gauge lights, a 3.4W bulb for
indicator lights, or a 3.0 W bulb for PTO indicator
and Trailer hazard indicator.
Figure 3-38
6
7
Figure 3-39
Figure 3-40


 To Next Page