Chapter 2 Operating Instructions
Ranger E/D
12 SICK IVP • Industrial Sensors • www.sickivp.com • All rights reserved 8011731
Installation Guide
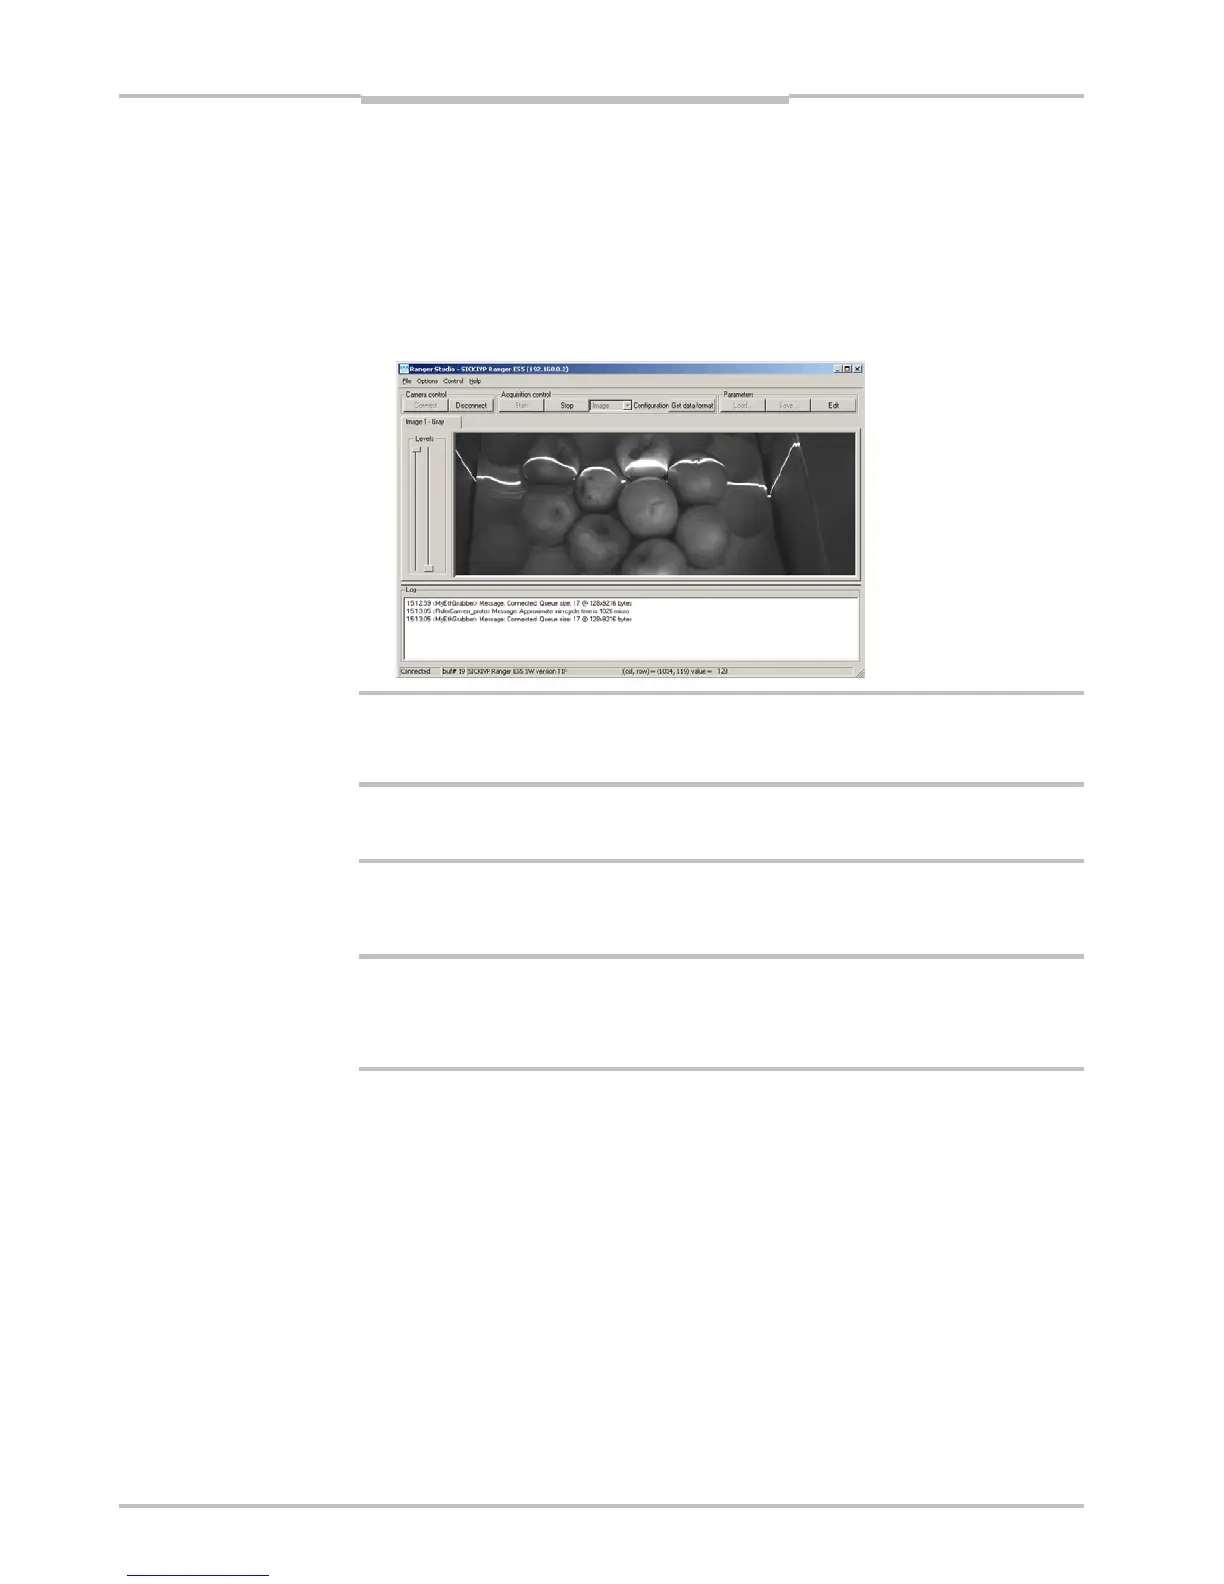
10. Click Connect on the toolbar in Ranger Studio.
The status bar at the bottom of the Ranger Studio main window shows the camera
type and version. The same message is also written in the log.
11. Choose Image from the Configuration menu.
The main window contains one visualization tab, but which is still empty.
12. Click Start to start the acquisition.
The visualization tab shows a live 2D view from the Ranger. If an object is present un-
der a laser line, the projected laser line is also seen in the view.
The Image mode is very useful when it comes to adjusting the exposure time and to decide
the region of interest. More information on how to use the visualization window can be
found in Ranger Studio chapter.
13. When you are ready click Stop to stop the acquisition.
14. Click Disconnect to shut down the conection to the Ranger.
2.6 Maintenance
Warning
If the Ranger is used with a laser, the power to the laser must be turned off before any
maintenance is performed. Failure to turn the power off when maintaining the unit may
result in hazardous radiation exposure.
Check screw connections and connectors at regular intervals.
Clean the housing with a soft cloth, dry or dampened with a mild water diluted cleaning
agent without powder additives.
2.7 Service
The Ranger contains no user serviceable parts inside.
In case of unit failure contact SICK IVP or an SICK IVP representative that delivered the
unit for further instructions.
a