Operating Instructions Chapter 3
Ranger E/D
8011731 SICK IVP • Industrial Sensors • www.sickivp.com • All rights reserved 15
Overview
A basic recommendation is therefore to always eliminate ambient light – for example by
using a cover – and instead use illumination specifically selected for the measurements to
be made.
The geometries of the set-up – that is the placement of the Ranger, the lightings and the
objects in relation to each other – are also important for the quality of the measurement
result. The angles between the Ranger and the lights will affect the type and amount of
light that is measured, and the resolution in range measurements.
Chapter “Mounting Rangers and Lightings” in the Reference manual contains an introduc-
tion to factors to consider when mounting the Ranger and lightings.
3.3 Configuring the Ranger
Before the Ranger can be used in a machine vision application, the Ranger has to be
configured to make the proper measurements, and to deliver the profiles with sufficient
quality and speed. This is usually done by setting up the camera in a production-like
environment and evaluating different ways of mounting, measurement methods and
parameter settings until the result is satisfactory.
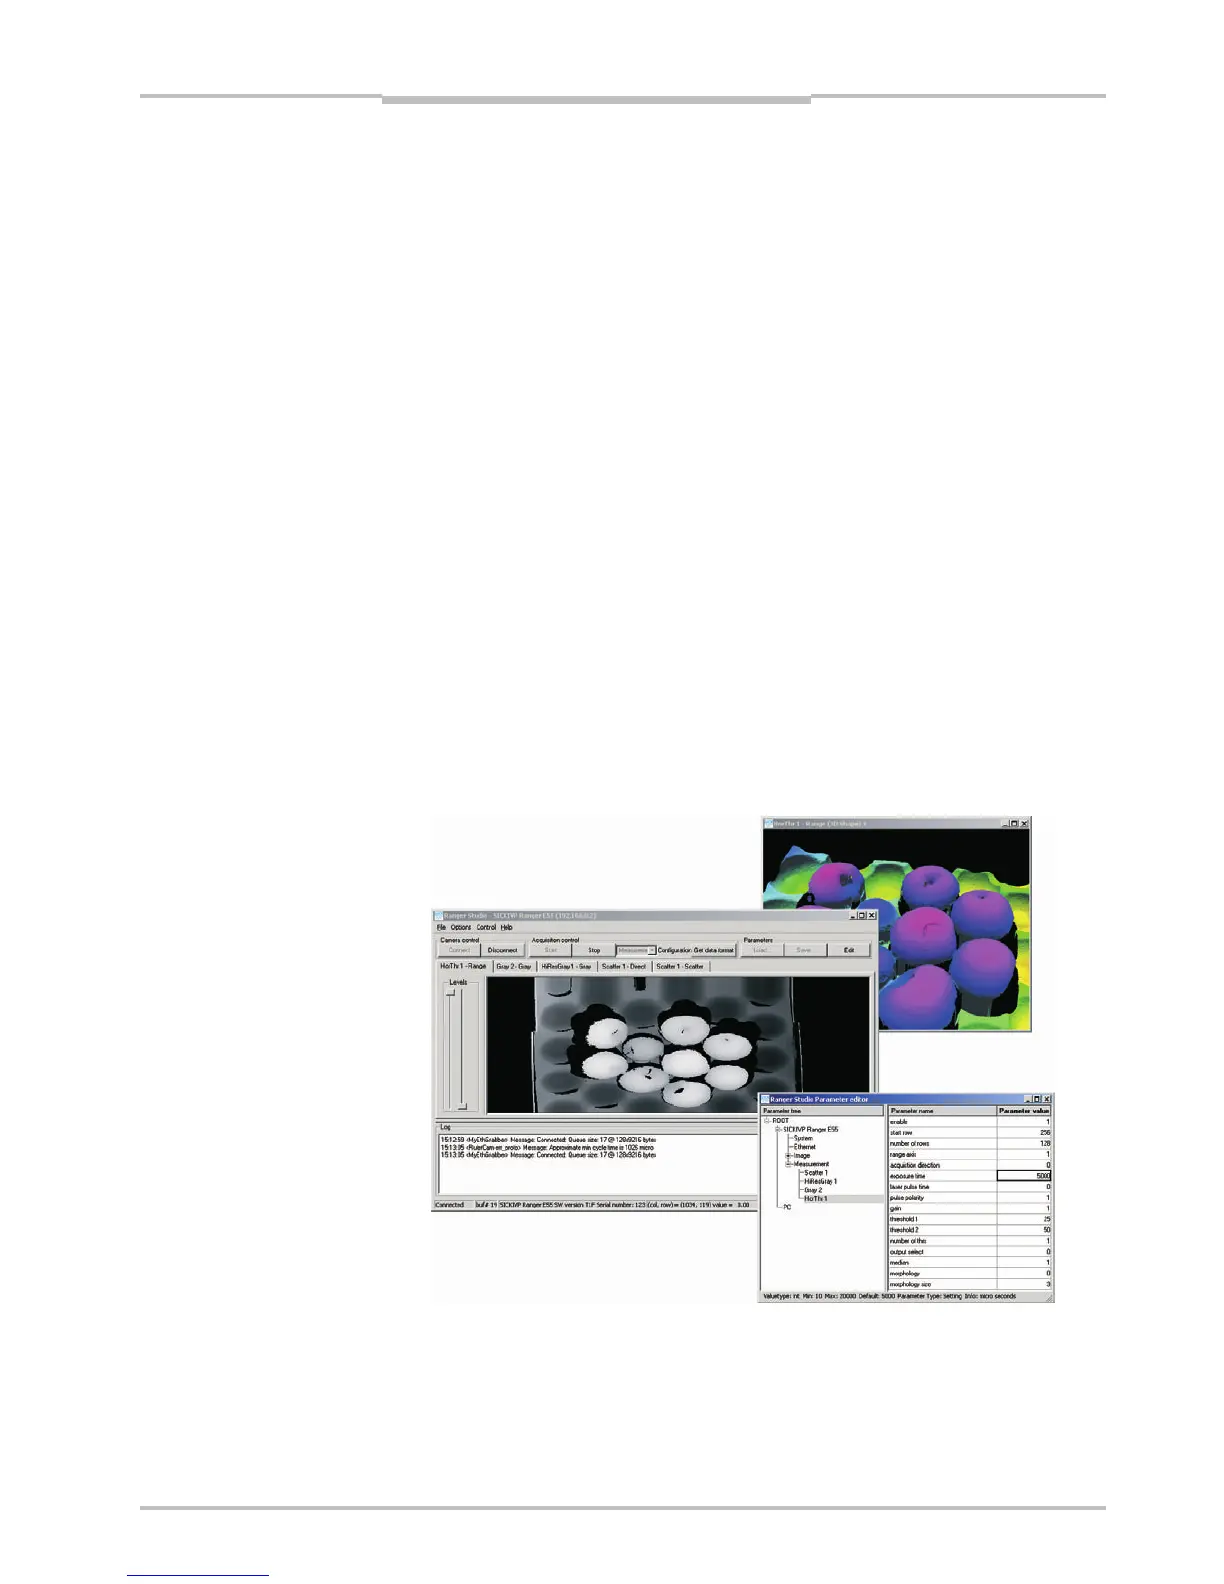
3.3.1 Ranger Studio
The Ranger Studio application – which is a part of the Ranger development software – can
be used for evaluating different set-ups of the camera, and for visualizing the measure-
ments. With Ranger Studio, you can change the settings for the camera and instantly see
how the changes affect the measurement result.
Once the Ranger has been set up to deliver measurement data that meets the require-
ments, the settings can be saved in a parameter file from the Ranger Studio. This parame-
ter file is later used when connecting to the Ranger from the machine vision application.
Figure 3.3 – Configuring the Ranger with Ranger Studio.