NOTE
•
T
o teach in another actuator, bring it into the response range of the sensor. The
teach-in sequence is the same as for the first teach-in process.
•
Any actuators which were taught in earlier are now no longer accepted and cannot
be taught in again.
•
Universally coded actuators cannot be taught in.
•
A maximum of eight actuators can be taught in on uniquely coded sensors. The
device is then automatically locked for additional teach-in processes. The inter‐
locking cannot be removed.
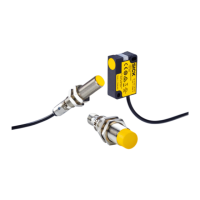
6.2.2 Teaching in and locking a uniquely coded sensor
How to teach in an actuator and lock the sensor for additional teach-in processes
1.
Switch on the voltage supply for the sensor.
2. Bring the actuator into the response range of the sensor. The sensor then auto‐
matically begins teaching in.
3. Remove the actuator from the response range during step 4 of the teach-in
sequence (“Programming complete”) until the Status/Diag LED lights up O red.
4. Bring the actuator back to the response area. The Status/Diag LED flashes
Ö green again (1 Hz). The sensor is now locked and no other teach-in processes
are possible. With its flashing signal, the Status/Diag LED shows the number of
teach-in processes that would be possible for 15 seconds.
Teach-in sequence
•
Actuator in response range: The Status/Diag LED flashes Ö green for 15 sec‐
onds (2 Hz).
•
Verifying actuator: The Status/Diag LED flashes Ö green/red for 15 seconds
(1 Hz).
•
Programming sensor: The Status/Diag LED flashes Ö green/red for 15 seconds
(2 Hz).
•
Programming complete: The Status/Diag LED flashes Ö green (2 Hz) and shows
the number of possible remaining teach-in processes, followed by a break. This
signal is repeated for 15 seconds. If you remove the actuator from the response
range during these 15 seconds and then bring it back into the response range, the
sensor is locked for additional teach-in processes.
•
Teach-in complete, sensor ready: The Status/Diag LED flashes O green.
NOTE
•
T
he interlocking processes (removal and return of the actuator) must be com‐
pleted within the 15 seconds of step 4.
•
The interlocking cannot be removed.
6.2.3 Fault indicators during teach-in
Table 4: Fault indicators during teach-in
Display of the Status/Diag
LED (4 Hz)
Meaning
Ö Gr
een
OSSD inputs invalid or not available
8 × Ö gr
een
No actuator taught-in (delivery state)
Ö 3 × r
ed, 1 × green
A universally coded actuator should be taught in. This is not
pos
sible.
Ö 3 × r
ed, 2 × green
An actuator which was already taught in on this sensor should
be t
aught in again. This is not possible.
6 COMMISSIONING
18
O P E R A T I N G I N S T R U C T I O N S | TR4 Direct Cylindrical 8022968/15V1/2019-11-22 | SICK
Subject to change without notice