Maintenance
9.2 Repair
Synchronous/induction motors 1PH813
70 Operating Instructions, 04/2009, 610.48000.22
9.2.2 Removing/installing the motor
Removal
● When removing the motor, mark the original position of the components with respect to
each other (e.g. using a colored pen, scribing iron) to make subsequent installation
easier.
● For information on how to remove the encoder, see "Removing the speed encoder".
● Unscrew the NDE bearing shield screws and carefully remove the NDE bearing shield.
● Unscrew the bearing cap screws (see "Spare parts", item 1.02).
● Remove the grease slingers from the shaft shoulder (DE).
● Remove the rotors from the motor. Use a suitable device to remove the rolling-contact
bearings.
Installation
● Do not reuse rolling-contact bearings that have been removed.
● Heat up the new rolling-contact bearings evenly to 80 - 100°C and attach them. When
doing so, make sure that the bearing inner ring lies on the shaft shoulder.
● The device must not be subject to hard knocks (e.g. do not use a hammer etc.).
● Insert the motor rotor into the stator.
● Secure the bearing cap.
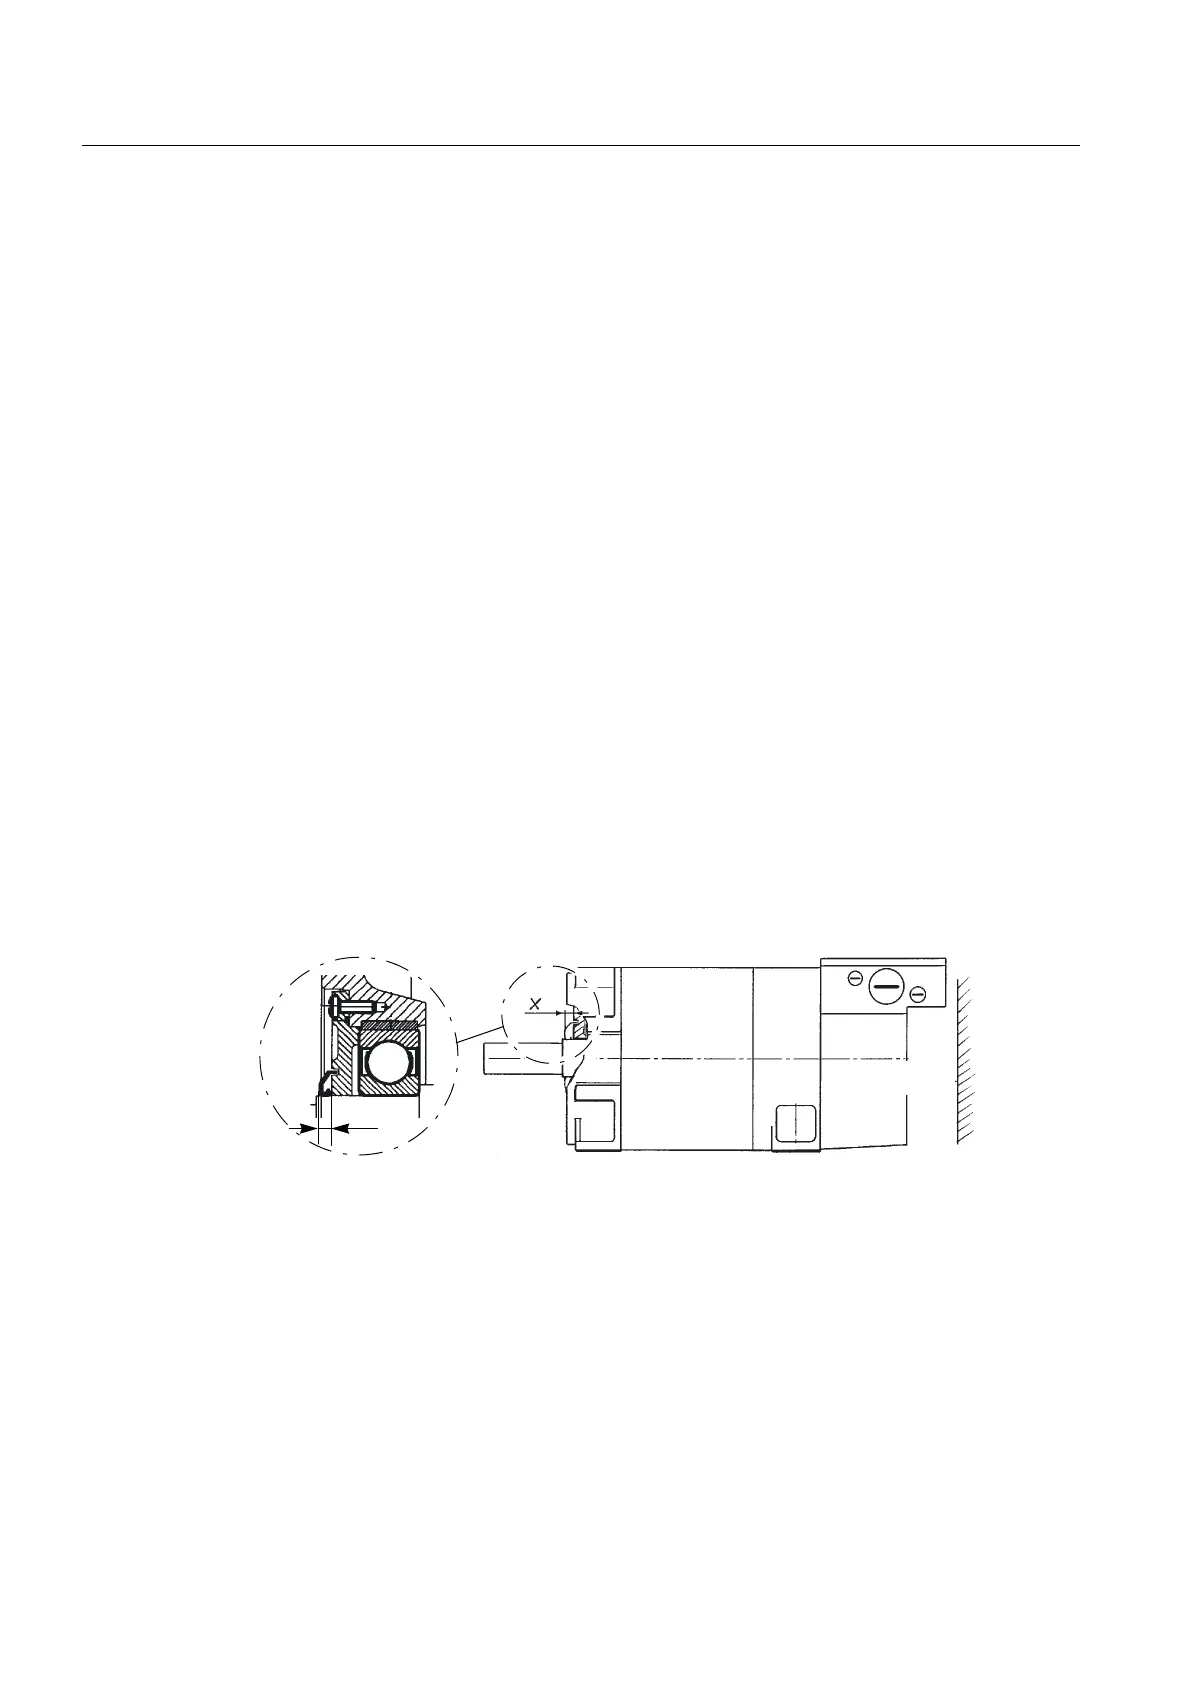
● Insert the NDE bearing (with shaft spring) into the NDE flange (keep the bearing straight)
and tighten the screws.
x
Figure 9-1 Installing the gamma ring
● Press on the grease slinger (gamma ring housing 9RB... without sealing lip) with a
suitable sleeve (dimension x = 0 mm (flush with cover)). Do not use any grease slingers
that were damaged when removed.
Running in the bearings
Once you have replaced the bearings, allow the rolling-contact bearings to run in to distribute
the grease evenly. When doing so, the motors should be initially run continuously from 0 to
approx. 75% of the maximum speed n
max
over a period of 15 minutes.