1. Ensure that power has been disconnected from the analyzer.
2. Open the electronics enclosure door.
3. Unplug SYSCON power cable from the bottom of the SYSCON cage.
4. Unplug the PECM 24V cable.
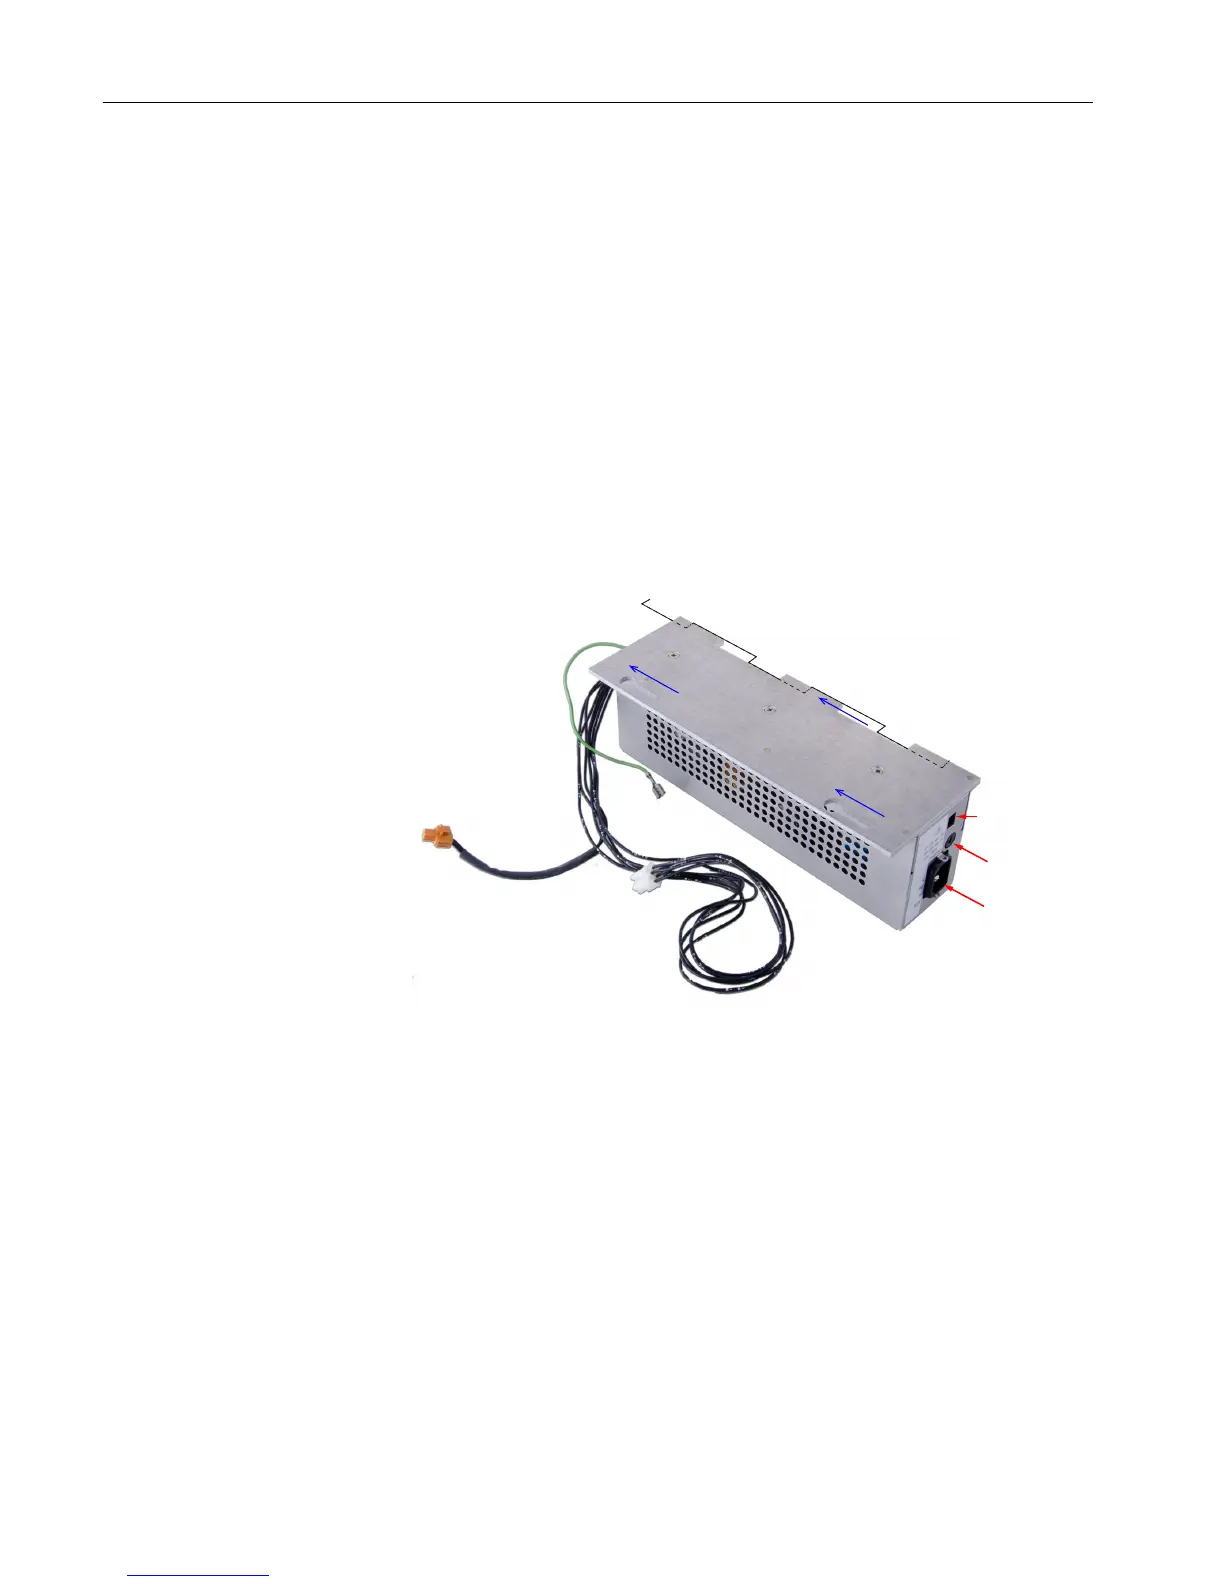
5. Loosen nuts (1 in photo A above)
6. Slide the power supply forward enough to disengage the power-supply tabs from enclosure
tabs as shown in photo below. (2 in photo A above)
7. Tilt the power supply clockwise to allow the tabs to clear the flanges. (3 in photo A above)
8. Drop the power supply off the nuts. (4 and 5 in photo B above)
9. Before completely removing the supply, unplug the safety ground wire from the spae lug
on the back of the enclosure. (See 7 in the photo C
Removing the Power Supply Module
above.)
10.Slide the power supply out of encloure. (6 in photo B above)
Figure 2-3 Power Supply Module Details
Reinstalling the power supply
The new supply is installed using the steps in reverse order. It may be necessary to slightly
bend the flange edges down to allow the supply bracket to engage the flanges. See C in the
photo
Removing the Power Supply Module
above.
Electronic Compartment Component Descriptions and Maintenance Procedures
2.1 Power Supplies
Maxum II Reference Manual
16 Manual, 7/2017, 2000596-001
 Loading...