Mobility, Intelligent Traffic Systems
Sopers Lane, Poole, Dorset, BH17 7ER
Security classification Unrestricted Page 57 of 92
Version 3 Status Issued
Last Editor Alan Doyle Date 05-Oct-2017
Document Name Stratos Outstation General and ICM Handbook Document No. 667/HB/52250/000
Copyright © Siemens plc 2014. All Rights Reserved. Mobility and Logistics is a division of Siemens Plc
5.2 Preparation
Before attending site to Install a Stratos Outstation check that you have the following pre-
requisites:
• Installation tools as described above in section 5.1.3.
• Ensure that the Outstation is the correct variant of the product.
• Ensure you have the correct licenses for the application pre-installed, or on a
Card.
• Any required Communication equipment (will be site specific).
• Communication network configuration information (Site Specific).
• OTU Supply Kit – (667/1/27121/000) (In case there are no spare fused supplies).
• Printed SAT Sheet for completion on site (667/CI/31601/002).
• Printed OTU/MOVA Set Up Form for completion on site (667/CI/31601/000).
• Handbooks etc. As described in section 1.3.
5.3 Assembly
Additional board kits should be fitted according to section 7.3.1.
The Stratos Outstation comes as standard with the following parts:
Part Description Part Number
Lamp Supply Monitor Cable 667/1/47177/000
IEC 90 degree Mains Lead 702/4/08537/000
Zip Tie for mains lead 915/4/97087/026
Fixing Kit (M6 screws, caged nuts, washers, M2.5 screws & washers 667/1/47182/000
Ethernet Cable – 1m 998/4/88323/000
Modem Power Connector 531/4/03187/172
Outstation to Controller standard serial cable 667/1/47176/100
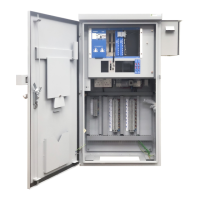
5.4 Mounting the Stratos Outstation
The Stratos Outstation can be mounted in a number of ways depending on the
configuration required. The unit should be mounted as low as possible in the controller
cabinet to reduce operating temperatures and maximise battery life.
 Loading...