101
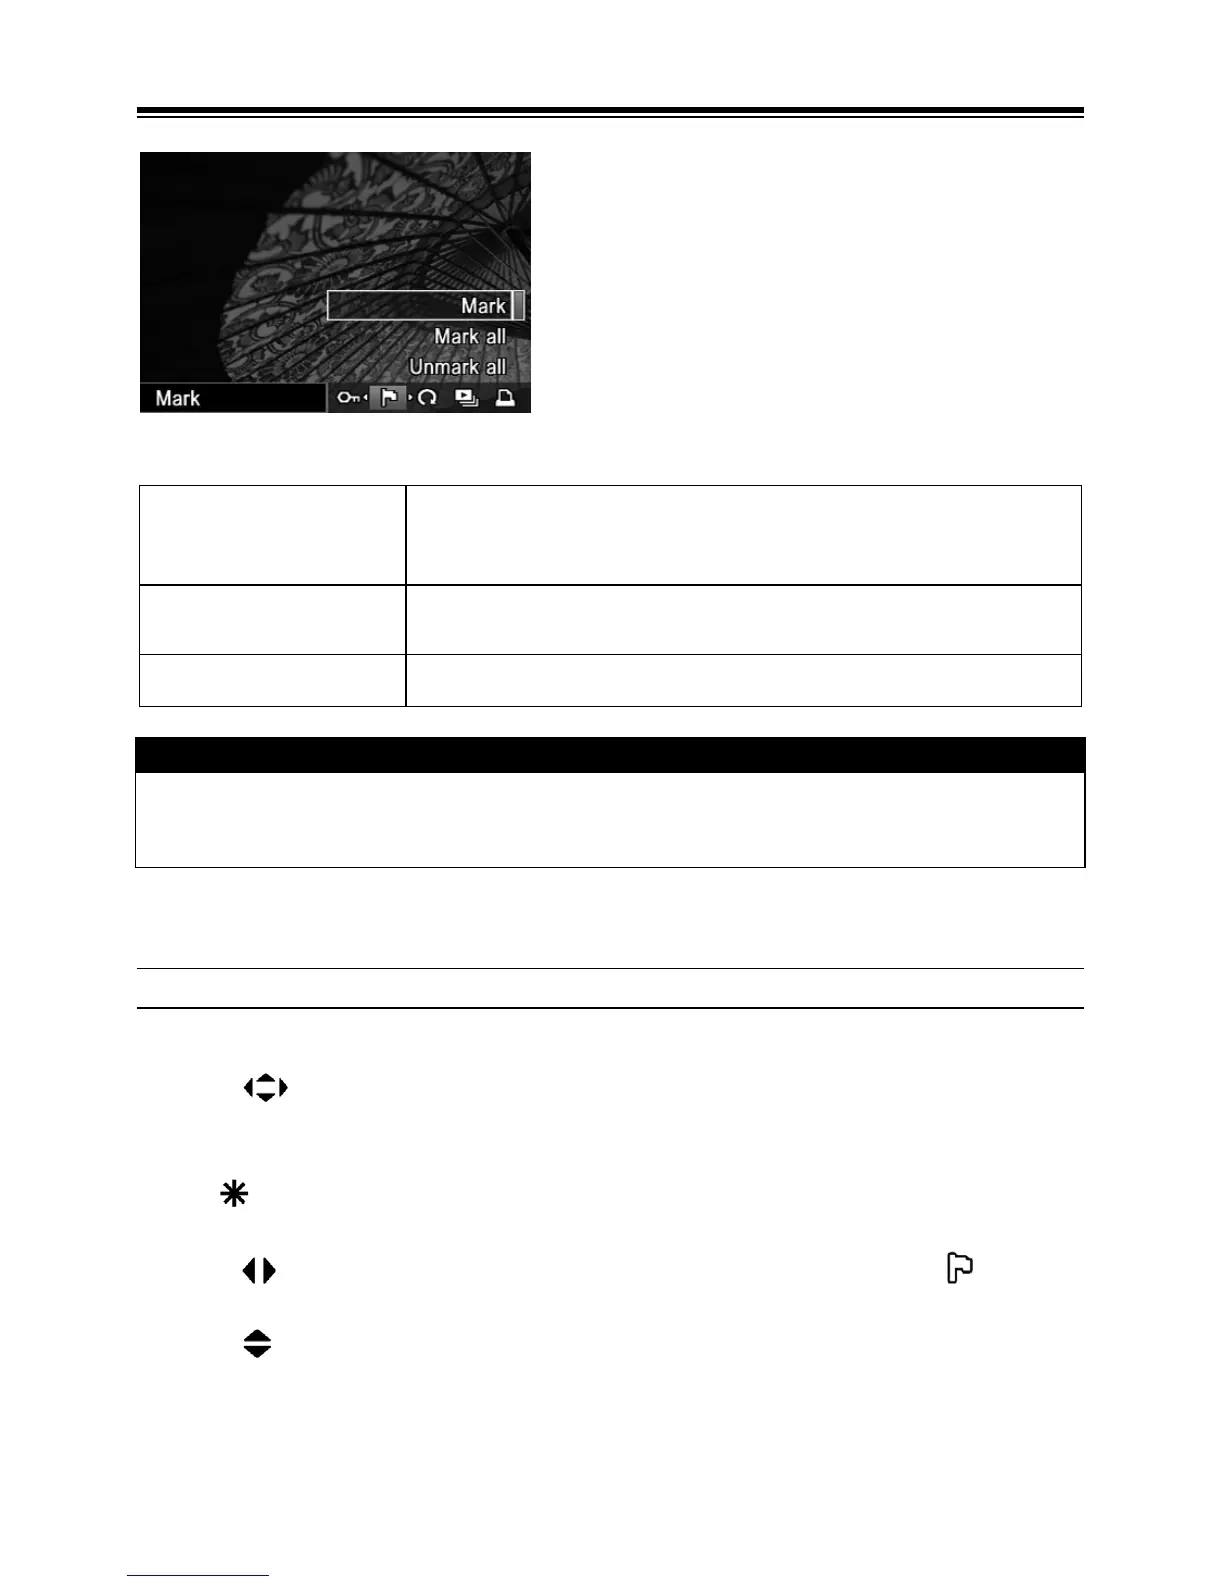
MARKING IMAGES
Images can be marked for various
reasons, such as to identify favorites, to
select images for a Slideshow, or to select
images to be deleted with the “All marked”
menu item in the Delete Menu (P.9 6 ).
MARK MENU
Mark/Unmark
Mark the currently selected image only. If the image is
already marked, the menu item changes to “Unmark”. (Not
available if the Mark Menu is opened from Jump Mode.)
Mark All
Mark all images on the card. (If all images on the card are
already marked, this menu item will not be available.)
Unmark All Unmark all marked images on the card.
TIP
• Images marked on the camera will retain their marked status when viewed in
SIGMA Photo Pro.
TO MARK A SINGLE IMAGE
1
Use the arrows on the 4-way controller to select the image to be marked in
Contact Sheet or Single-Image View.
2
Press to display the Modification Menu.
3
Use the arrows on the 4-way controller to select the Mark Menu ( ).
4
Use the arrows on the 4-way controller to select [Mark].
● If the selected image is already marked, the [Mark] menu item will change to
[Unmark].