23 von 37V 07.17
Service Manual BXT3-13/16/19
ENGLISH
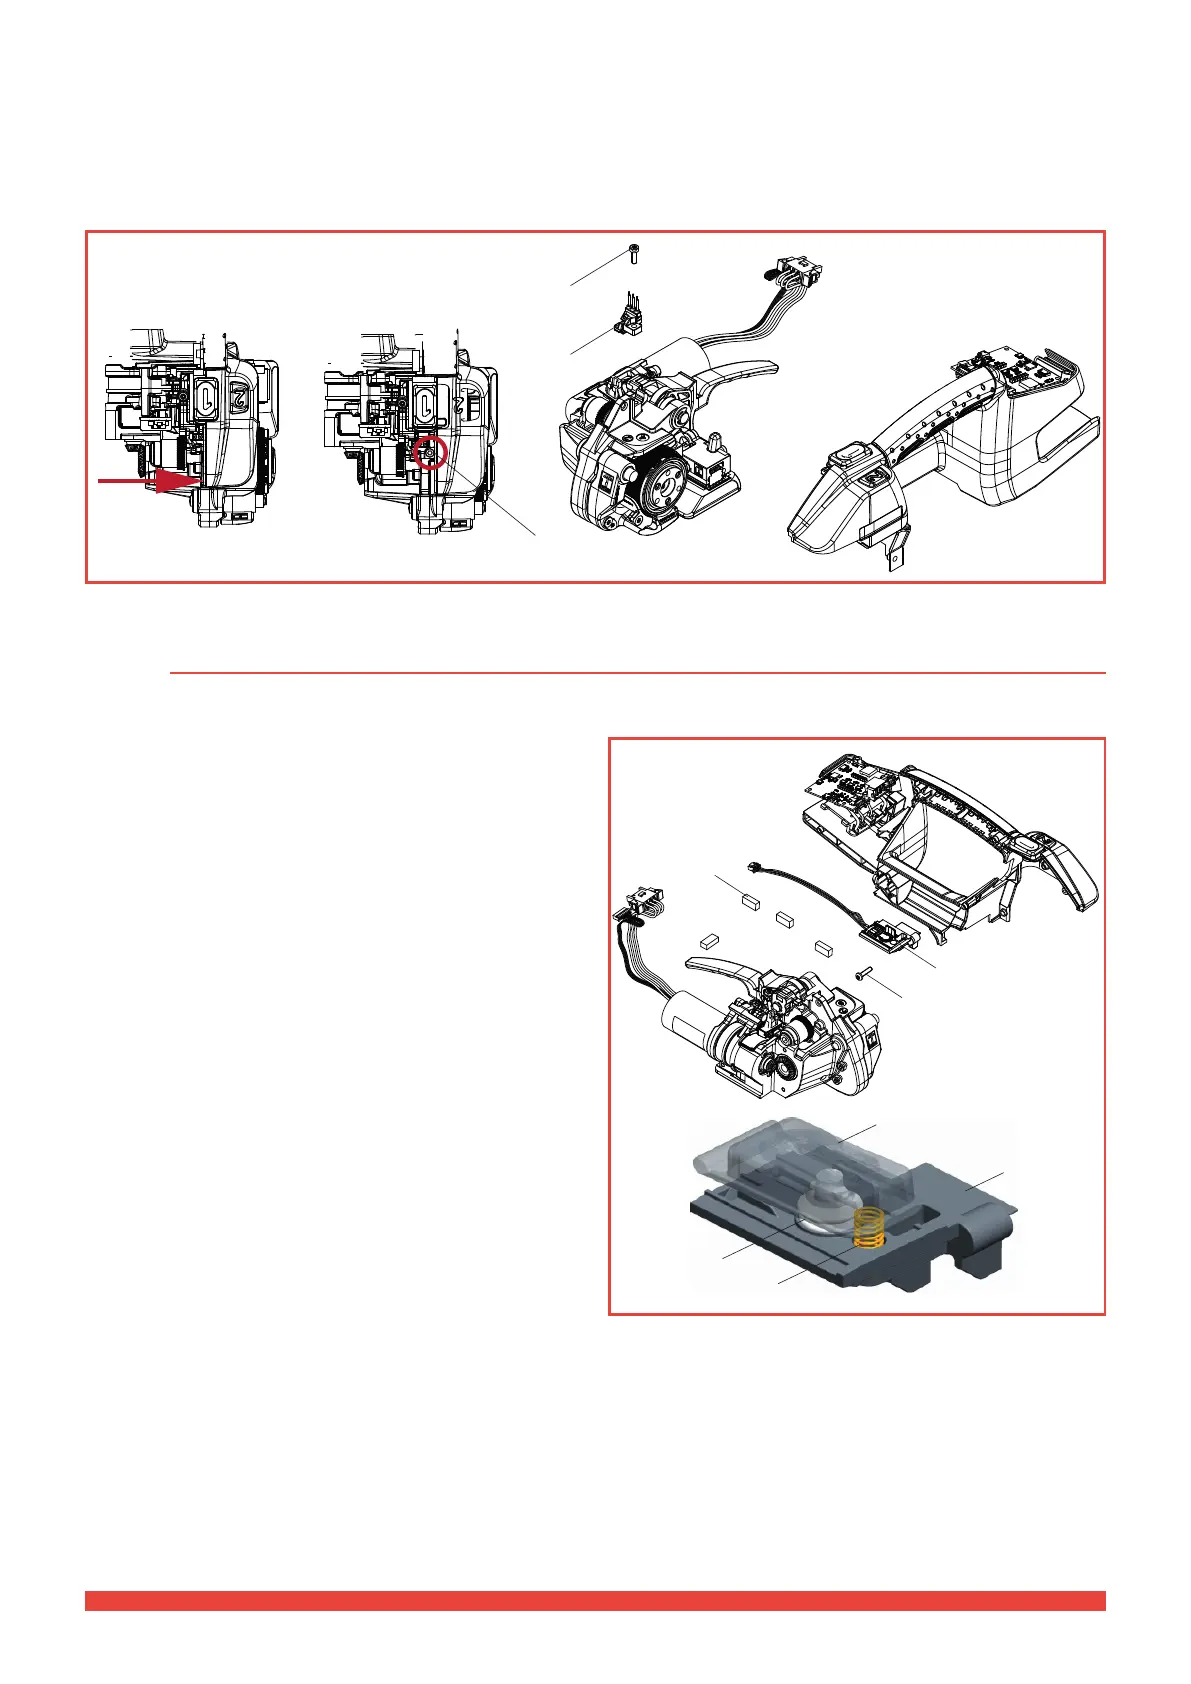
► Pull on the rocker lever and remove the left housing part.
Fitting
► Carry out assembly in the reverse order. Observe the correct position of the wiring! (Chapter 5.11).
► Tighten cylinder screws # 184 with a torque of 1.0 Nm.
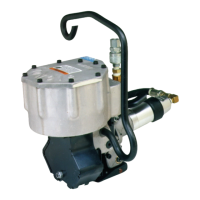
5.3 Wiring components and switches
5.3.1 Replacing the housing wiring harness (tensioning and welding button)
Dismantling
► Remove the left housing part of the tool (Chapter
5.2.2).
► Remove the plastic clamping pieces # 222.
► Disconnect the 4-pin connector of the wiring harness
# 105 from the control board.
► Remove the PT-screw # 197.
► Now the wiring harness # 105 can be removed along
with the plastic support piece
► Remove tensioning button # 205 together with actuator
# 200 and pressure spring
# 202.
Fitting
► Carry out assembly in the reverse order. Observe the
correct position of the wiring! (Chapter 5.11).
► Insert the pressure spring # 202 into the cable harness
# 105. When the tensioning button # 205 is installed,
make sure that the actuator # 200 is completely in the
recess of the cable harness.
► Tighten PT-screw # 197 with a torque of 1.0 Nm.
184
79
184
222
105
197
105
205
200
202