26 von 37
V 07.17
Service Manual BXT3-13/16/19ENGLISH
5.5 Motor
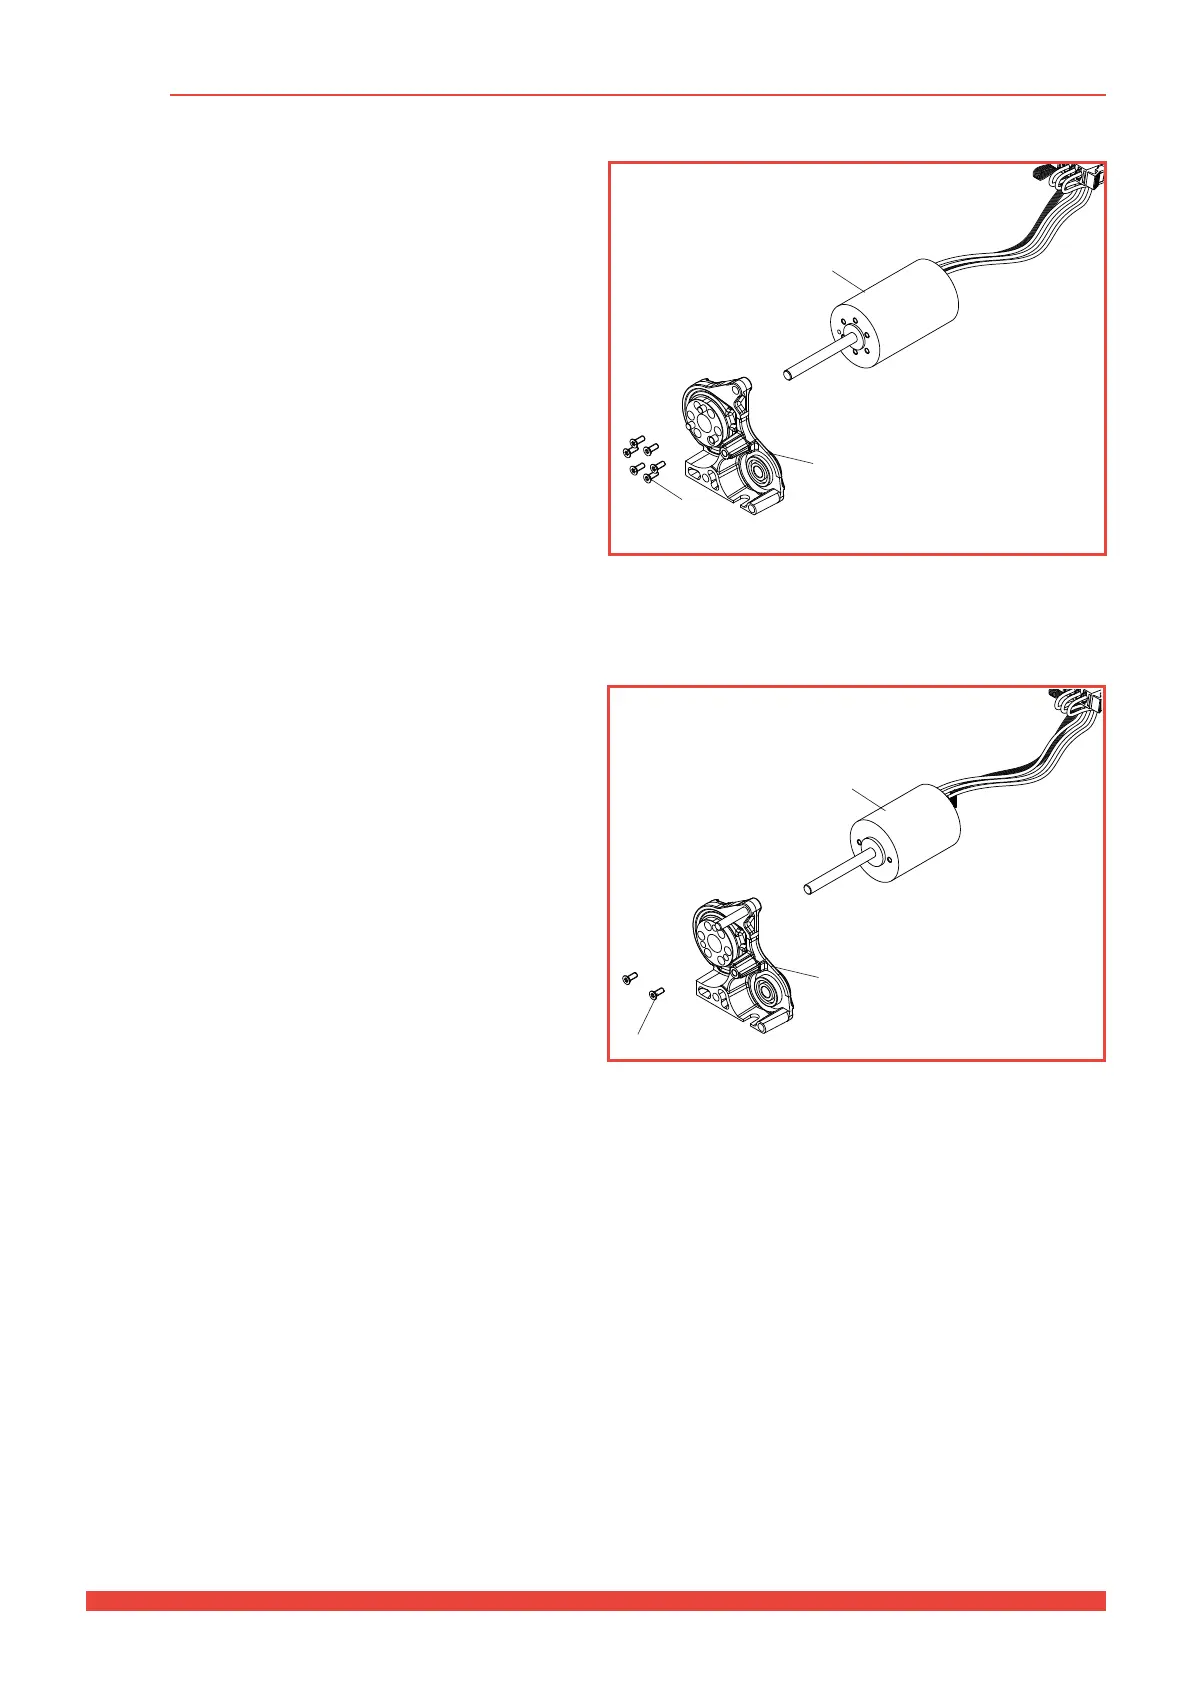
5.5.1 Disassemble motor BXT3-16 and BXT3-19
Dismantling
► Disassemble the welding mechanism (chapter 5.4.2) in
order to gain access to the motor screw connection.
► Pre-heat six motor screws # 99 to max. 80°C using a
hot air gun. Loosen the motor screws using the
respective Torx screwdriver.
► Remove the motor # 95 from bearing support
# 125.
Fitting
► For the installation of the motor, use the original
(pre-coated) screws # 99.
► Position the motor on the motor bearing and align. The
thick white cable is located at the top.
► Position the six screws and tighten them cross-wise to
1.2 Nm.
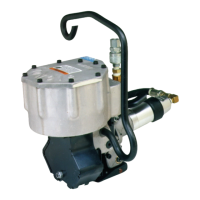
5.5.2 Disassembling motor BXT3-13
Dismantling
► Disassemble the welding mechanism (chapter 5.4.2) in
order to gain access to the motor screw connection.
► Pre-heat two motor screws # 99 to max. 80°C using a
hot air gun. Loosen the motor screws using the
respective Torx screwdriver.
► Remove the motor # 95 from bearing support
# 125.
Fitting
► For the installation of the motor, use the original
(pre-coated) screws # 99.
► Position the motor on the motor bearing and align. The
thick white cable is located at the top.
► Position the two screws and tighten them in alternating
order to 1.2 Nm.
95
99
125
95
99
125