27 von 37V 07.17
Service Manual BXT3-13/16/19
ENGLISH
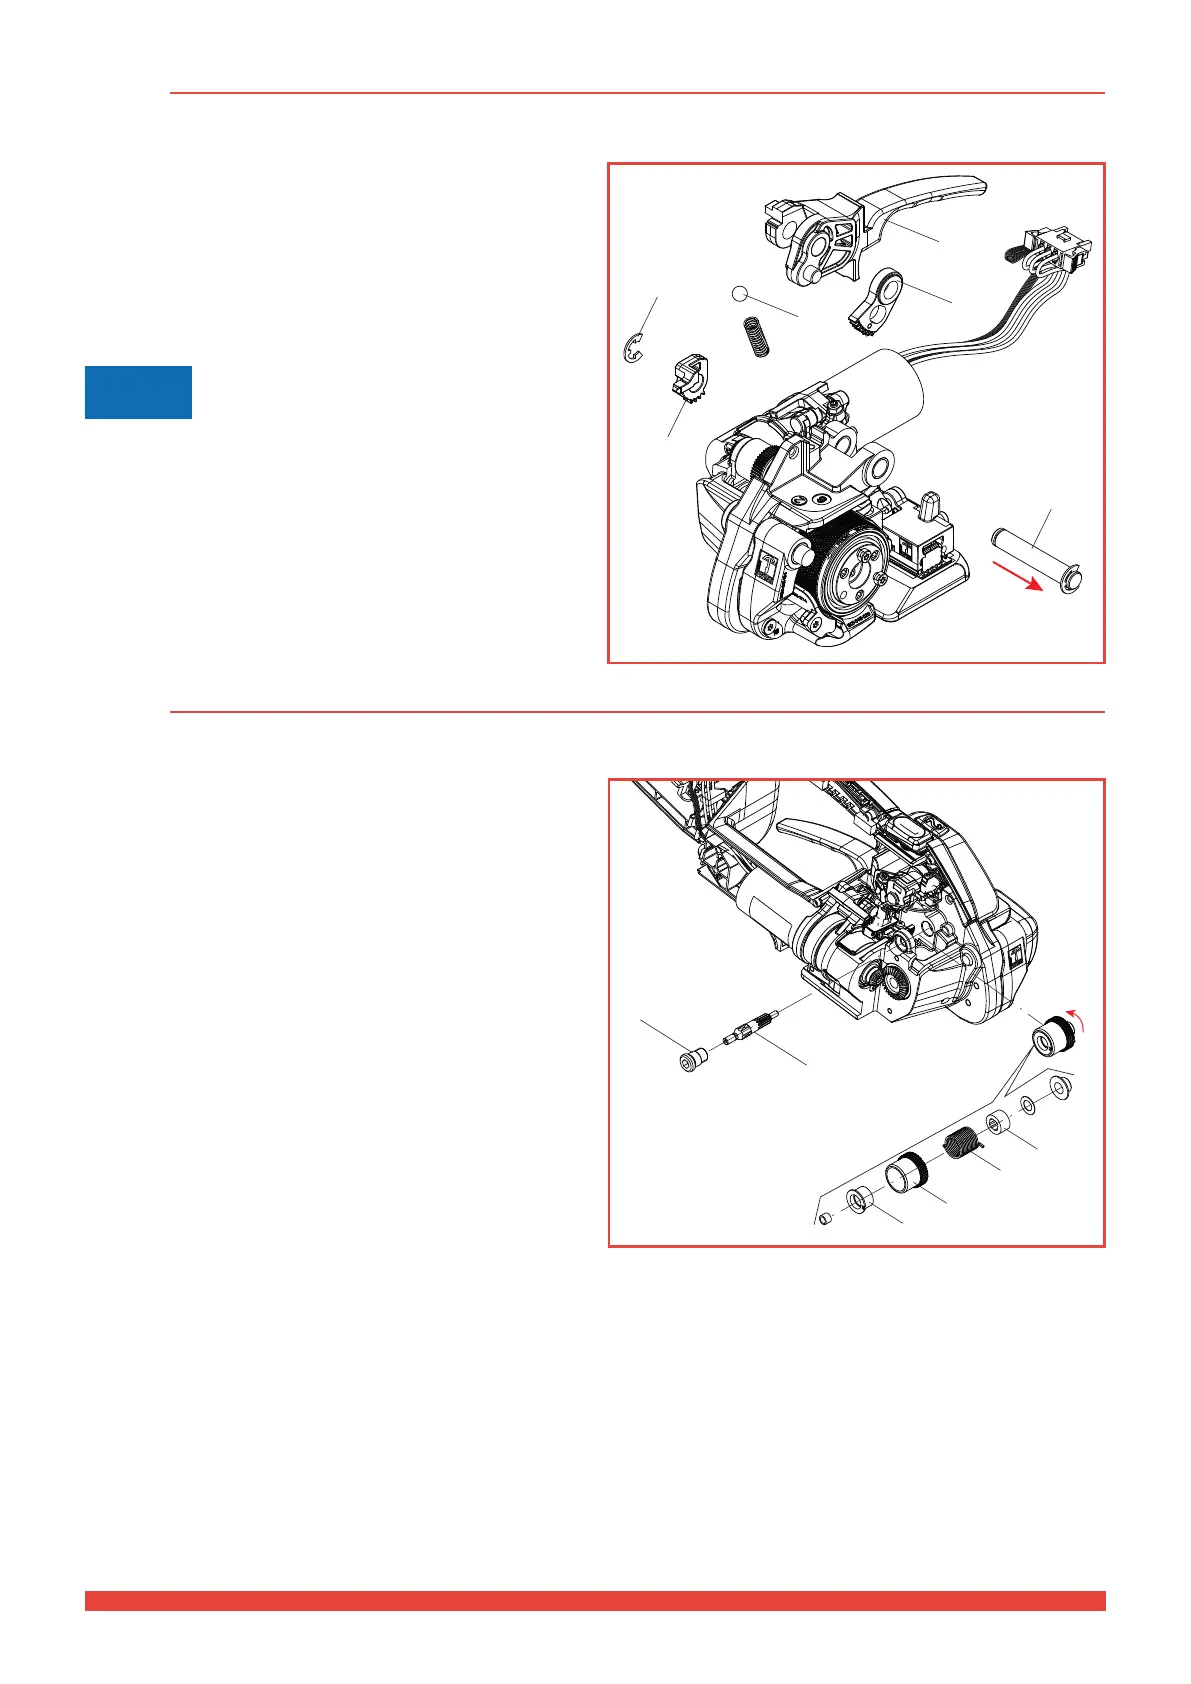
5.6 Rocker lever
5.6.1 Disassemble the rocker lever and connecting parts
Dismantling
► Remove both housing parts (chapter 5.2).
► Remove the retaining washer # 66 resting against the
blocking lever # 65.
► Secure the blocking lever # 65 with your thumb and
press the bolt # 66 through the hole towards the arrow.
Attention
The ball # 82 located below the
blocking lever # 65 is spring-loaded.
► Remove toothed segment # 90 from rocker lever # 89.
Fitting
► First hang the toothed segment # 90 into the lever,
guide both into position and ensure for the correct
intermesh of the teeth in the cam disk # 44.
► Carry out assembly in the reverse order.
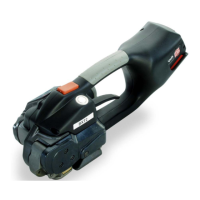
5.7 Wrap spring clutch unit
5.7.1 Disassemble the wrap spring / clutch shaft
Dismantling
► Right housing part is removed (Chapter 5.2.1).
► Using your hand, hold the sleeve # 80 from rotating,
loosen the bearing bolt # 61 and remove.
► Hold the clutch shaft # 57 tight with the long nose plier
and pull out completely.
► Turn the sleeve # 80 approx. 90° counter-clockwise
so that the spring carrier points to the rear. Now
press the sleeve to the front out of the guide using your
thumb, and remove the sleeve.
Fitting
► Carry out assembly in the reverse order. Before tigh-
tening the bearing bolt # 61, the sleeve must be rotated
in such a manner that the spring carrier is located in
a 2 o´clock position. Check that the sleeve # 80 can
be rotated springy.
► Tighten bearing bolt # 61 with a torque of 4.0 Nm.
!
80
57
61
58
59
67
65
66
64
82
89
90