9 Torque Generator Repair
Reassembly
9 - 8
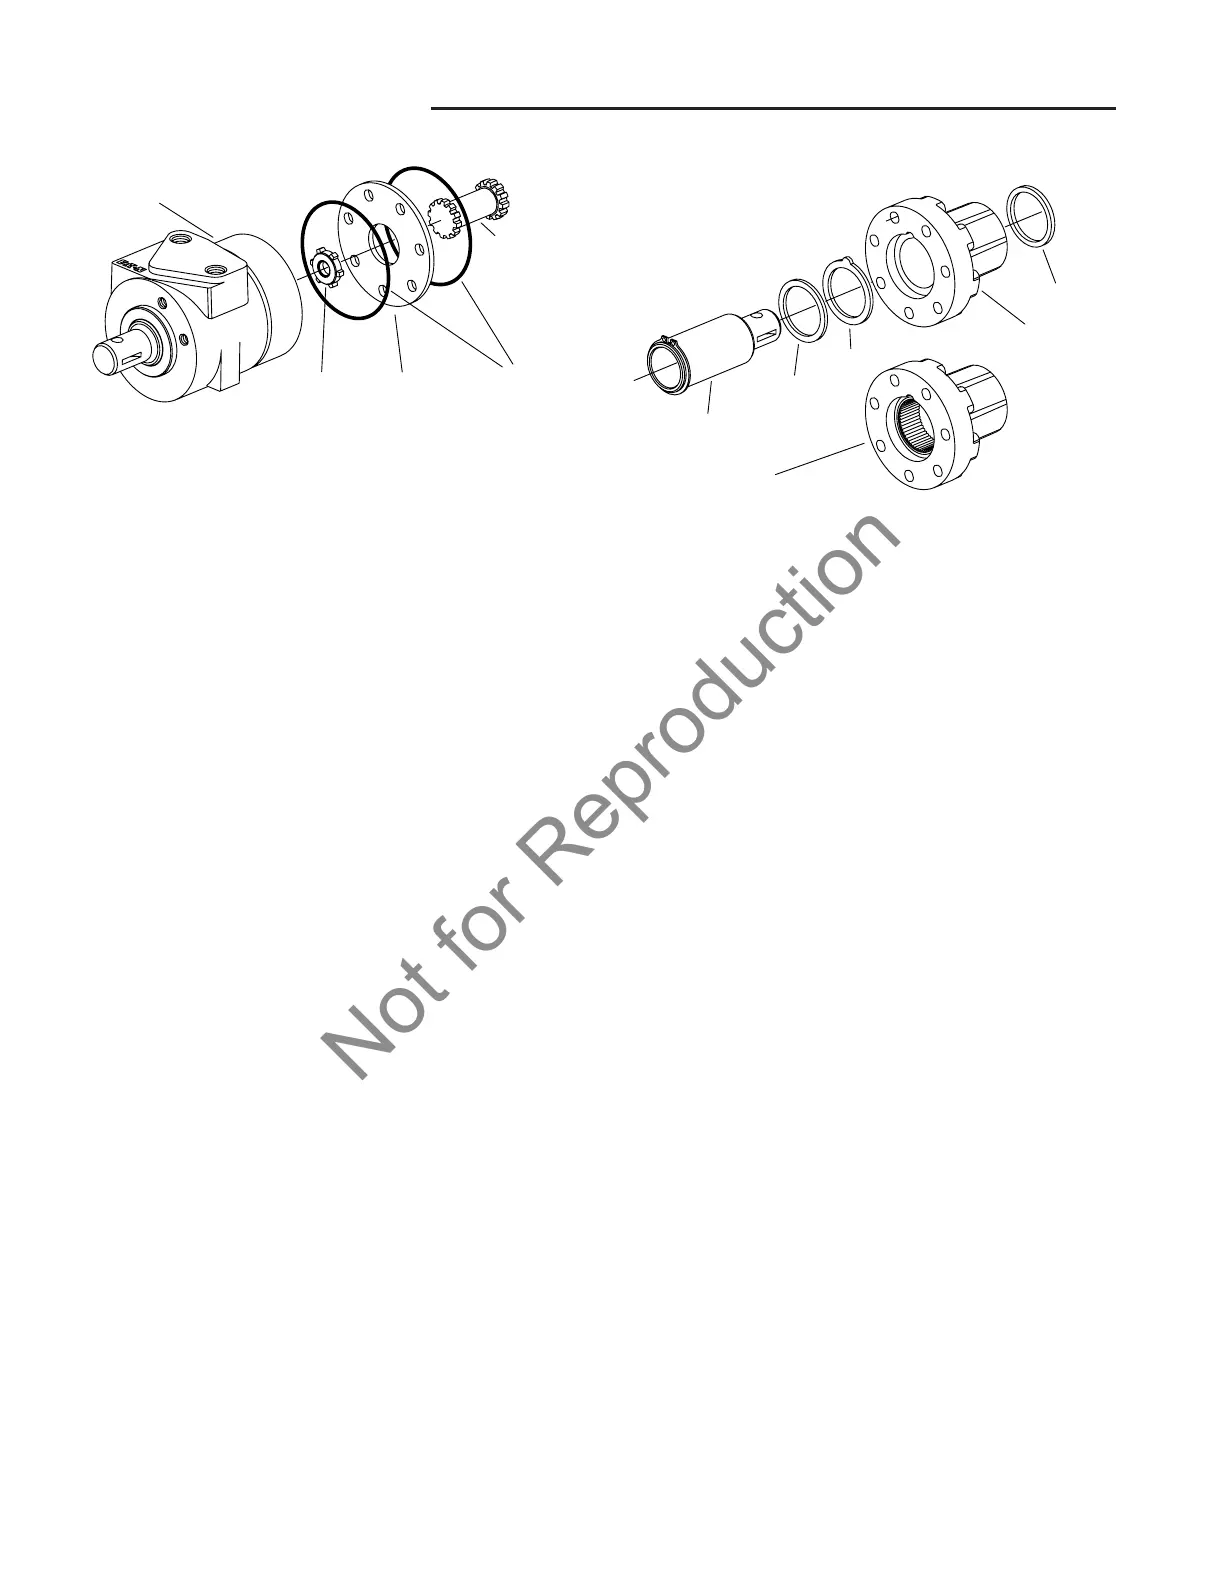
40. Lubricate and install the o-ring into the gerotor or
Gerotor.
NOTE: Spacer is used only with 227 Series (step 41).
41. Install the spacer in the Gerotor star.
42. Lubricate and install the drive into the gerotor or
Gerotor star.
NOTE: The spline on one end of the drive is not as thick
as the other and this thinner spline end must be installed
into the gerotor or Gerotor star.
43. Lubricate and install the spacer plate, with the seal
groove side facing upward. Install by aligning the cap
screw holes with the matching holes in the gerotor or
Gerotor.
44. Lubricate and install the o-ring in the groove located
in the spacer plate.
45. Lubricate and install the quad seal in the groove
located in the power end housing.
46. After installing, make sure the quad seal is not twist-
ed and is firmly seated in its groove.
47. With the quad seal installed, turn the power end
housing over and support it in an upright position
(surface with seven mounting holes up). Lubricate
and install the first washer by aligning the bump on
the washer with the matching recess in the power
end housing.
48. Lubricate and install the second washer in the power
end housing.
NOTE: Careful reassembly will prevent shaft seal dam-
age when pushing the power end shaft into place (step
49).
49. Lubricate and install the power end shaft in the hous-
ing.
50. Before engaging the power end housing assembly,
align the input and output shaft keyways and cross
holes. Spline on the drive and the spline in the power
end shaft should line up. With the power end assem-
bly installed, rotate housing to align cap screw holes.
51. Install the cap screws and torque in a crisscross
sequence to 23 Nm [200 in-lb].
52. The torque generator is now ready for test and instal-
lation.