14 Transmission Tear-Down
Assembly
14 - 20
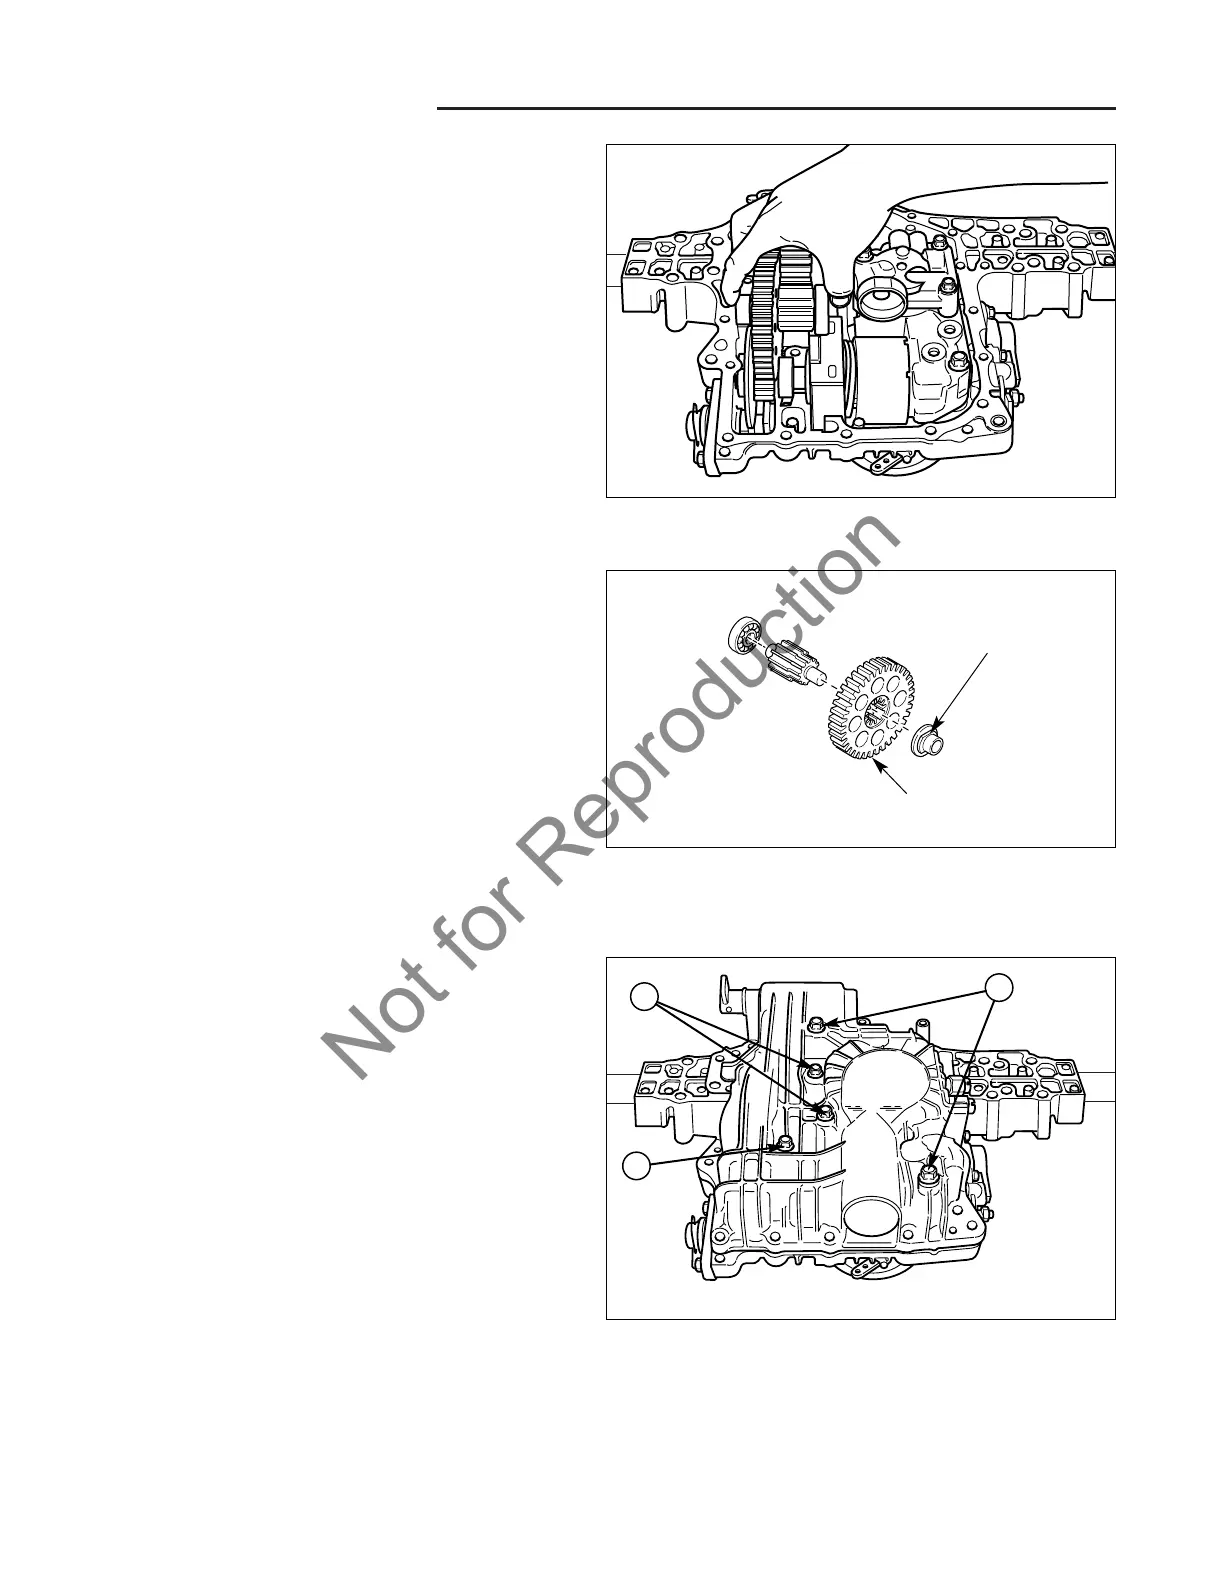
14. See Figures 31 & 32. Assemble the intermediate
gear assembly and install into the upper case. Be
sure the flats on bushing line up with the housing.
Also be sure the bevel on gear is facing the center of
the transaxle.
14. Install the small round filter into the upper case.
15. Line up the shift fork for the differential lock by cen-
tering it over the boss for the axle bushing. Also be
sure the differential lock is unlocked, and the magnet
is installed.
Figure 31. Remove Intermediate Gear Assy.
Figure 32. Intermediate Gear Assembly
Bushing
Flats
Beveled Edge
16. Apply a good quality automotive RTV silicone sealant
to the sealing surfaces of the upper case. Be sure all
surfaces are clean and free of any old sealant.
17. See Figure 33. Carefully install the lower case to the
upper case. Install the bolts and tighten evenly going
from the inside to the outside, just snugging them up.
18. You can test the differential lock by rotating one of
the axle shafts while moving the differential lock lever
forward. You should get to a point where it will
engage then release. This may require help from an
assistant due to the preload of the controlled traction
mechanism . If everything works normally, torque the
bolts to 16-18 ft. lbs (21-24 NM).
Figure 33. Case Bolts
A. Long Bolts C. Drain Plugs
B. Medium Bolt
A
B
C