7 - 17
7 Electrical System Service
Location and Replacement
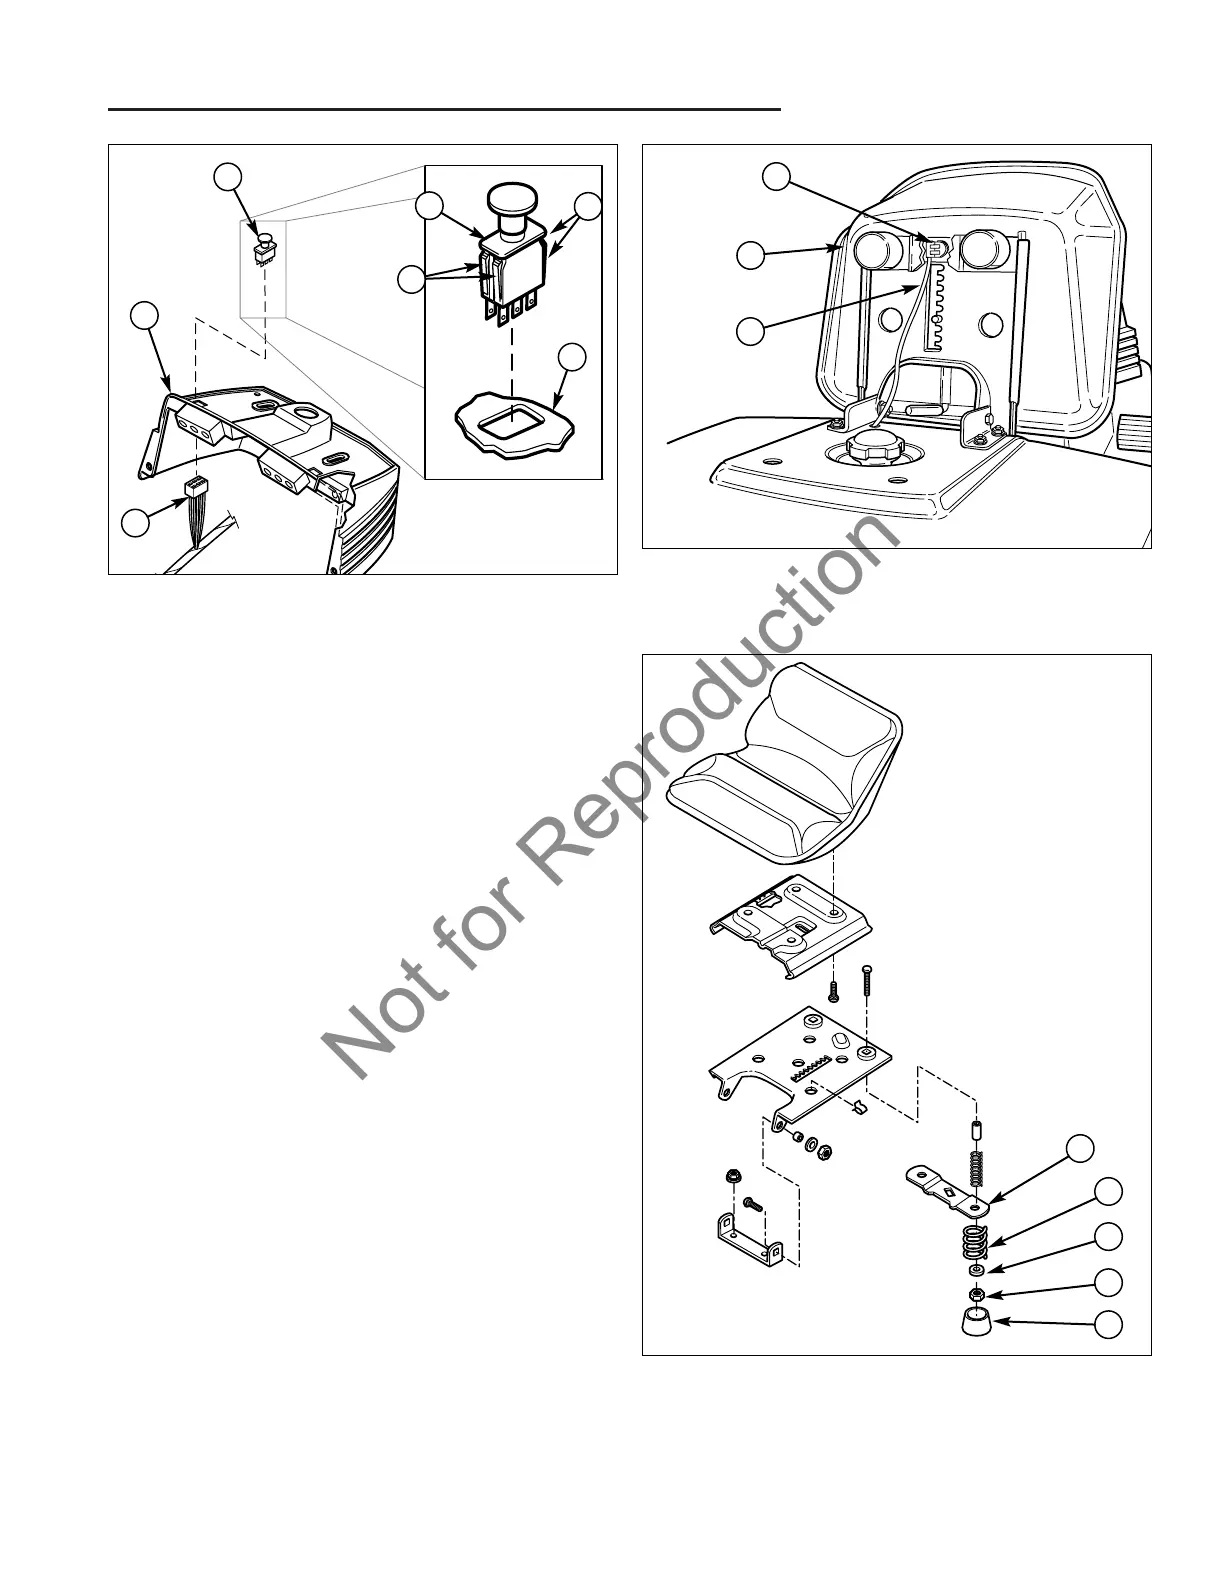
Figure 15. Seat Switch Safety System
A. Seat Switch C. Seat
B. Wire Harness
B
SEAT SWITCH
1. Disconnect and secure the negative battery cable,
(see Section 6, COMMON SERVICE PROCE-
DURES).
2. Tip the seat deck forward to access the bottom of the
seat assembly.
3. Disconnect the wire harness (B, Figure 15) from the
seat switch (A).
4. Remove the spring cover (A, Figure 16).
5. Remove the nut (B), washer (C), and spring (D).
6. Remove the seat switch from the switch mounting
plate (E).
7. Install seat switch in reverse order of removal.
A
C
Figure 16. Seat Switch Removal
A. Spring Cover D. Spring
B. Nut E. Switch Mounting Plate
C. Washer
A
B
C
D
E
Figure 14. PTO Switch Replacement
A Dashboard C. PTO Switch
B. Wire Harness D. Locking Tabs
A
PTO SWITCH
The PTO switch (C, Figure 14) is located in the
dashboard (A) on the right-hand side of the steering
wheel.
1. Disconnect and secure the negative battery cable,
(see Section 6, COMMON SERVICE PROCE-
DURES).
2. Unplug the wire harness (B, Figure 14) from the back
of the switch (C).
3. From behind the dashboard, push in the locking tabs
(D) and remove the switch as shown in Figure 14.
4. Install PTO switch in reverse order of removal.
B
A
C
C
D
D