N5
ONE-STEP BUTTONHOLING
= Your machine automatically makes a buttonhole to the size of your button in one,
easy step You never need to move the fabric or reposition the needle.
,, Always make a practice buttonhole on a reach areas, convert machine bed to
sample of your fabric_ free arm sewing.
• Be sure bobbin contains enough thread.. = Mark buttonhole position on fabric as
,, When making buttonholes on-hard-to- indicated in pattern.
2
6
3
4 5 A B
!
J
!
!
7
RECOMMENDED SETTINGS
Stitch Selection:
Stitch Width:
Buttonhole Stitch
:ill
Stitch Length: 4
Foot: Buttonhole Attachment (L)
Needle Plate: General Purpose (A)
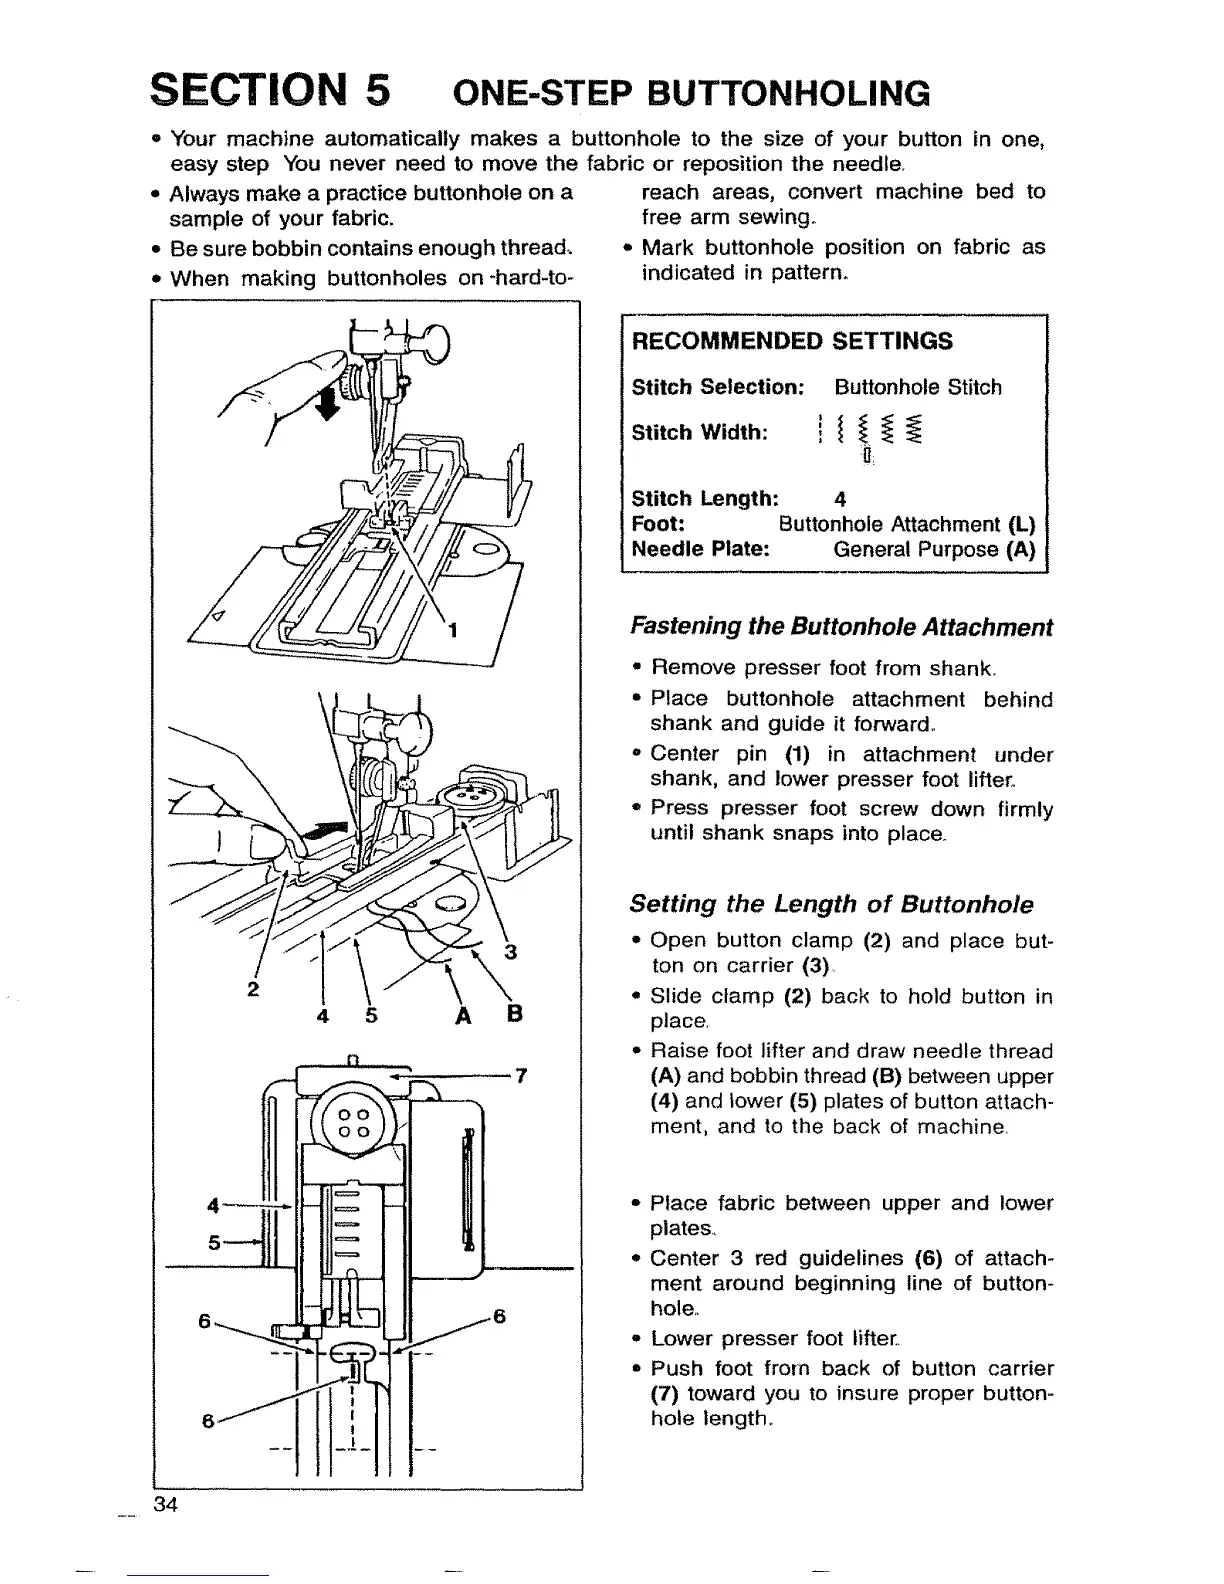
Fastening the Buttonhole Attachment
- Remove presser foot from shank.
• Place buttonhole attachment behind
shank and guide it forward,.
= Center pin (1) in attachment under
shank, and lower presser foot lifter,
• Press presser foot screw down firmly
until shank snaps into place°
Setting the Length of Buttonhole
o Open button clamp (2) and place but_
ton on carrier (3)..
,, Slide clamp (2) back to hold button in
place,
,, Raise foot lifter and draw needle thread
(A) and bobbin thread (B) between upper
(4) and lower (5) plates of button attach-
ment, and to the back of machine..
- Place fabric between upper and lower
plates,,
• Center 3 red guidelines (6) of attach-
ment around beginning line of button-
hole.,
° Lower presser foot lifter,
° Push foot from back of button carrier
(7) toward you to insure proper button-
hole length.
34