18
i
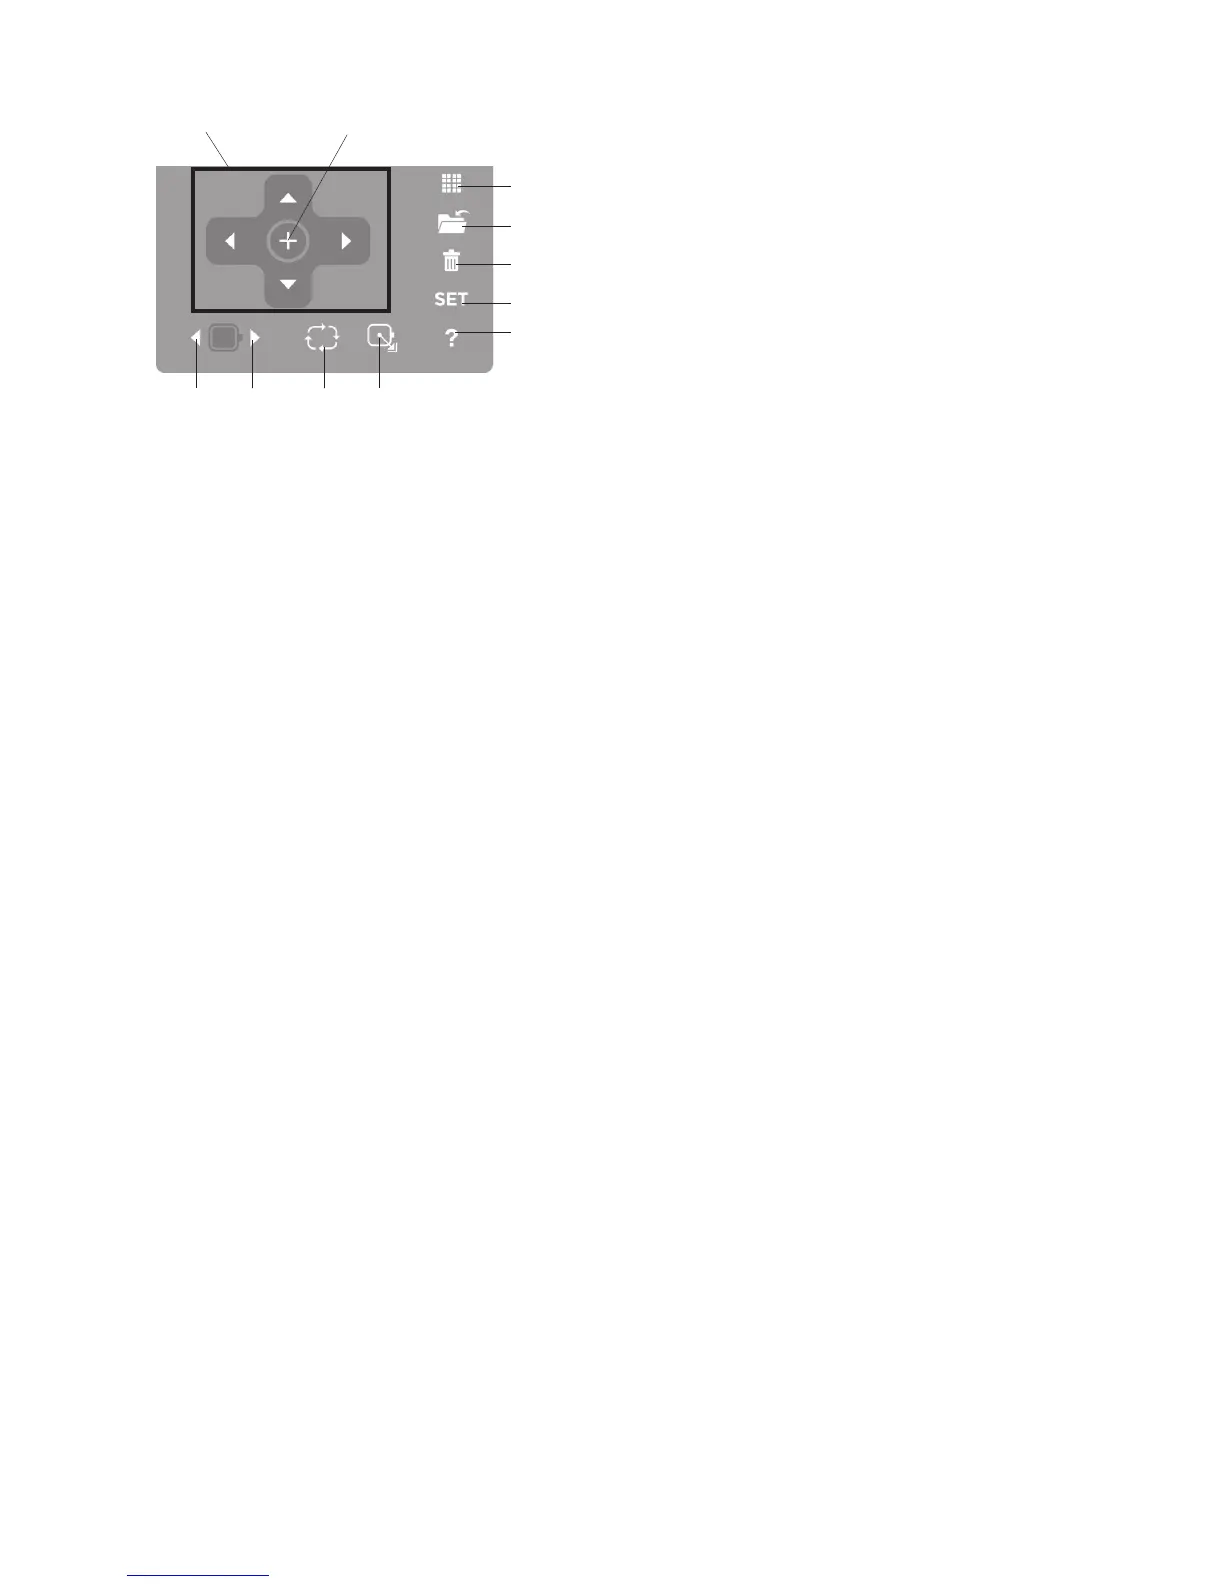
Editing Button
Press this button to open the editing window. You can
resize, rotate, flip and combine the pattern to create
your own original embroidery design.
o
File Save Button
Press this button to save the lettering or edited design
as a file.
!0
Delete Button
Press this button to delete the selected pattern.
!1
SET Button
Press this button to open the custom setting windows.
You can set the machine functions to your preference
(See page 19-22 for options).
!2
Help? Button
Press this button to view the step by step illustrated
instructions of the following four basic operations:
• Changing needle
• Inserting the bobbin
• Threading the machine
• Winding the bobbin
!3
Positioning Buttons
Press one of the 4 buttons to move the hoop in the
direction of the arrows. In the editing mode, press
these buttons to move the selected pattern in the
editing window.
!4
Centering button
Press this button to move the hoop to the center.
!5
Trace Button
Press this button to trace the location of embroidery
pattern without stitching in the hoop.
!6
Carriage Return Button
Press this button to return the carriage to the home
position. The needle will be positioned in the far left
corner of the hoop.
!7
Stitch Forward Button
Press this button to move the hoop forward. The hoop
will move forward 10 stitches each time you press this
button.
!8
Stitch Back Button
Press this button to move the hoop backward. The
hoop will move backward 10 stitches each time you
press this button.
i
o
!0
!1
!2
!3
!6!5!7!8
!4