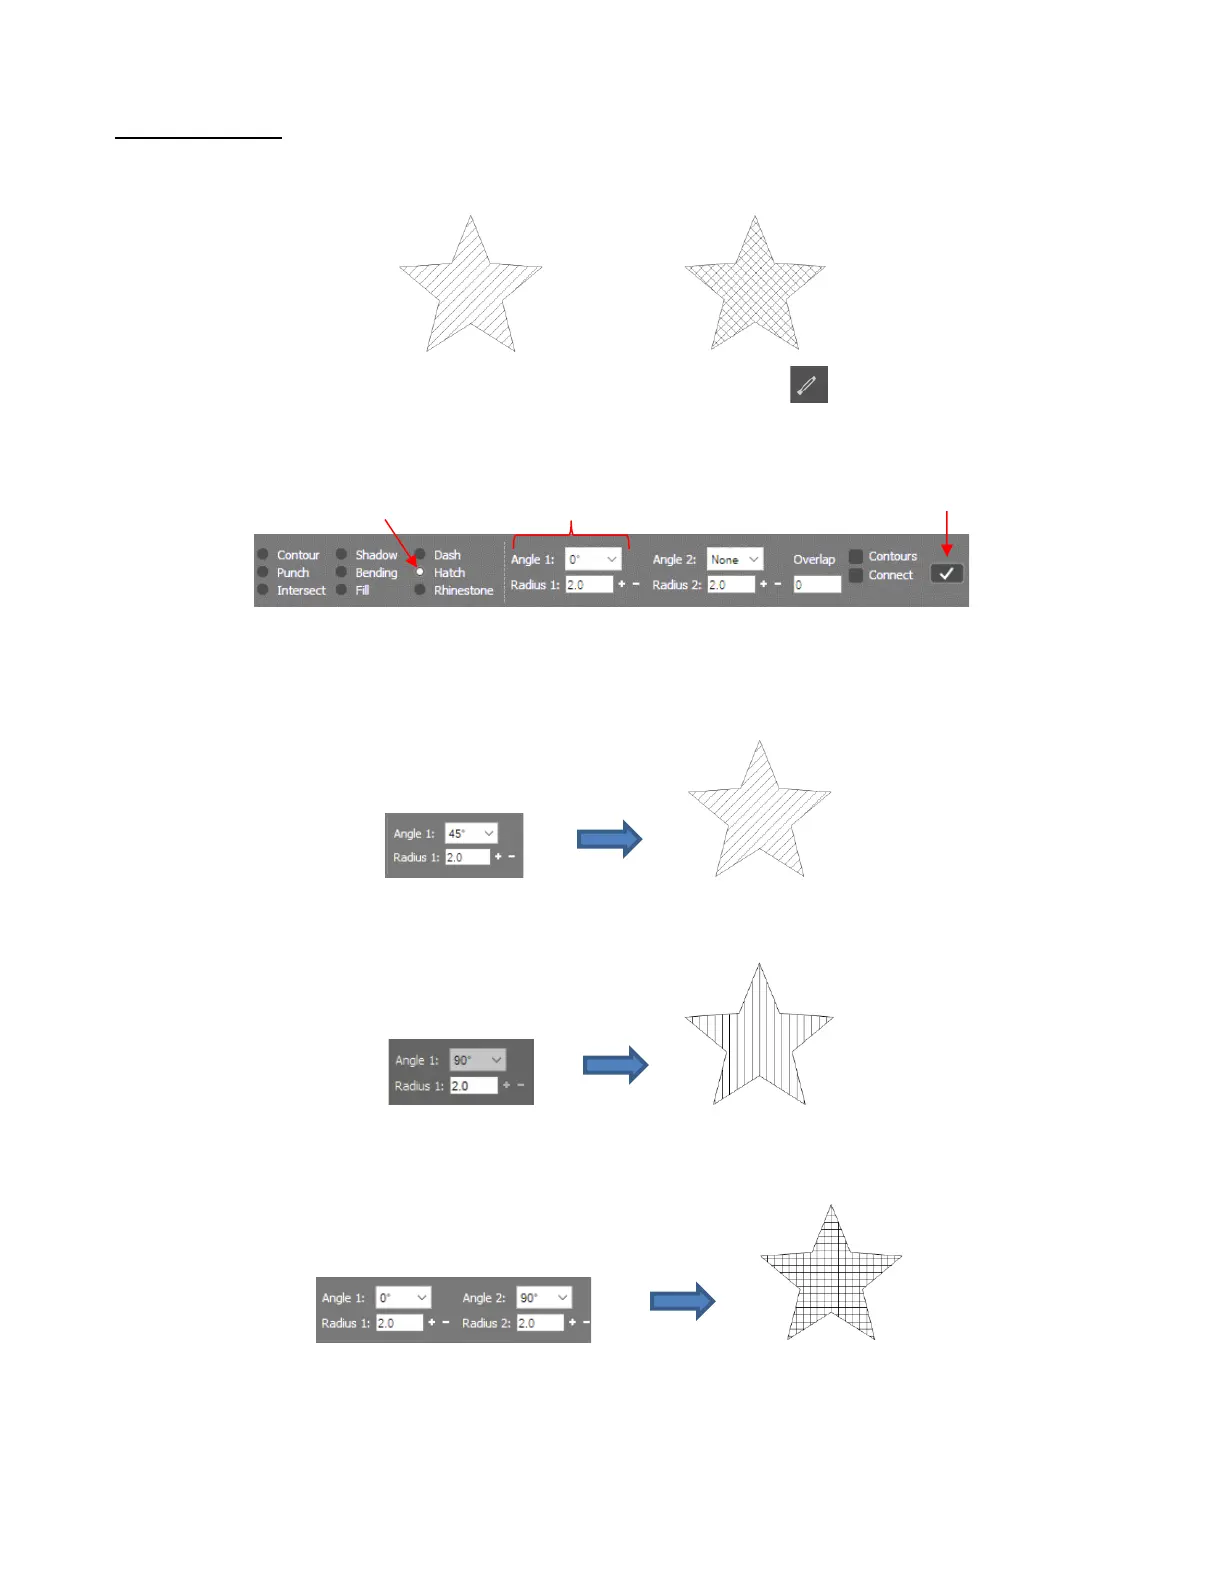
5.03.1 Hatch Fill
• The Hatch Fill effect will create a linear fill that can be single-line or double-line (hatched):
• To add a linear fill, select the vector shape and click on the Effects icon on the Tools panel (or press
the shortcut key A). Mark the Hatch option and the Properties & Function Bar will now have the following
settings and options:
• Select the desired angle for the first line from the drop-down menu. Below, in the Radius 1 field, enter the
desired spacing between the lines. Normally, with a tool such as the Skycut engraver, a very small value
would be used, such as 0.1 mm (or 0.004”). However, to better illustrate the effect for the screenshots used
in this tutorial, a much larger value has been entered. Click on the Apply icon to accept the settings:
• As with other functions in SignCut Draw, if you want to make changes, use Undo to back up. Then change
the settings, as desired. Perhaps you prefer a different angle:
• To add a second set of lines for a hatch fill, select a different angle from the Angle 2 drop-down menu and
enter the desired spacing in the Radius 2 field:
• The Overlap setting is typically used with rotary tools where the exactly diameter of the tool is known. That
is entered into the Radius field(s) and the Overlap is usually set to half that radius (or more) to make sure
there are no gaps when the engraving occurs, assuming a complete fill is the goal: