• To add a contour fill, select the vector shape and click on the Effects icon on the Tools panel (or
press the shortcut key A). Mark the Contour option and the Properties & Functions Bar will most likely
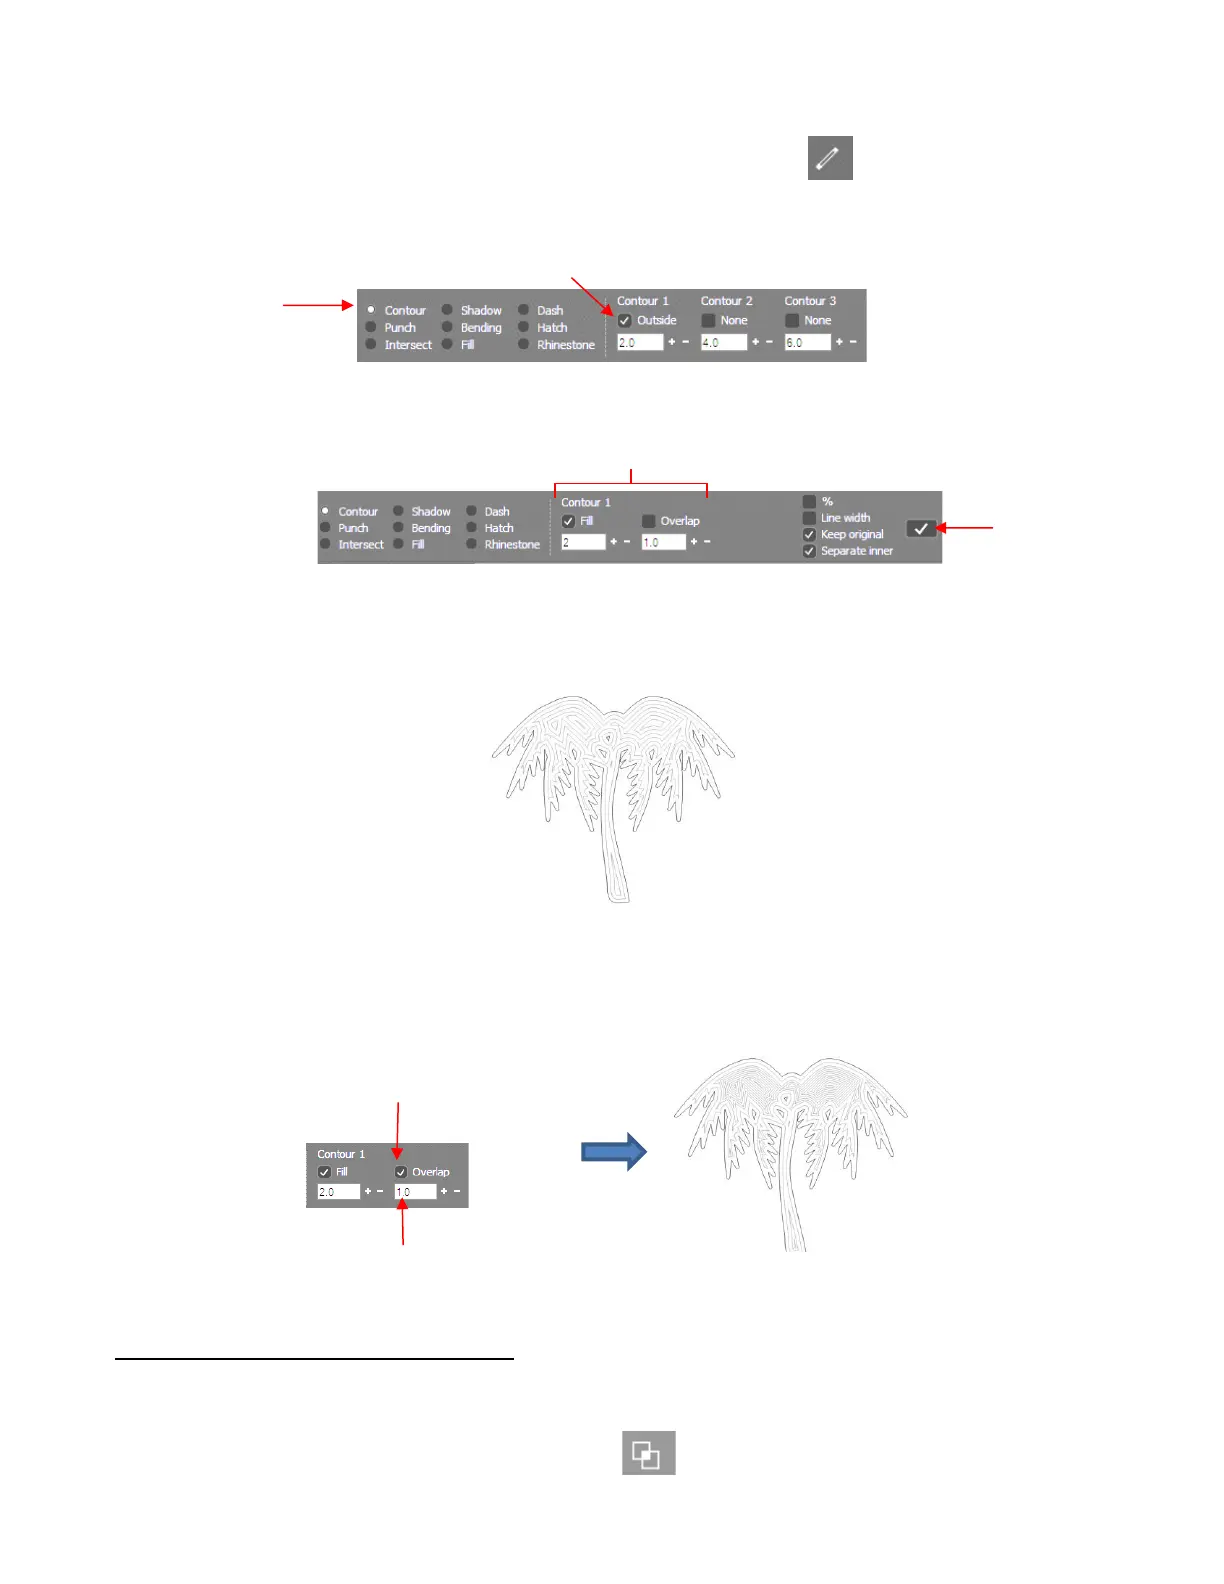
look like this:
• Click several times on the check box next to Outside, under Contour 1 until it changes to Fill:
• Below Fill, enter the desired spacing between the lines. Normally, with a tool such as the Skycut engraver, a
very small value would be used, such as 0.1 mm (or 0.004”). However, to better illustrate the effect for the
screenshots used in this tutorial, a much larger value has been entered. Click on the Apply icon to accept
the settings:
• With a smaller tool, the gaps seen in the prior screenshot will not necessarily be present. Thus, test out the
actual settings you plan to use. Note that with a very small spacing, it can take a number of minutes for the
pattern to be rendered.
• As with the Hatch Fill feature, an Overlap setting can be applied if the radius of a rotary tool is entered
instead of the desired spacing:
5.03.3 Inside Fills Versus Outside Fills
• In certain situations, you might want to reverse the parts of a design that are filled. To do this, add any
outside shape to the design, such as a rectangle, an oval, a heart, etc. Select both the inside and the
outside shapes and apply Combine objects (Ctrl-L)