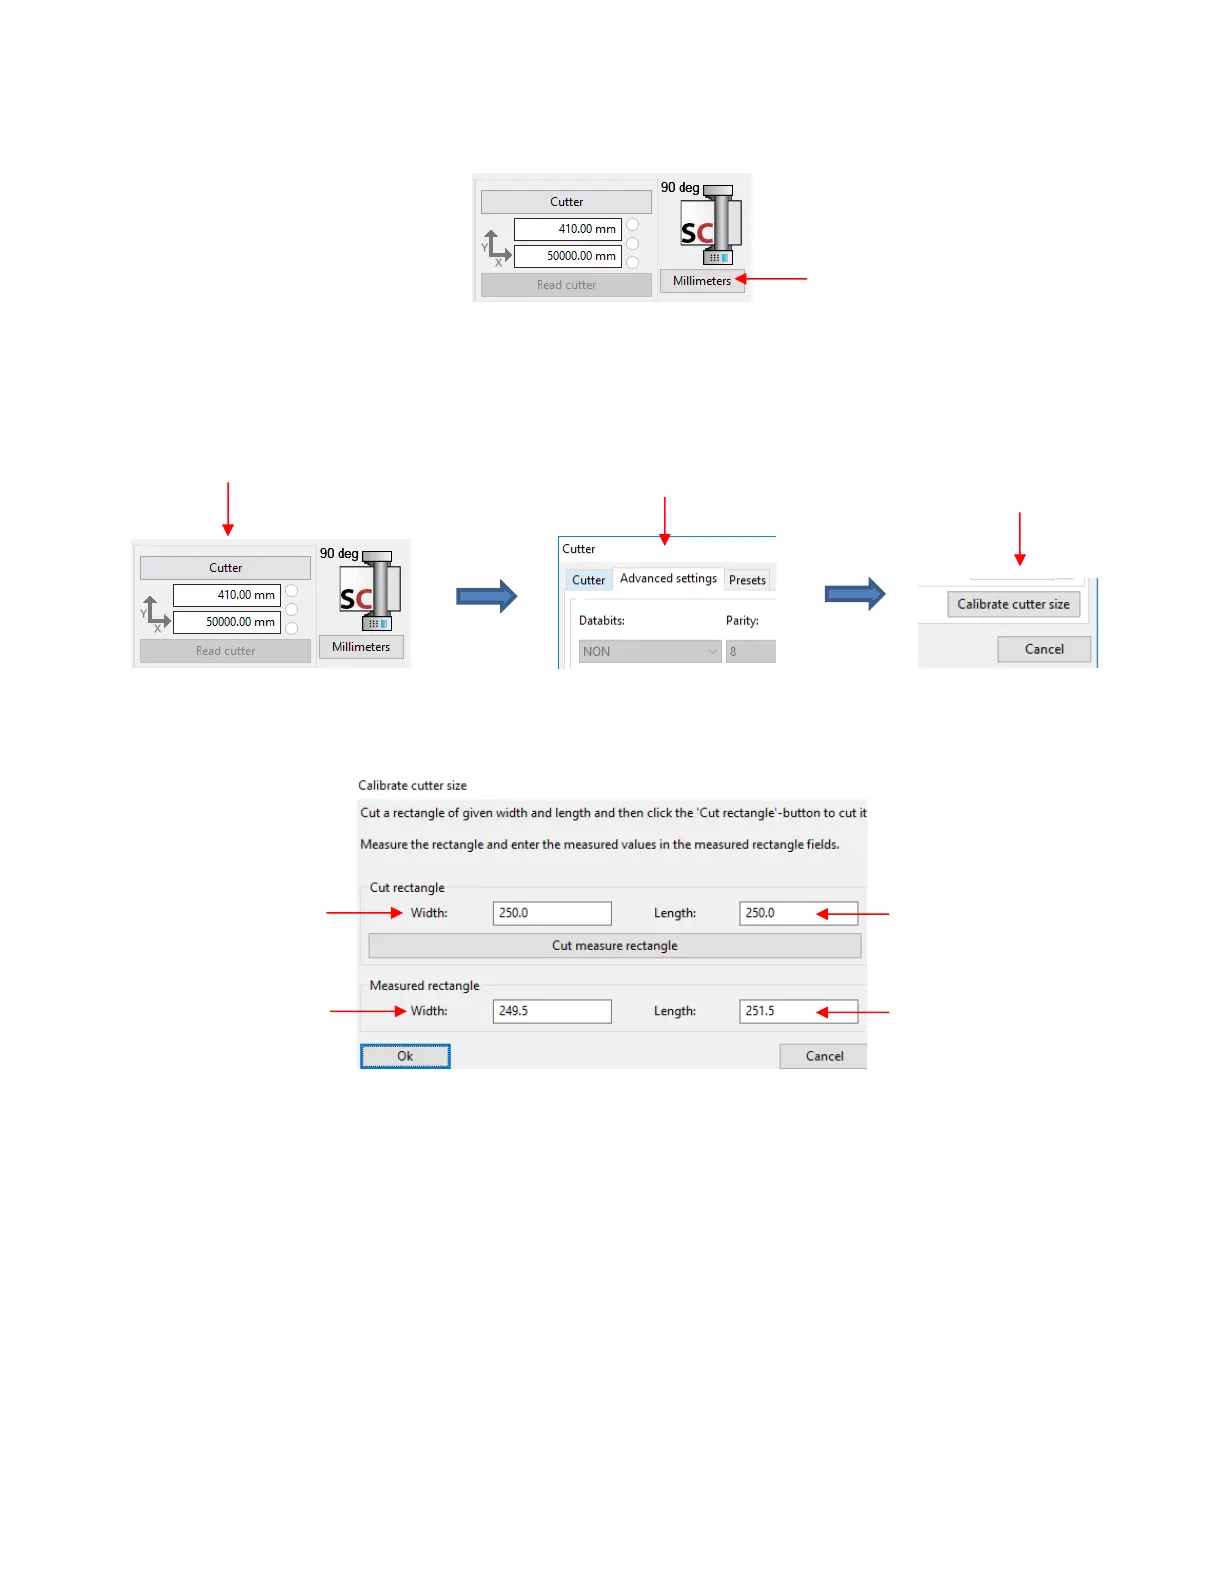
• Verify that the units are set to Millimeters on the Cutter Panel. If not, click on the button until Millimeters
is displayed:
• To open the Calibrate cutter size window, click on the Cutter button on the Cutter Panel. Select the
Advanced settngs tab and, in that same window, click on the Calibrate cutter size button (lower right
corner):
• The following window opens where you will enter the size of the square you sent to cut, along with the
actual size the square drew:
• Draw the square again and measure to verify the square is now 250 mm x 250 mm.
• Make adjustments as needed. For example, with the Width example above:
If the square is now drawing larger than 250 mm, then decrease the Width you entered as your
measured value. Try entering 249.3 instead of 249.5.
If the square is still drawing smaller than 250 mm, then increase the Width you entered. Try entering
249.7 instead of 249.5.
• Once you have your calibration set, please record these values in your “little black book” in case your
computer crashes and you lose your calibration.