26 | CHAPTER 4 – CUSTOMIZING WITH SMART TABLE TOOLKIT
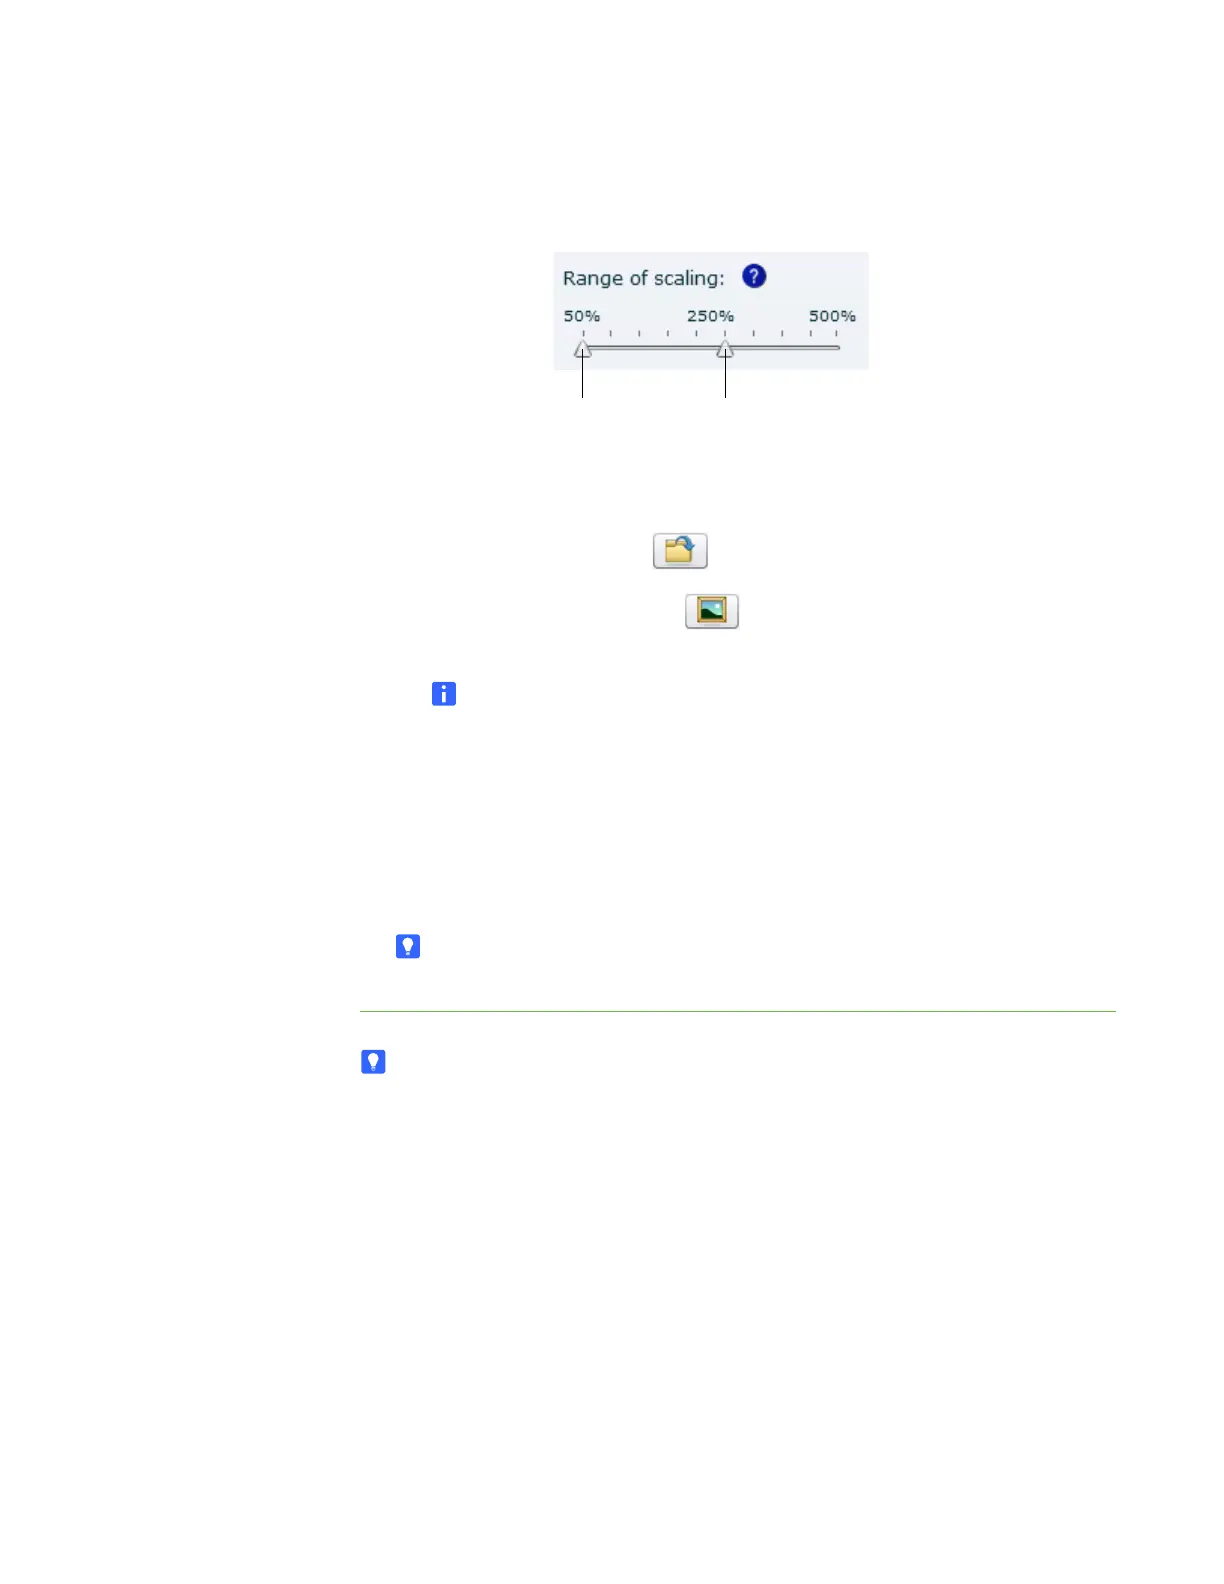
5. Set the Range of scaling sliders to the minimum and maximum sizes that
students can resize graphics and video files.
6. Add a graphics or video file using any of the following methods:
– Click Import Image File to import a JPEG, GIF or PNG file.
– Click Import Gallery Image to import an image from SMART
Exchange.
NOTE
Your computer must be connected to the Internet to access and
download Gallery images.
– Click Paste to paste a graphics or video file that you copied in another
application.
– Drag and drop a graphics or video file into the toolkit.
7. Repeat step 6 for each graphics or video file you want to add to Media.
TIP
To remove a file, select it, and then click Remove.
TIPS
• You may want to import or create a blank background image so that imported
graphics or videos aren’t superimposed over background graphics.
• A blank background also won’t interfere with document camera images you
display when running the Media activity.
The minimum size that students
can scale a file is 50% of its
original size.
The maximum size that students
can scale a file is 300% of its
original size.