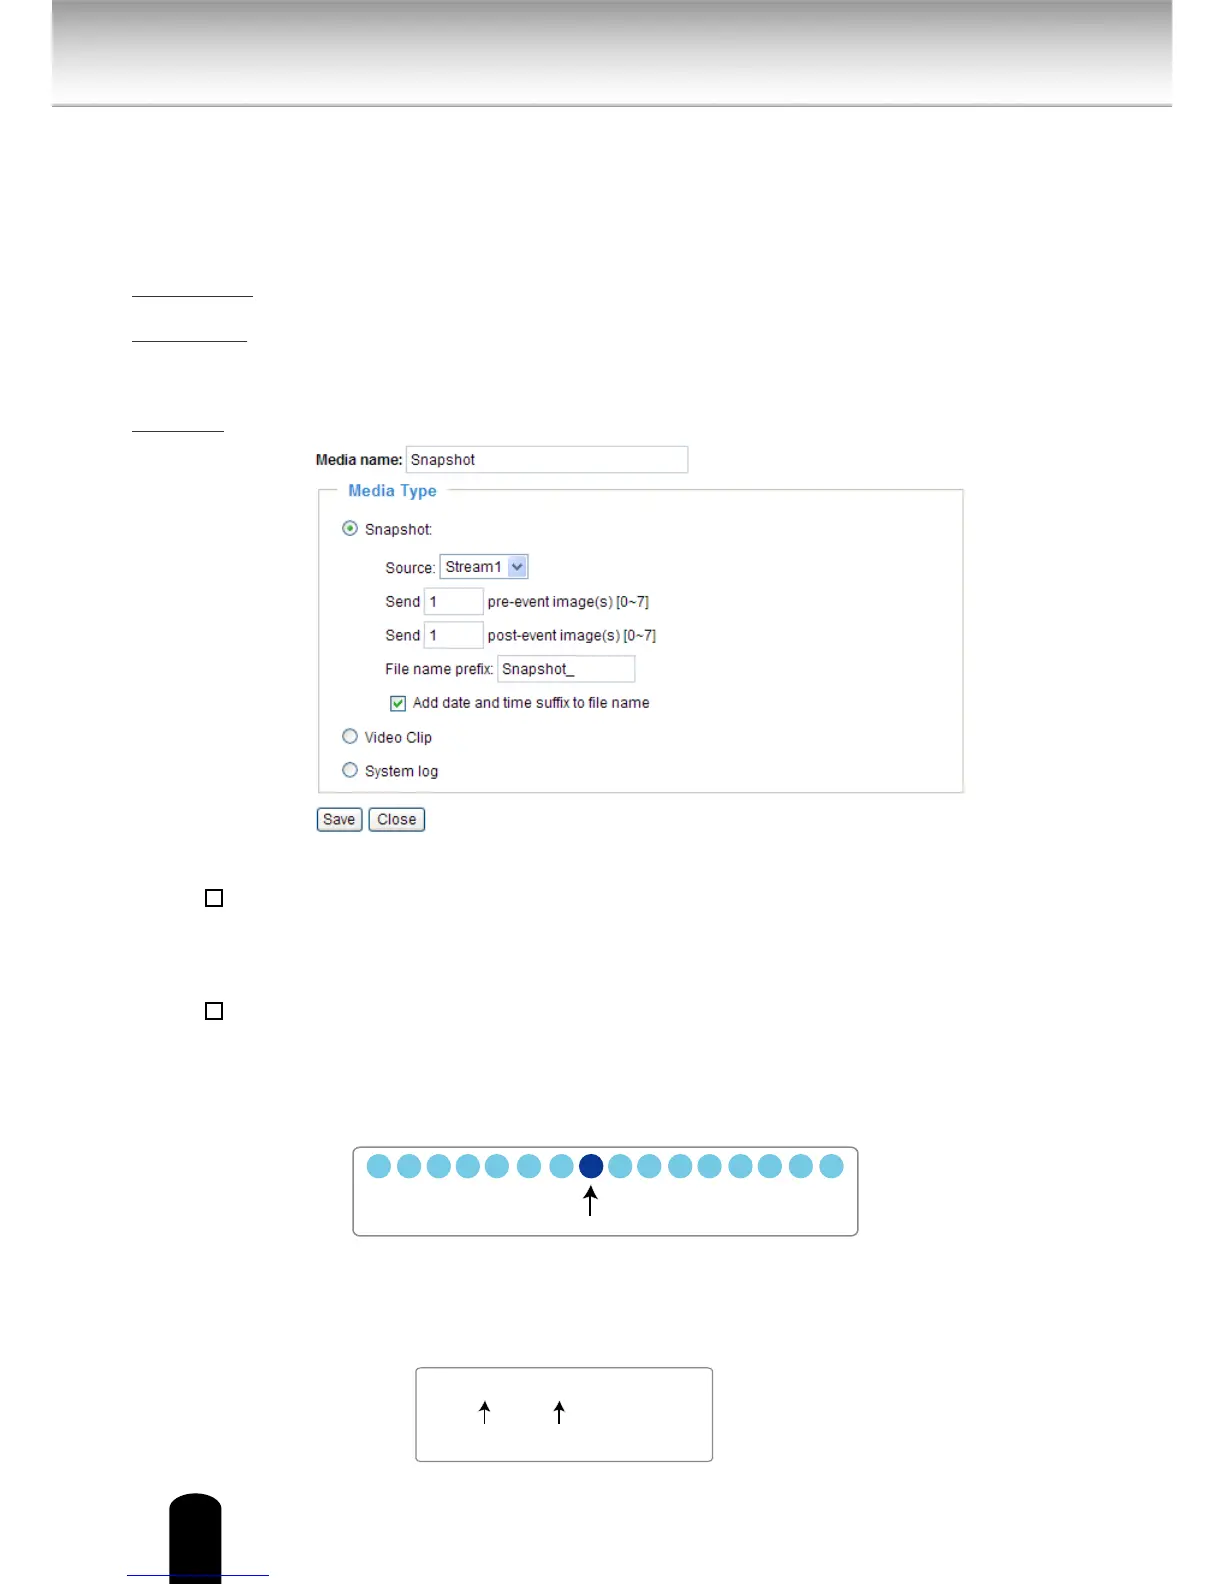
Media Settings
Click Add Media on the Event Settings page to open the Media Settings page. On this page, you
can specify the type of media that will be sent when a trigger is activated. A total of 5 media
settings can be congured.
Media name: Enter a name for the media setting.
Media Type
There are three choices of media types available: Snapshot, Video Clip, and System log.
Select
the item to display the detailed conguration options. You can congure either one or all of them.
Snapshot: Select to send snapshots when a trigger is activated.
■ Source: Select to take snapshots from stream 1 ~ 4.
■ Send
pre-event images
The Network Camera has a buer area; it temporarily holds data up to a certain limit. Enter a
number to decide how many images to capture before a trigger is activated. Up to 7 images
can be generated.
■ Send
post-event images
Enter a number to decide how many images to capture after a trigger is activated. Up to 7
images can be generated.
For example, if both the Send pre-event images and Send post-event images are set to 7, a
total of 15 images are generated after a trigger is activated.
■ File name prex
Enter the text that will be appended to the front of the le name.
■ Add date and time sux to the le name
Select this option to add a date/time sux to the le name.
For example:
 Loading...