4 How to use
-56-
No.PS※※-OMW0009-A
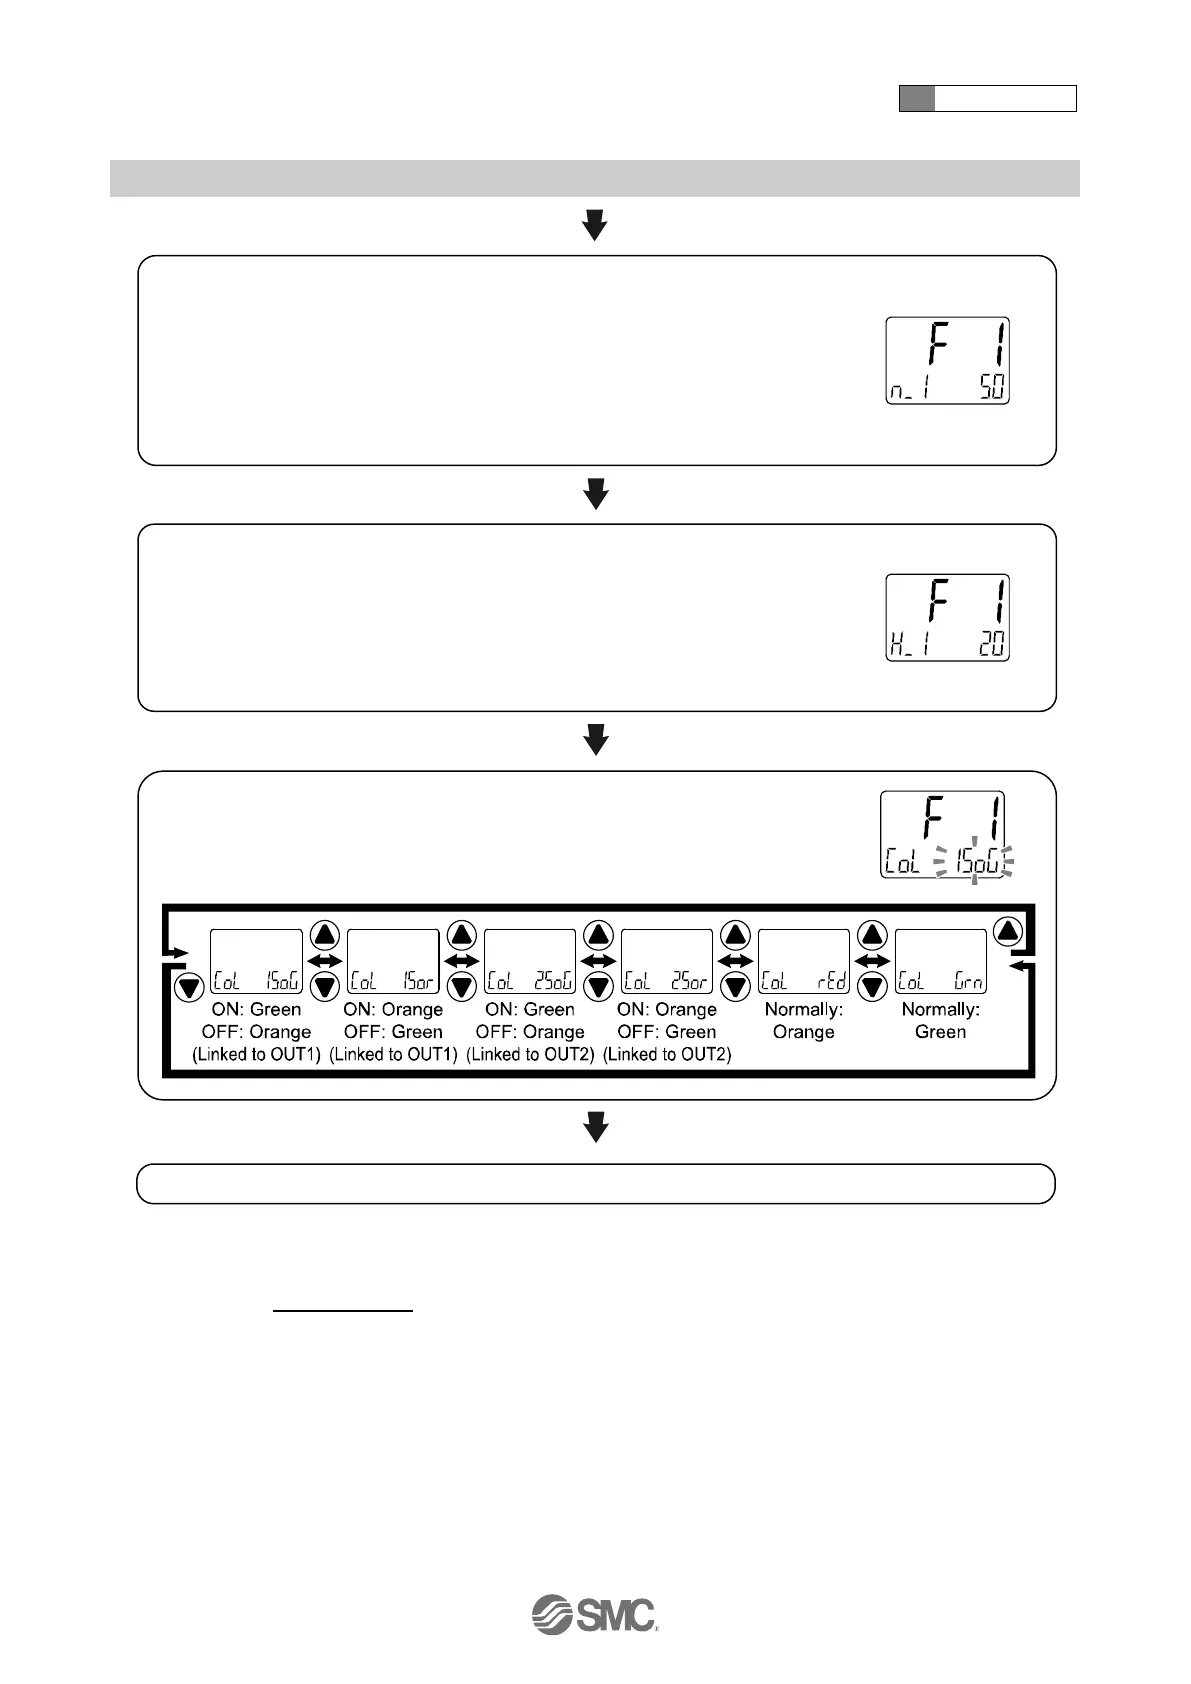
Switch point (distance) setting
Set the switch point based on the setting method on page 48.
Hysteresis mode: [P_1]
Window comparator mode: [P1L] [P1H]
"P" is changed to "n" as [P_1] [n_1] when reversed output is selected.
The snap shot function can be used. (Refer to page 86)
Press the SET button to set. Move on to hysteresis setting.
Hysteresis setting
Set the pressure referring to the setting method on page 48.
Hysteresis mode: [H_1]
Window comparator mode: [WH1]
The snap shot function can be used. (Refer to page 86)
Press the SET button to set. Move on to display colour setting.
Display colour setting
Press the UP or DOWN button to select the display colour.
Press the SET button to set. Return to function selection mode.
[F 1] Setting of OUT1 completed
1: Selected item becomes valid after pressing the SET button.
2: After enabling the setting by pressing the SET button, it is possible to return to the measurement mode by keeping pressing the
SET button for 2 seconds or longer.
 Loading...