41BOC Smootharc 180 Multiprocess operating manual
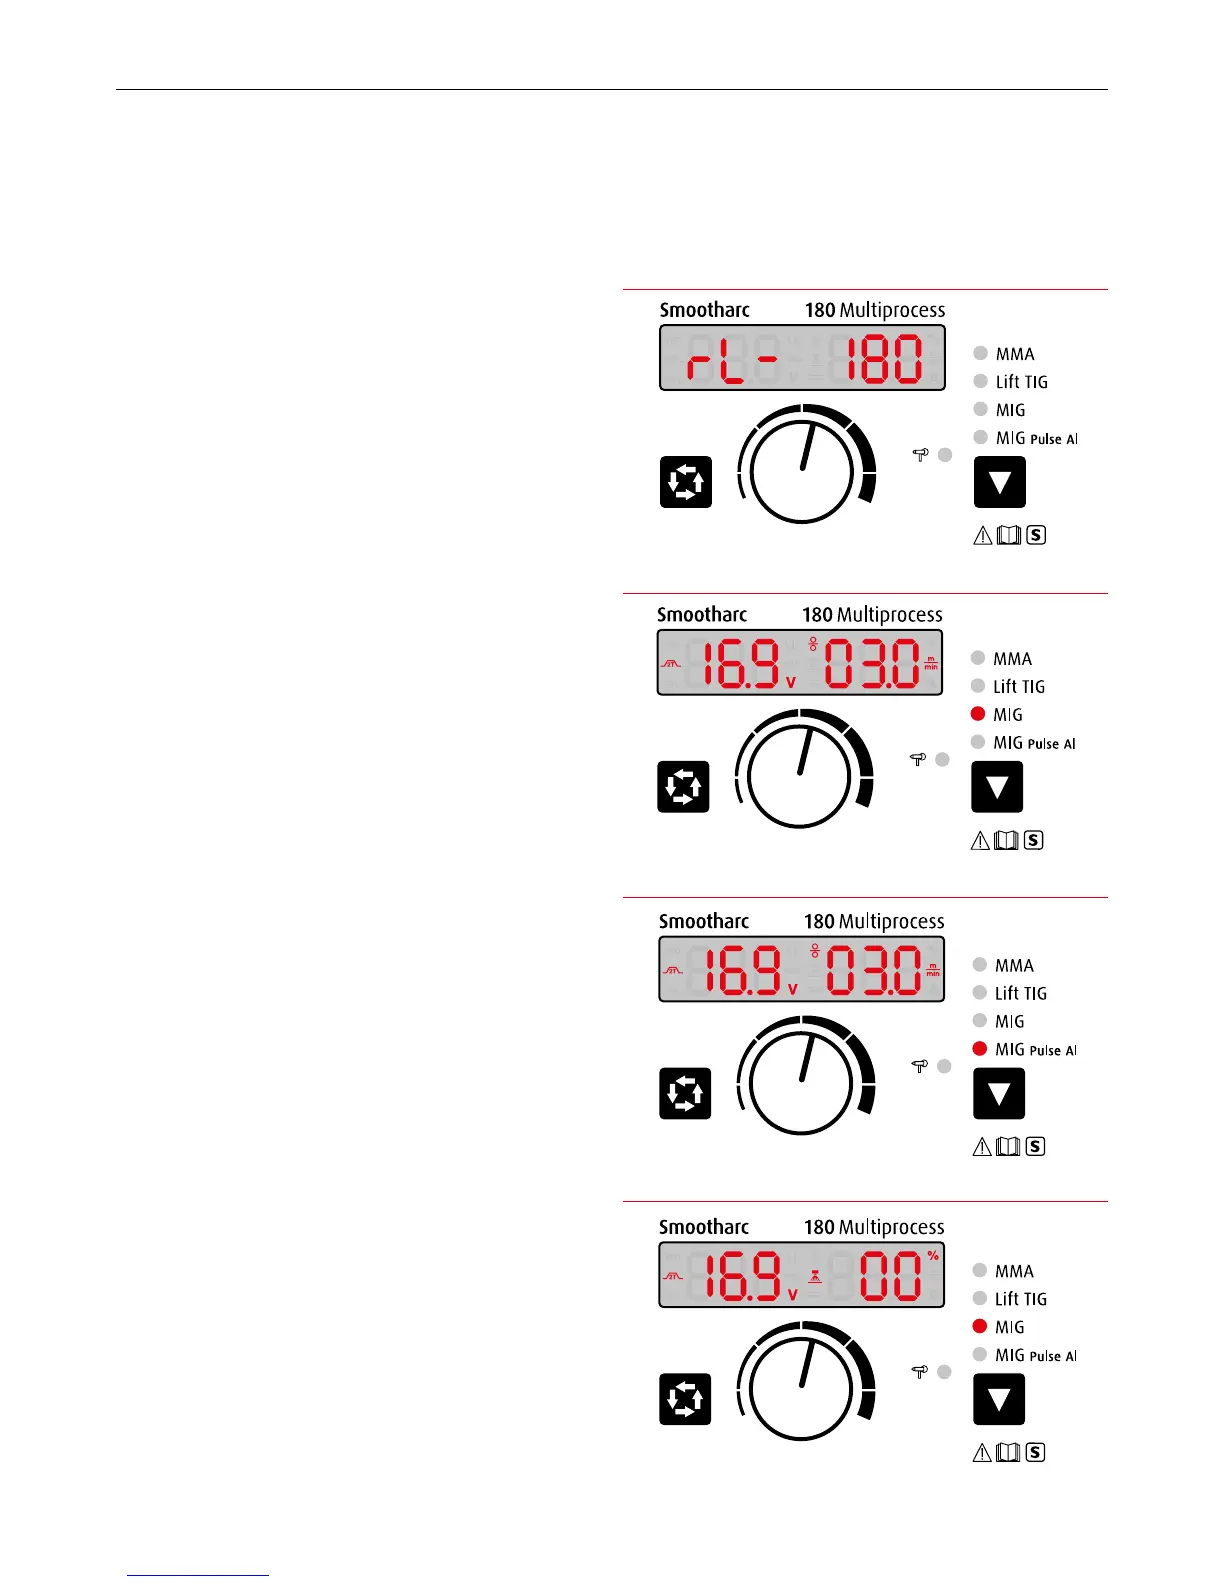
Illustration 1. Start-up display
Illustration 2. MIG Mode
Illustration 3. MIG Pulse Al Mode
Illustration 4. MIG mode – Display status when welding
10.1 Starting up
Switch on the machine. The 1 Multifunctional data display will ash for
5 seconds. The panel will display the previous settings that were saved
in the last shutdown.
10.2 Operation instruction under MIG mode
1 Set welding mode
Press the 9 Function Switch Key to choose the welding mode. The
machine enters into MIG mode (Illustration 2) when 7 MIG indicator
lights up, and enters into MIG Pulse Al mode (Illustration 3) when
8MIG Pulse Al indicator lights up.
As shown in Illustrations 2 & 3, the 1 Multifunctional Data Display
shows the preset voltage and the preset wire feeding speed.
Under MIG mode, the wire can be fed through the torch at high speed
by pressing and holding the torch switch without welding. To stop
wire feeding, press the torch switch again.
2 2T/4T mode
Under MIG mode, press 2 Data Selection Key for 2 Seconds to choose
the 2T/4T mode.
The welding mode (2T/4T)* can be selected by depressing the
2 Data Selection Key. The selected mode will be shown on the
1 Multifunctional Data Display. (Refer to the section on MIG
Fundaments in this manual for an explanation for 2T and 4T
operation).
The welding parameters can be adjusted during welding by turning
the 3 Multifunctional Data adjustment. This action will synergically
change both parameters (volts and wire feed speed).
* 2T is non-latched trigger operation (press and hold to keep welding and let go
tostop). 4T is latched trigger operation (click trigger to start welding and click
again tostop).
3 Adjusting parameters
Under MIG mode, you can adjust the voltage, inductance and wire
feeding speed.
Press the 2 Data Selection Key once, the 1Multifunctional Data
Display shown in Illustration 4, which means the selected preset
welding voltage is adjustable within a range of ±20%.
10.0 Operation