P - Moving and releasing the switch allows viewing system information via the
LEDs, and performing the following functions:
P Position
Duration
Function Comments
Switch moved
to P for 2
seconds, then
released.
Displays (via
LEDs)production
information for 5
seconds, or error type
indications (if exist) for 5
seconds.
Activates the Wi-Fi
access point for
connecting to the
SetApp
While the switch is in P, all
LEDs are ON.
When the switch is released all
LEDs turn OFF for 0.5 sec and
then display the production or
error indication.
Switch moved
to P for more
than 5 seconds,
then released.
Starts pairing
Pairing is indicated by all 3
LEDs blinking simultaneously.
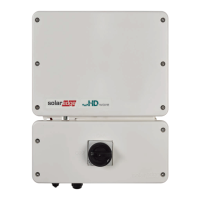
LEDs
LEDs: three LEDs indicate, by color and state (on/ off/ blinking
(1)
/
flickering
(2)
/alternating
(3)
), different system information, such as errors or
performance indications. For more information, refer to
https://www.solaredge.com/leds.
The main LED indications are:
Blue ON - the inverter is communicating with the monitoring
platform
Green ON- the system is producing
Green blinking - AC is connected but the system is not producing
Red ON - system error
(1)
Blinking = Turns ON and OFF for the same duration
(2)
Flickering = Turns ON for 100 mS and turns OFF for 5 seconds
(3)
Alternating = alternate LED flashes
Chapter 3: Installing the Inverter 23
Single Phase Energy Hub Inverter MAN-01-00812-1.1
 Loading...