EasyManuals Logo

Solax X3-PRO G2 Series User Manual

Solax X3-PRO G2 Series
41 pages
To Next Page IconTo Next Page
To Previous Page IconTo Previous Page
Page #19 background imageLoading...
Page #19 background image
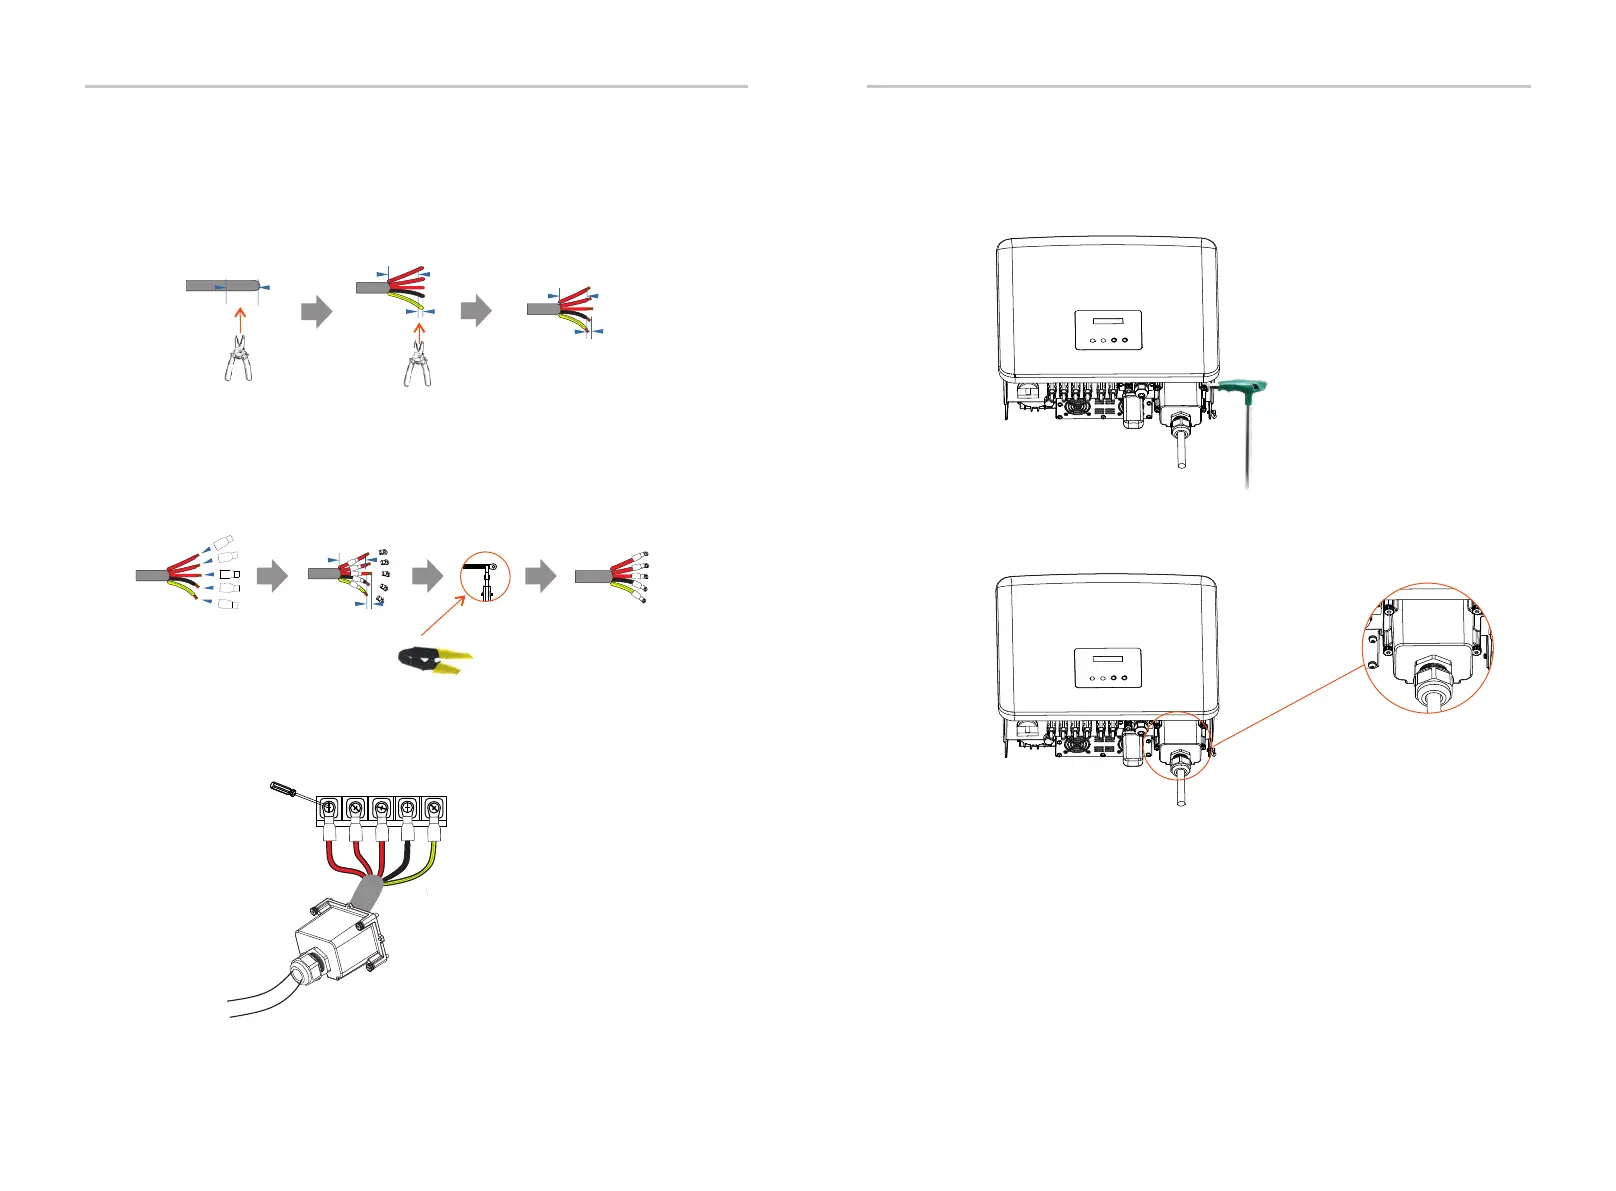
e) Strip 82 mm of insulation from the cable ends by using the stripping
pliers.
f ) Crimp the wire ends by using the wire crimper.
Stripping pliers
Stripping pliers
Crimp
8
2 m
m
12 m
m
7
0 m
m
1
2 mm
7
0 mm
Wire crimper
g) Pull one terminal cover each over conductors L1, L2, L3, N and the grounding
conductor. The terminal cover must be below the stripped conductor section.
h) Use the OT terminal crimping tool to press OT terminals.
7
0 mm
12 m
m
Torque: 1.2 0.1 ± N·m
L1 L2 L3 N PE
i) Tighten the screws of the wire ends with a screwdriver.
j) Align the waterproof cover and tighten the four screws with an inner
hexagonal wrench.
Torque: 0.1 1.2± N·m
k) Tighten the waterproof fastening head.
32 33
Electrical Connections Electrical Connections

Questions and Answers:

Question and Answer IconNeed help?

Do you have a question about the Solax X3-PRO G2 Series and is the answer not in the manual?

Solax X3-PRO G2 Series Specifications

General IconGeneral
ModelX3-PRO G2 Series
CategoryInverter
MPPT Efficiency99.9%
Max. DC Voltage1100V
THDi<3%
DC SwitchYes
European Efficiency98%
CommunicationWiFi, Ethernet, RS485
Operating Temperature Range-25°C to +60°C
AC Voltage Range310V-480V
AC Grid Frequency50/60 Hz
Warranty10 years
Rated Power6kW, 8kW, 10kW, 12kW, 15kW, 20kW, 25kW, 30kW
Number of MPPTs2 or 4 (depends on model)
AC Output Power6kW / 8kW / 10kW / 12kW / 15kW / 20kW / 25kW / 30kW
Nominal AC Voltage400V
ProtectionDC Reverse Polarity Protection, AC Short Circuit Protection, Output Over Current Protection, Output Over Voltage Protection

Related product manuals