Section 3 A-Scan Operation and Clinical Use
¾ Aphakic
¾ Pseudophakic
When Pseudophakic mode is selected, one
of three different pseudophakic lens types
(PMMA, Acrylic or Silicone) may be
selected using the [ LENS ] button. The
tissue velocity will be automatically adjusted
for the selected lens type.
2. Tissue Velocity. Ensure the appropriate
tissue velocity is selected as indicated in the
upper right corner of the Measure Screen
(the system default tissue velocity is 1548
m/s). See Appendix A for standard values of
tissue velocity used in the P
ACSCAN™.
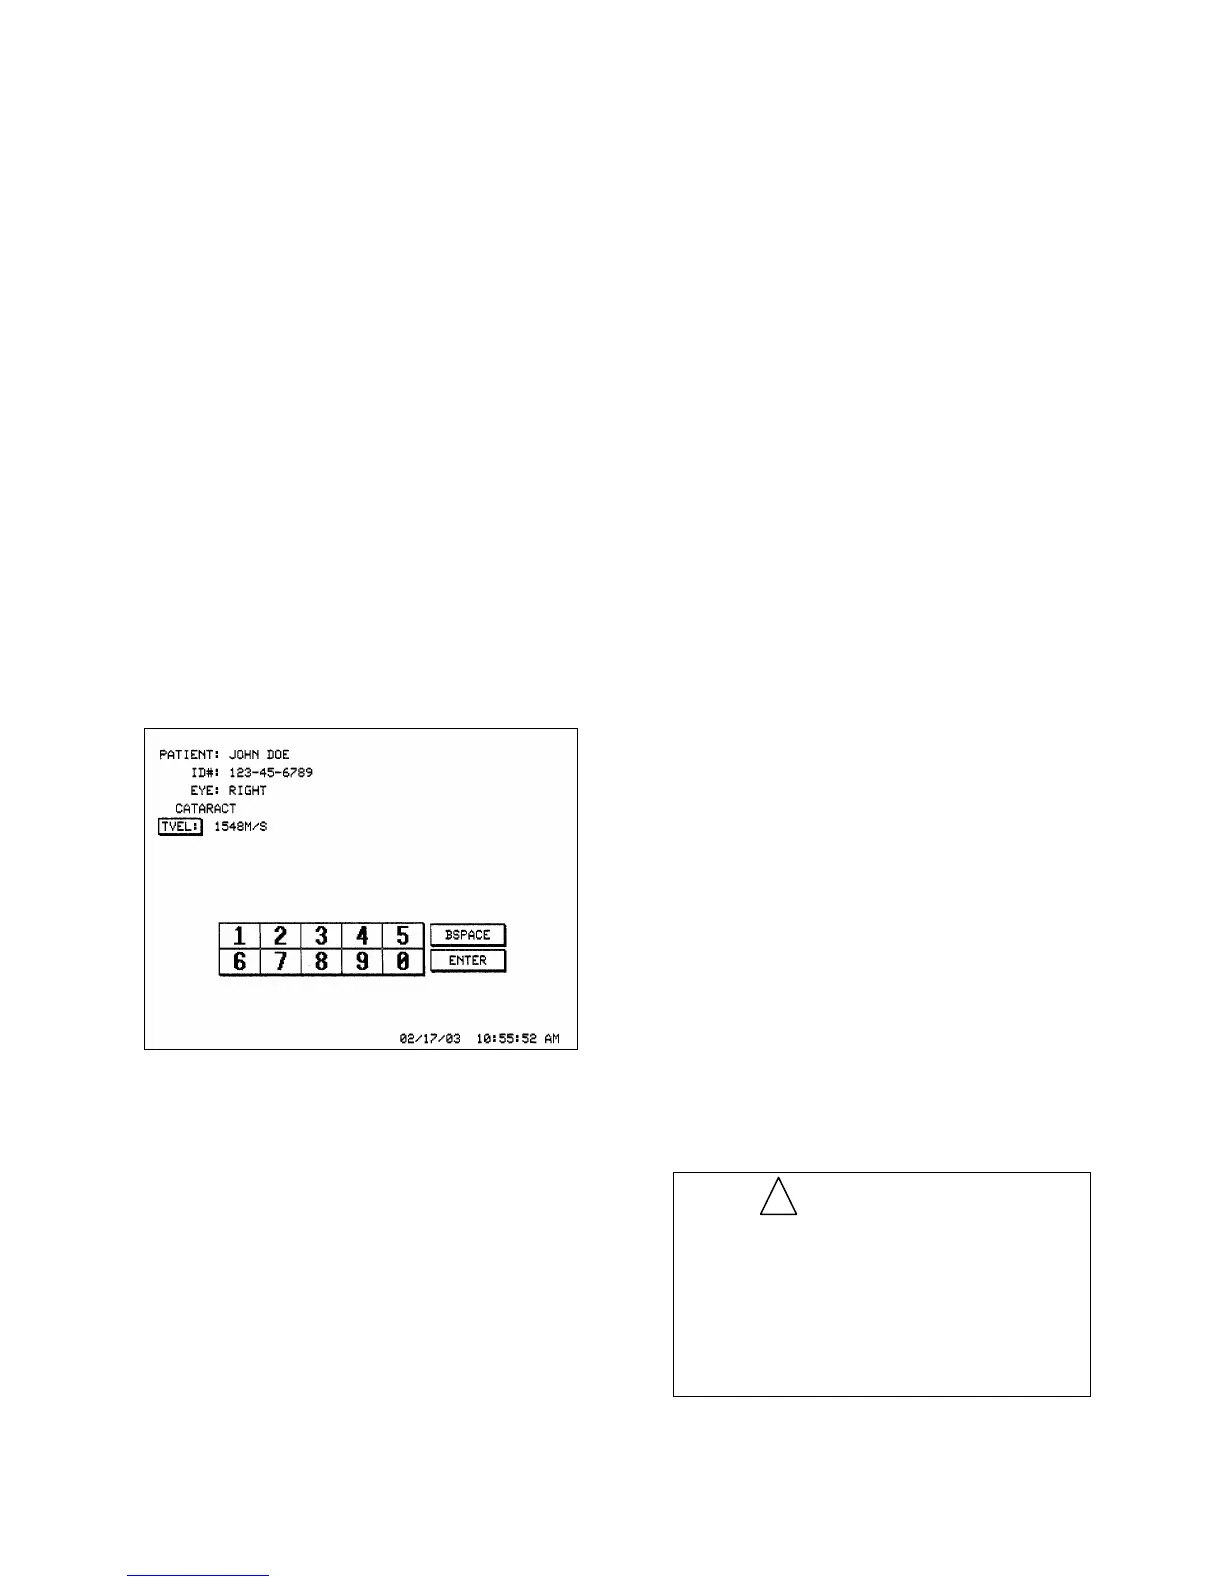
The tissue velocity may be changed by first
touching the [ TVEL ] button to display the
Tissue Velocity Screen (see Figure 3-6).
Figure 3-6. Tissue Velocity Screen Display
Touch the [ TVEL ] button to edit the tissue
velocity, enter the appropriate number, and
touch the [ ENTER ] button. Verify that the
tissue velocity has changed when returned to
the Measure Screen.
3. Immersion Option. Ensure that the
immersion option is OFF as indicated in the
lower left corner of the Measure Screen. The
immersion option may be toggled between
ON and OFF by touching the [ IMMER ]
button.
4. Scan Eye.
Instruct the patient to look
towards the red fixation light in the probe tip
and visually align the probe along the
patient's visual axis. Move the probe forward
until contact with the cornea is achieved.
Once contact is made, a live A-scan pattern
will be displayed and no further forward
movement should be made.
5. Automatic Scan Capture. If the scan meets
all the parameters of the selected
examination mode, it will immediately be
frozen, saved and a long audible tone will be
emitted signifying that the instrument has
accepted the measurement.
If necessary, the gain control may be
adjusted by touching the [ MIN ] and
[ MAX ] buttons at the bottom center of the
Measure Screen. The resulting gain as a
percentage of the maximum will be
displayed. The default gain is 80%; however
a gain of 84 to 86 has been shown to give
satisfactory results for most eyes. The gain
setting may not be changed for any scan
which has already been frozen.
Once accepted, the scan pattern will be
displayed on the screen; the axial length will
be calculated and stored under “SCAN 1” in
the upper center of the Measure Screen. The
location of the key structures in the scan
waveform will be indicated by flashing gate
markers displayed above the waveform. The
anterior chamber depth and lens thickness
will also be displayed (except for
Pseudophakic eye where a default lens
thickness is used or for an Aphakic eye).
IMPORTANT
It is important to remember that the auto
modes are meant to facilitate the
examination procedure but not replace the
examiner's clinical judgment. All scans
should be thoroughly evaluated by the user
prior to being accepted and used for
calculating lens powers.
!
Doc # 0300-A-1901-3D 3 - 5



 To Next Page