Pachymeter Operation and Clinical Use Section 4
To perform the probe sensitivity test, follow
these steps:
1. Connect the pachymeter probe to the
P
ACSCAN™ system. Make sure that the
probe tip is clean and dry and not in contact
with any object before performing this test
2. Touch the [ PROBE SENSITIVITY
TEST ] button to begin the test, which
consists of analyzing the strength of the
signal from the probe. A graph of the signal
strength from 0 to 100% will be displayed.
3. Verify that the “PROBE OK” message
appears on the screen, thereby indicating
that the probe sensitivity is acceptable.
IMPORTANT
If acceptable probe sensitivity cannot be
verified, contact Sonomed service department
for further help.
It is recommended that the probe sensitivity test
be performed prior to obtaining measurements;
however, the test mode can be skipped if so
desired by touching any of the other menu
buttons on the right side of the screen when the
Pachymeter Test Screen appears.
ENTERING USER INFORMATION
Up to five (5) different user profiles may be
entered and permanently stored within the
P
ACSCAN™ memory. User profiles allow for
user identification.
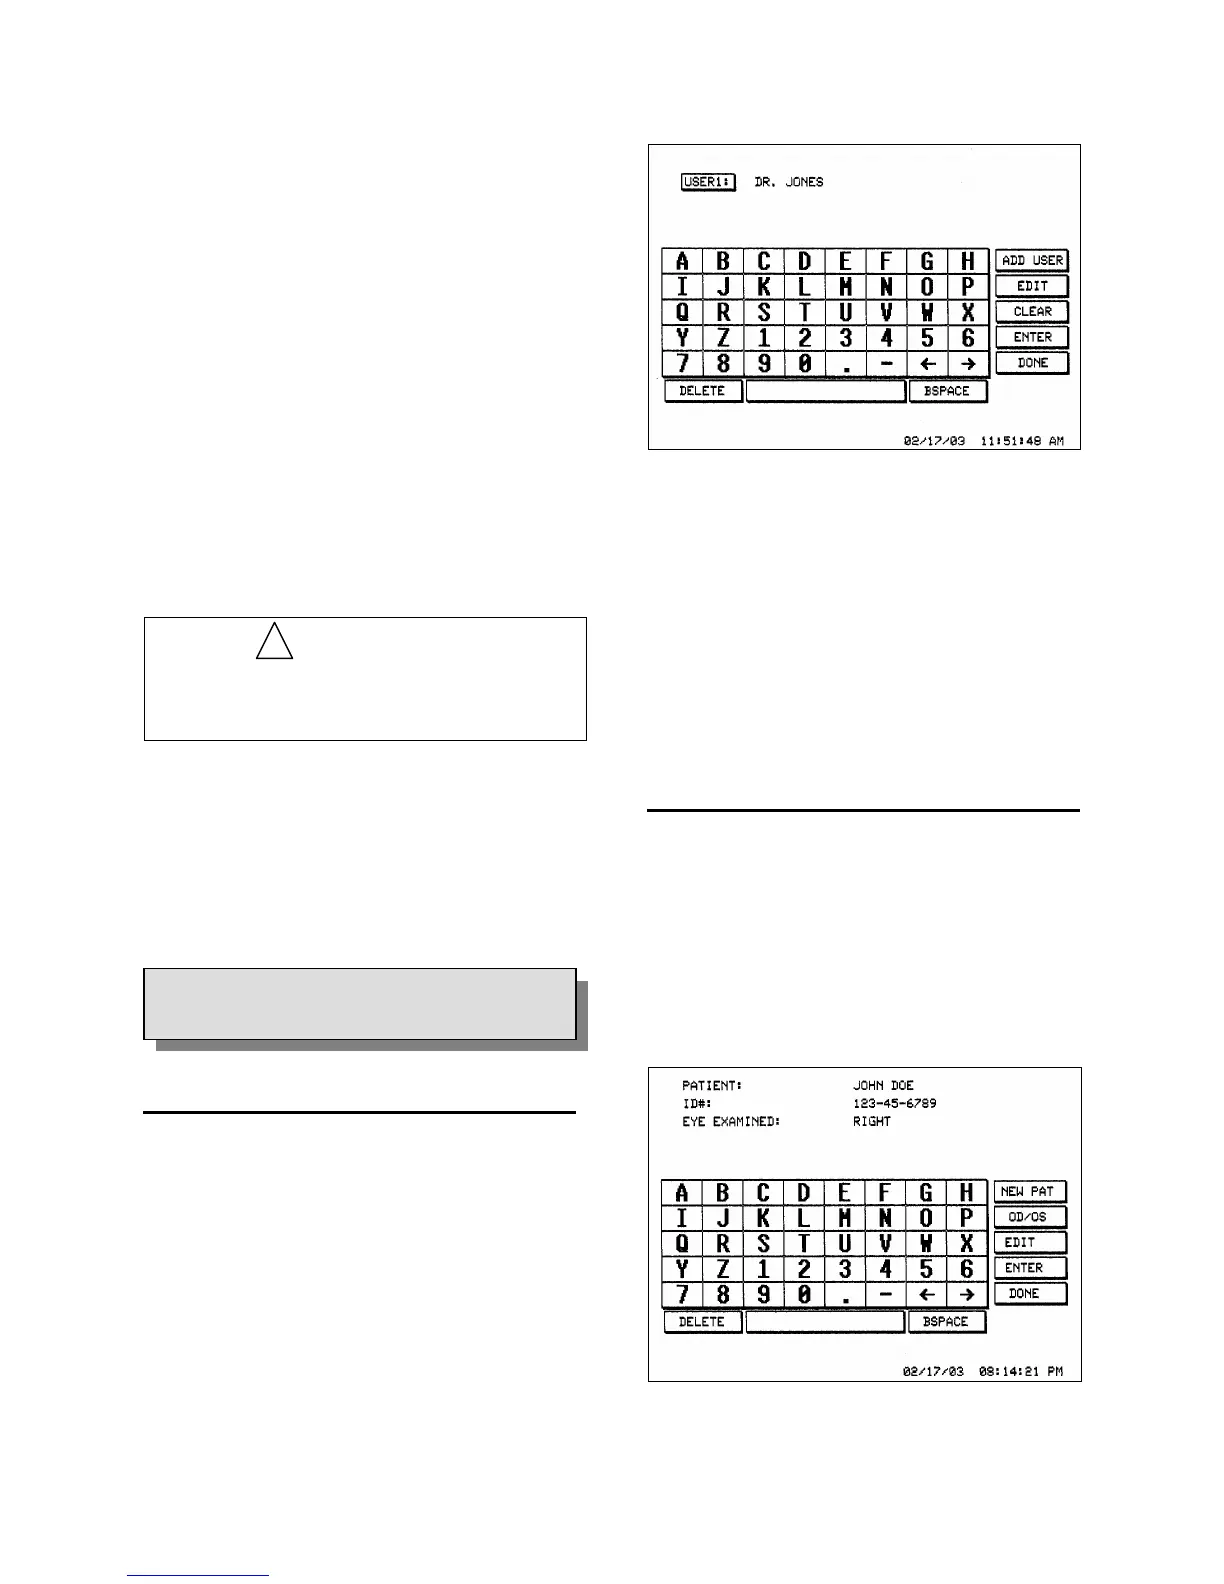
1. Entering / Editing User Identification.
Touch the [ USER DATA ] button. Verify
that the User Data Screen appears (see
Figure 4-2).
Figure 4-2. User Data Screen
Touch the [ ADD USER ] button to add a
new user profile, or the [ EDIT ] button to
edit an existing user profile. Enter the name
and/or ID of the user by touching the
appropriate alphanumeric buttons. When
finished, touch the [ ENTER ] button.
!
Touch the [ DONE ] button when finished.
ENTERING PATIENT INFORMATION
Patient information including name,
identification number, and eye to be examined
can be stored within P
ACSCAN™ memory. Only
one patient may be stored at a time, but the
information will remain until overwritten.
4.3
SYSTEM SET-UP
1. Touch the [ PATIENT ] button. Verify that
the Patient Screen appears (see Figure 4-3).
Figure 4-3. Patient Screen Display
4 - 2 Doc # 0300-A-1901-3D
 Loading...