28
GB
3
Press f/F to select the direction
to rotate the image and then
press ENTER.
• Rotate 90° Clockwise: Each time
you press ENTER, the image rotates
90° clockwise.
• Rotate 90° Counterclockwise:
Each time you press ENTER, the
image rotates 90° counterclockwise.
Tip
To print the image previewed, press PRINT
(page 30).
Adjusting an image
1
Display the Edit menu (page 26).
2
Press g/G to select (Adjust)
and then press ENTER.
The Adjust menu is displayed.
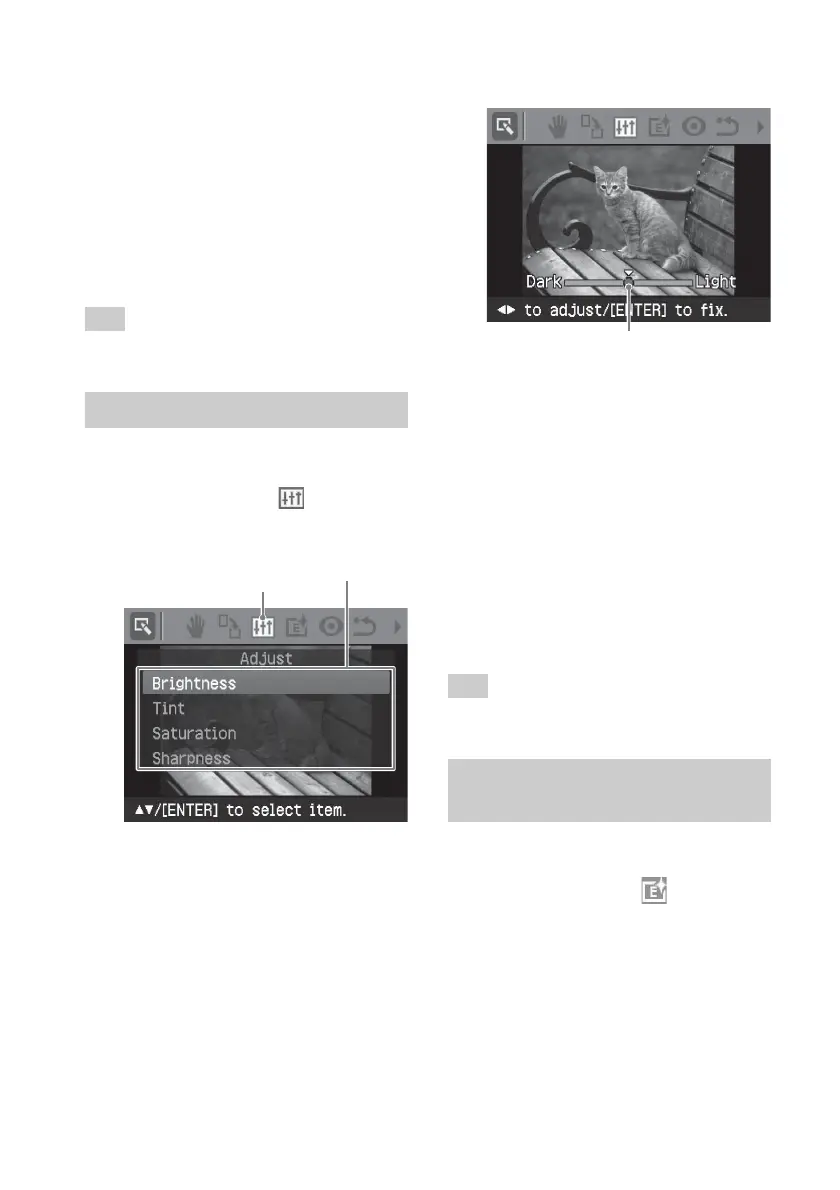
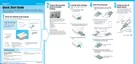
Adjust icon Adjust menu
3
Press f/F to select the desired
adjustment tool and press ENTER.
The adjustment slider appears.
When “Brightness” is selected.
Adjustment slider
4
Move the slider to the desired
position to adjust the level.
• Brightness: Press G to brighten the
picture or g to darken it.
• Tint: Press G to make the picture
bluish or g to make it reddish.
• Saturation: Press G to deepen the
colors or g to lighten the colors.
• Sharpness: Press G to sharpen the
outlines or g to reset them.
5
Press ENTER.
The adjustment takes effect.
Tip
To print the image previewed, press PRINT
(page 30).
Adding a special filter to an
image
1
Display the Edit menu (page 26).
2
Press g/G to select (Filter) and
then press ENTER.