XBR-49/55/65/75X900E
ADJUSTMENT
WB/MURA/CUC DATA TRANSFER
(Please apply Main board or panel is replaced.)
1. In “Panel/PQ” service mode.
a. Go to “WB/Mura/CUC data transfer” category by “↑” or “↓”.
b. To select “WB/Mura/CUC data transfer”, press “→” button.
c. To change data, press “←” or “→” button on remote commander.
2. In “WB/Mura/CUC data transfer”.
a. Select “WB/Gamma data transfer” by pressing “↑” or “↓” button on remote commander.
b. To change the items, press “←” or “→” button on remote commander and press “Enter”
button.
Selectable items are:
0. SoC to T-con
1. T-con to SoC
2. No action
c. Similarly, select the items in Mura and CUC data.
d. Select “[start]” and press “Enter” button to start transfer.
*Please refer to another manual “Service Procedure for Panel, Board and Software Change /
Upgrade(P/N:98881800x)” for details. GN3TR chassis is the same as GN1T chassis basically.
B-board
replace
T-con
replace
Panel
replace
WB/
Gamma
1.T-con to
Soc
0.SoC to
T-con
0.SoC to
T-con
Mura
1.T-con to
Soc
0.SoC to
T-con
1.T-con
to Soc
CUC
1.T-con to
Soc
0.SoC to
T-con
1.T-con
to Soc
16
>>
>>
>>
>>
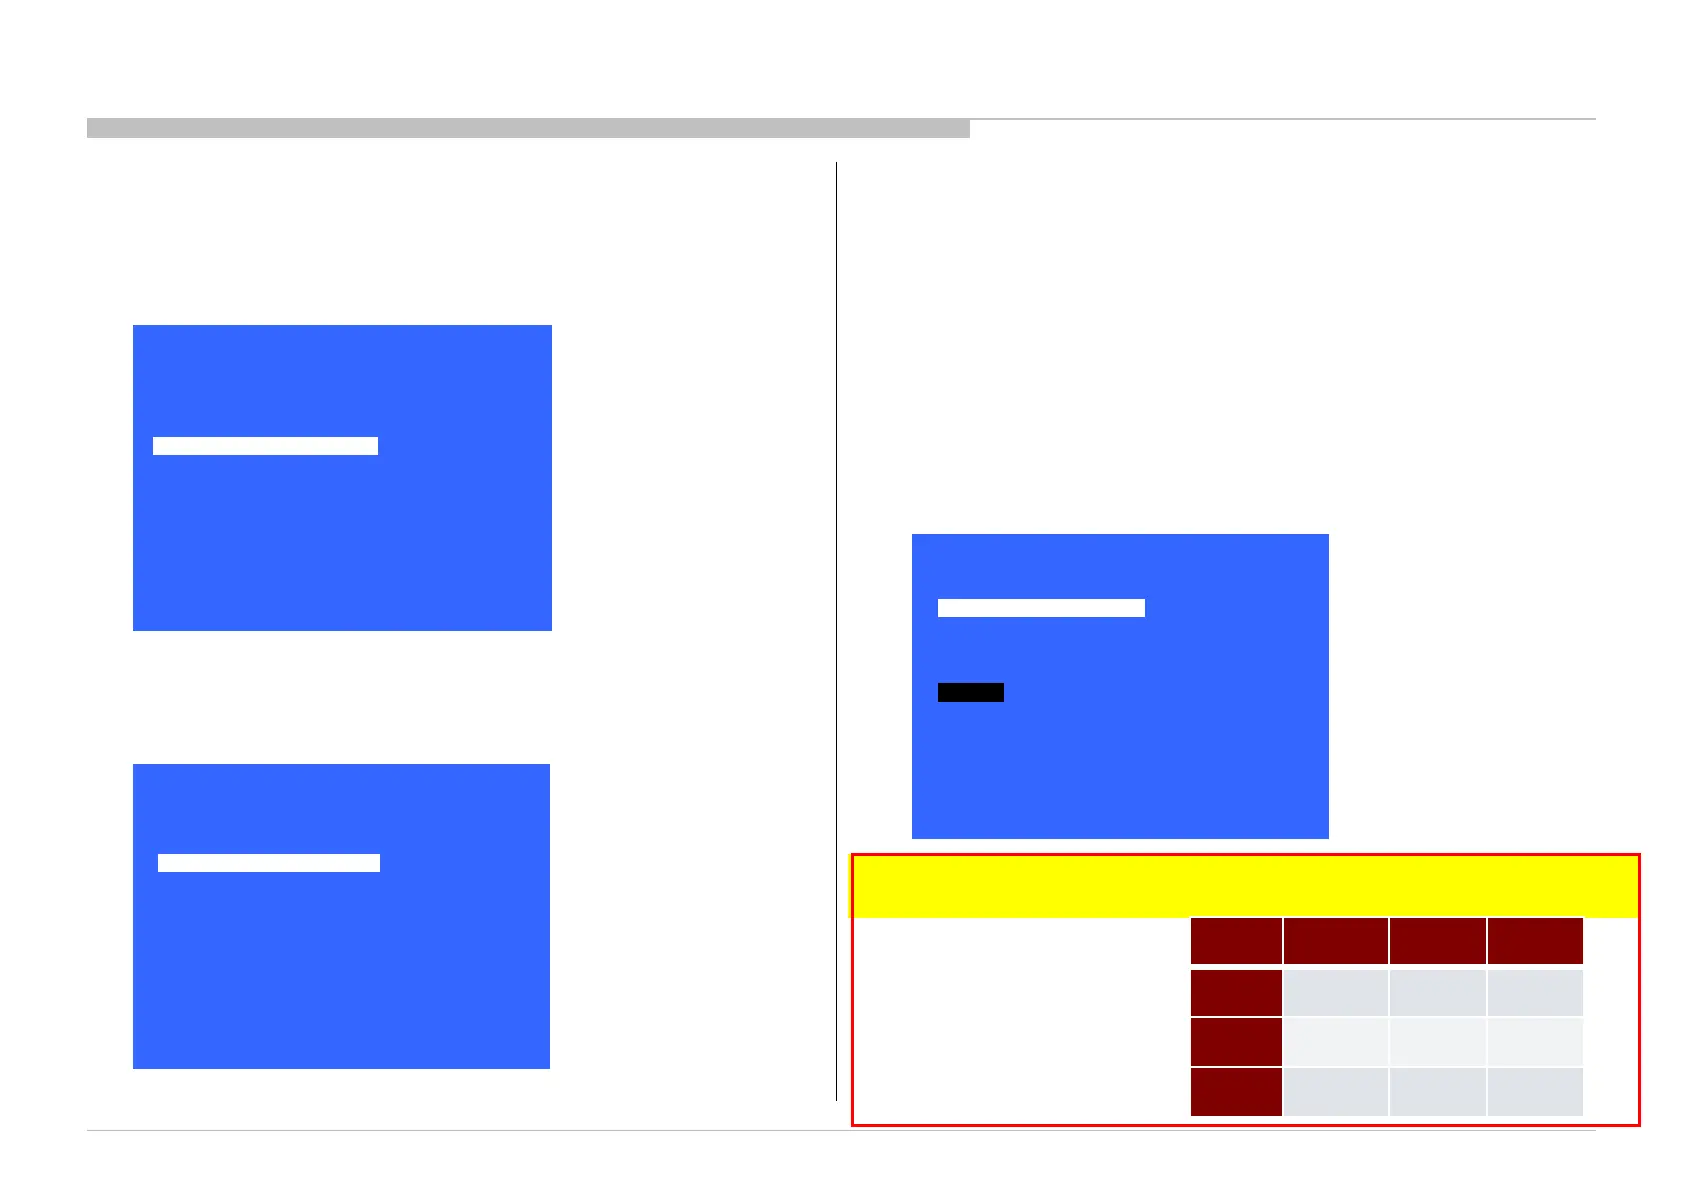
>> General Setting
Tuner
Wi-Fi / BT
Service Mode
Model Information
Self diagnosis History
Video / Audio
Panel / PQ
SDB Service Menu
[</>] Set [Home]Exit
>>
>>
>>
<<
>>
>>
Panel / PQ
Back
WB Adjustment
WB/Mura/CUC data transfer
[</>] Set [Home]Exit
<<
<[ 0.Soc to T-con ]>
Back
WB / Gamma data transfer
[</>] Set [Home]Exit
<[ 0.Soc to T-con ]>
Mura data transfer
<[ 0.Soc to T-con ]> CUC data transfer
Start