Installation and Connections
Installation
53
For attaching the camera to the ceiling bracket, use
only the supplied screws. Using other screws may
damage the camera.
5
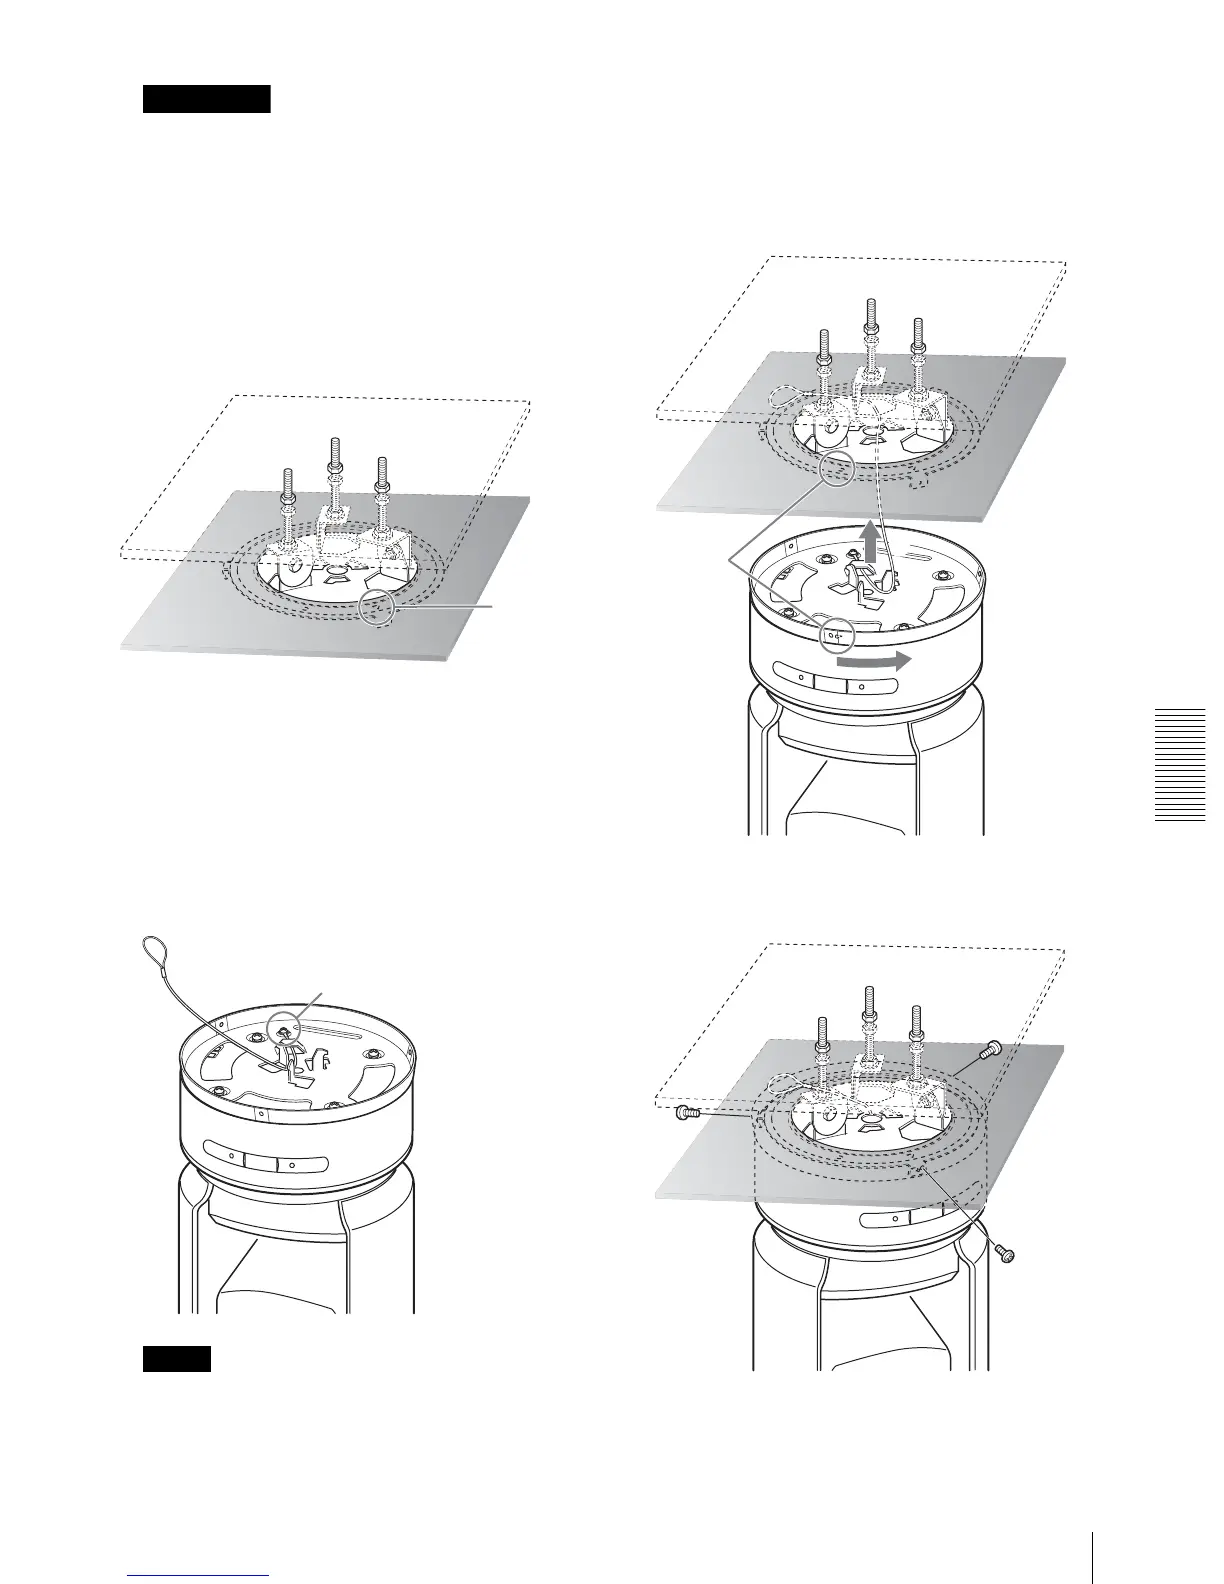
Attach the attachment materials (not supplied) to
the ceiling bracket (B), and install the bracket on
the ceiling.
Align the f hole on the ceiling bracket (B) in the
direction where the front of the camera will be
positioned later.
6
Attach the wire rope to the ceiling.
Use an appropriate screw larger than M8 (5/16
inches) (not supplied). Attach the wire rope to an
area on the ceiling independent of the area where
the ceiling bracket is attached.
7
Pass the wire rope through the fixing hole and
attach its end to the attachment hole on the bracket
using the supplied one screw (3M4 × 8).
Note
For attaching the wire rope to the bracket, use only
the supplied screw. Using another screw may
disable the function of the wire rope.
8
Insert the protrusions on the ceiling bracket (A) into
the spaces prepared in the ceiling bracket (B) with
the f hole on the ceiling bracket (A) aligned with
the a hole on the ceiling bracket (B), and
temporarily attach them by turning the ceiling
bracket (A) with the camera clockwise.
9
Secure the ceiling brackets (A) and (B) using the
supplied three screws (3M3 × 8).
WARNING
Ceiling bracket (B)
f hole
Ceiling
Attachment materials
3M4 × 8 (supplied)
Wire rope
Ceiling bracket (A)
1
2
Ceiling bracket (B)
Align.
Ceiling
Ceiling
bracket (A)
Ceiling
3M3 × 8
(supplied)