1-24
98
JPEG Image Files
About the “Photo
Album” Function
The “Photo Album” function enables you to
do following.
• Store JPEG image files on the HDD.
• View JPEG image files on the HDD, DATA
DVDs (DVD-RWs/DVD-Rs)/DATA CDs,
or connected USB device.
• Edit JPEG image files.
• Print JPEG image files.
• Copy JPEG image files and slideshow to
DVD-RWs/DVD-Rs.
Preparing for Using the
“Photo Album” Function
Connect a USB device to the USB jack on the
recorder, or copy JPEG image files from
DATA CDs/DATA DVDs or the connected
USB device to the HDD.
You can connect a USB device (digital still
camera, Memory card reader, and USB
memory) to the USB jack on the recorder to
view JPEG image files or copy to the HDD.
Refer to the operating instructions supplied
with the USB device before connecting.
1 Insert a disc that you are going to copy
to the HDD or connect the USB device
to the USB jack on the recorder.
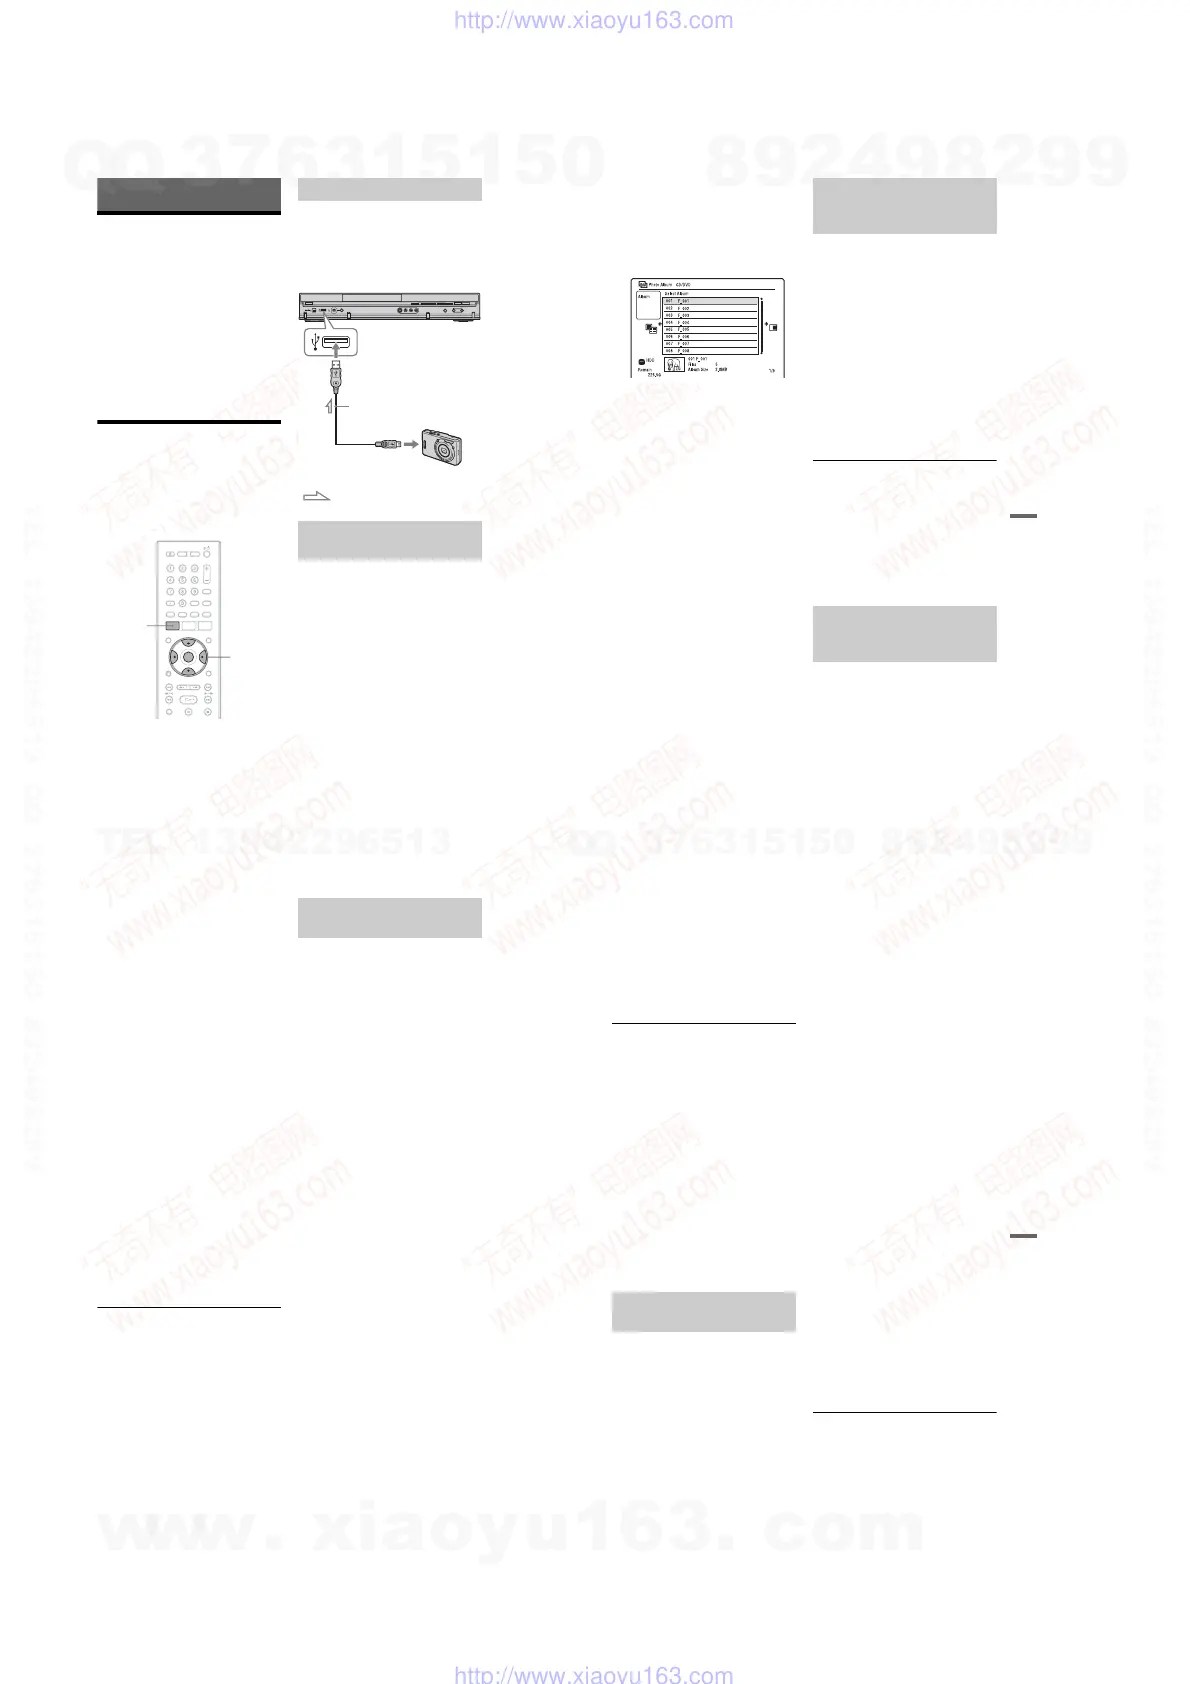
2 Press SYSTEM MENU.
The System Menu appears.
3 Select “Photo Album,” and press
ENTER.
The “Photo Album” menu appears.
SYSTEM
MENU
</M/m/,,
ENTER
Connecting the USB device
Copying JPEG image files to the
HDD (DISC/USB t HDD)
DVD recorder
to USB jack
USB cable (not supplied)
USB output
Digital still camera
: Signal flow
99
JPEG Image Files
4 Select the item, and press ENTER.
To copy from DATA CDs/DATA DVDs
(DVD-RWs/DVD-Rs), select “View
Photos on a CD/DVD.”
To copy from the connected USB device,
select “View Photos on a USB Device.”
The “Photo Album” list appears.
Example: CD/DVD
5 Select an album or JPEG image file
using M/m, and press ,.
The sub-menu appears.
6 Select an item, and press ENTER.
To copy two or more albums or JPEG
image files, select “Multi-Mode.”
To copy all the albums and JPEG image
files, select “Copy all to HDD,” and go to
step 11.
To copy the album or file selected in step
5 only, select “Copy to HDD,” and go to
step 11.
7 Select an album or JPEG image file,
and press ENTER.
A check mark appears in the check box
by the selected item.
• To clear the check mark, press ENTER
again.
• To clear all check marks, press , to
select “Single-Mode” from the sub-
menu.
8 Repeat step 7 to select all of the
albums or JPEG image files you want
to copy.
9 Press ,.
The sub-menu appears.
10
Select “Copy to HDD,” and press
ENTER.
The display asks for confirmation.
11
Select “Yes,” and press ENTER.
• To cancel, select “No.”
1 Connect the USB device to the USB
jack on the recorder.
2 Insert a blank DVD-RW/DVD-R (Video
mode).
3 Press SYSTEM MENU.
The System Menu appears.
4 Select “Photo Album,” and press
ENTER.
The “Photo Album” menu appears.
5 Select “Copy Photos from a Digital
Camera,” and press ENTER.
The display asks for confirmation.
6 Select “Yes,” and press ENTER.
• To cancel, select “No.”
z Hint
See “8. Reformatting a Disc” (page 42) to format
DVD-RWs/DVD-Rs in Video mode.
b Notes
• During copying, other operations cannot be
performed.
• While copying JPEG image files, timer
recordings are unavailable. If the timer is set
during copying, the recorder starts the timer
recording after copying is finished.
1 Press SYSTEM MENU.
The System Menu appears.
2 Select “Photo Album,” and press
ENTER.
The “Photo Album” menu appears.
3 Select “View/Edit Photos on the
HDD,” and press ENTER.
The “Photo Album” list appears.
4 Select an album using M/m.
To copy the selected album, go to step 6.
To copy a JPEG image file, go to step 5.
Copying all JPEG image files
from the connected USB device
(USB t DVD-RW/DVD-R)
Copying JPEG image files or
albums on the HDD
(HDD y HDD)
,continued
100
5 Press ENTER, and select a JPEG
image file using M/m.
6 Press ,.
The sub-menu appears.
7 Select an item, and press ENTER.
To copy two or more albums or files,
select “Multi-Mode.”
To copy the selected album, select “Copy
Album Contents” in “Album Options,”
and go to step 12.
To copy the selected files, select “Copy”
in “File Options,” and go to step 12.
8 Select an album or JPEG image file,
and press ENTER.
A check mark appears in the check box
by the selected item.
• To clear the check mark, press ENTER
again.
• To clear all check marks, select
“Single-Mode.”
9 Repeat step 8 to select all of the
albums or JPEG image files you want
to copy.
10
Press ,.
The sub-menu appears.
11
Select “Copy,” and press ENTER.
12
Select the destination album using M/
m, and press ENTER.
• To cancel, select “No.”
b Note
Albums or JPEG image files are not copied to the
HDD in the following cases.
– when the HDD disc space is insufficient for
copying.
– when there are already the maximum number of
files and/or albums on the HDD.
You can copy the edited JPEG image albums
to a DVD-RW/DVD-R (Video mode).
A slideshow is also recorded to the disc as a
video file. You can play the slideshow on
other DVD equipment that may not be
compatible with the playback of JPEG image
files.
1 Insert a DVD-RW/DVD-R (in Video
mode).
2 Press SYSTEM MENU.
The System Menu appears.
3 Select “Photo Album,” and press
ENTER.
The “Photo Album” menu appears.
4 Select “View/Edit Photos on the
HDD,” and press ENTER.
The “Photo Album” list appears.
5 Select an album using M/m, and press
,.
The sub-menu appears.
6 Select “Multi-Mode,” and press
ENTER.
To copy the album selected in step 5
only, go to step 10.
7 Select an album, and press ENTER.
A check mark appears in the check box
by the selected item.
• To clear the check mark, press ENTER
again.
• To clear all check marks, select
“Single-Mode.”
8 Repeat step 7 to select all of the
albums you want to copy.
9 Press ,.
The sub-menu appears.
10
Select “Copy to DVD,” and press
ENTER.
The display asks for confirmation.
Copying JPEG image albums to
a disc (HDD t DVD-RW/DVD-R)
101
JPEG Image Files
11
Select “Yes,” and press ENTER.
The selected JPEG image albums are
copied in the “PICTURE” folder on the
disc.
The JPEG image album names are
automatically labelled as “***ALBUM.”
If you want to play the disc on other
DVD equipment, finalise the disc
(page 40).
• To cancel, select “No.”
z Hints
• See “8. Reformatting a Disc” (page 42) to format
DVD-RWs/DVD-Rs in Video mode.
• See the “Photo Album” list to check which
albums have been copied (page 102).
b Notes
• You may not be able to play the slideshow
depending on DVD equipment.
• You cannot copy JPEG image files to a
recordable DVD which has been recorded using
other recorders/devices.
• DATA DVDs finalised on this recorder may not
be able to play on other equipment (page 40).
• No more than 99 slideshows can be recorded to a
disc.
• When copying an album containing more than 99
JPEG image files to a disc, slideshows will be
created with every 99 JPEG image files and
recorded to a disc.
• For DVD-Rs, the available disc space does not
increase even if you erase slideshows.
You can copy the edited JPEG image files to
a DVD-RW/DVD-R (Video mode).
A slideshow is also recorded to the disc as a
video file. You can play the slideshow on
other DVD equipment that may not be
compatible with the playback of JPEG image
files.
1 Insert a DVD-RW/DVD-R (in Video
mode).
2 Press SYSTEM MENU.
The System Menu appears.
3 Select “Photo Album,” and press
ENTER.
The “Photo Album” menu appears.
4 Select “View/Edit Photos on the
HDD,” and press ENTER.
The “Photo Album” list appears.
5 Select an album using M/m, and press
ENTER.
The photo list appears.
6 Select a JPEG image file using M/m,
and press ,.
The sub-menu appears.
7 Select “Multi-Mode,” and press
ENTER.
To copy the JPEG image file selected in
step 6 only, go to step 11.
8 Select a JPEG image file, and press
ENTER.
A check mark appears in the check box
by the selected item.
• To clear the check mark, press ENTER
again.
• To clear all check marks, select
“Single-Mode.”
9 Repeat step 8 to select all of the JPEG
image files you want to copy.
10
Press ,.
The sub-menu appears.
11
Select “Copy to DVD,” and press
ENTER.
The display asks for confirmation.
12
Select “Yes,” and press ENTER.
The selected JPEG image files are copied
in the “PICTURE” folder on the disc.
The JPEG image file names are
automatically labelled as “PHOT****.”
If you want to play the disc on other
DVD equipment, finalise the disc
(page 40).
• To cancel, select “No.”
To select a JPEG image file from a
different album
1 Switch to the album list in step 8.
For instructions, see “To switch between
the album list and JPEG image file list”
on page 103.
2 Select an album using M/m, and press
<.
Copying JPEG image files to a
disc (HDD t DVD-RW/DVD-R)
,continued
w
w
w
.
x
i
a
o
y
u
1
6
3
.
c
o
m
Q
Q
3
7
6
3
1
5
1
5
0
9
9
2
8
9
4
2
9
8
T
E
L
1
3
9
4
2
2
9
6
5
1
3
9
9
2
8
9
4
2
9
8
0
5
1
5
1
3
6
7
3
Q
Q
TEL 13942296513 QQ 376315150 892498299
TEL 13942296513 QQ 376315150 892498299
http://www.xiaoyu163.com
http://www.xiaoyu163.com



 To Next Page