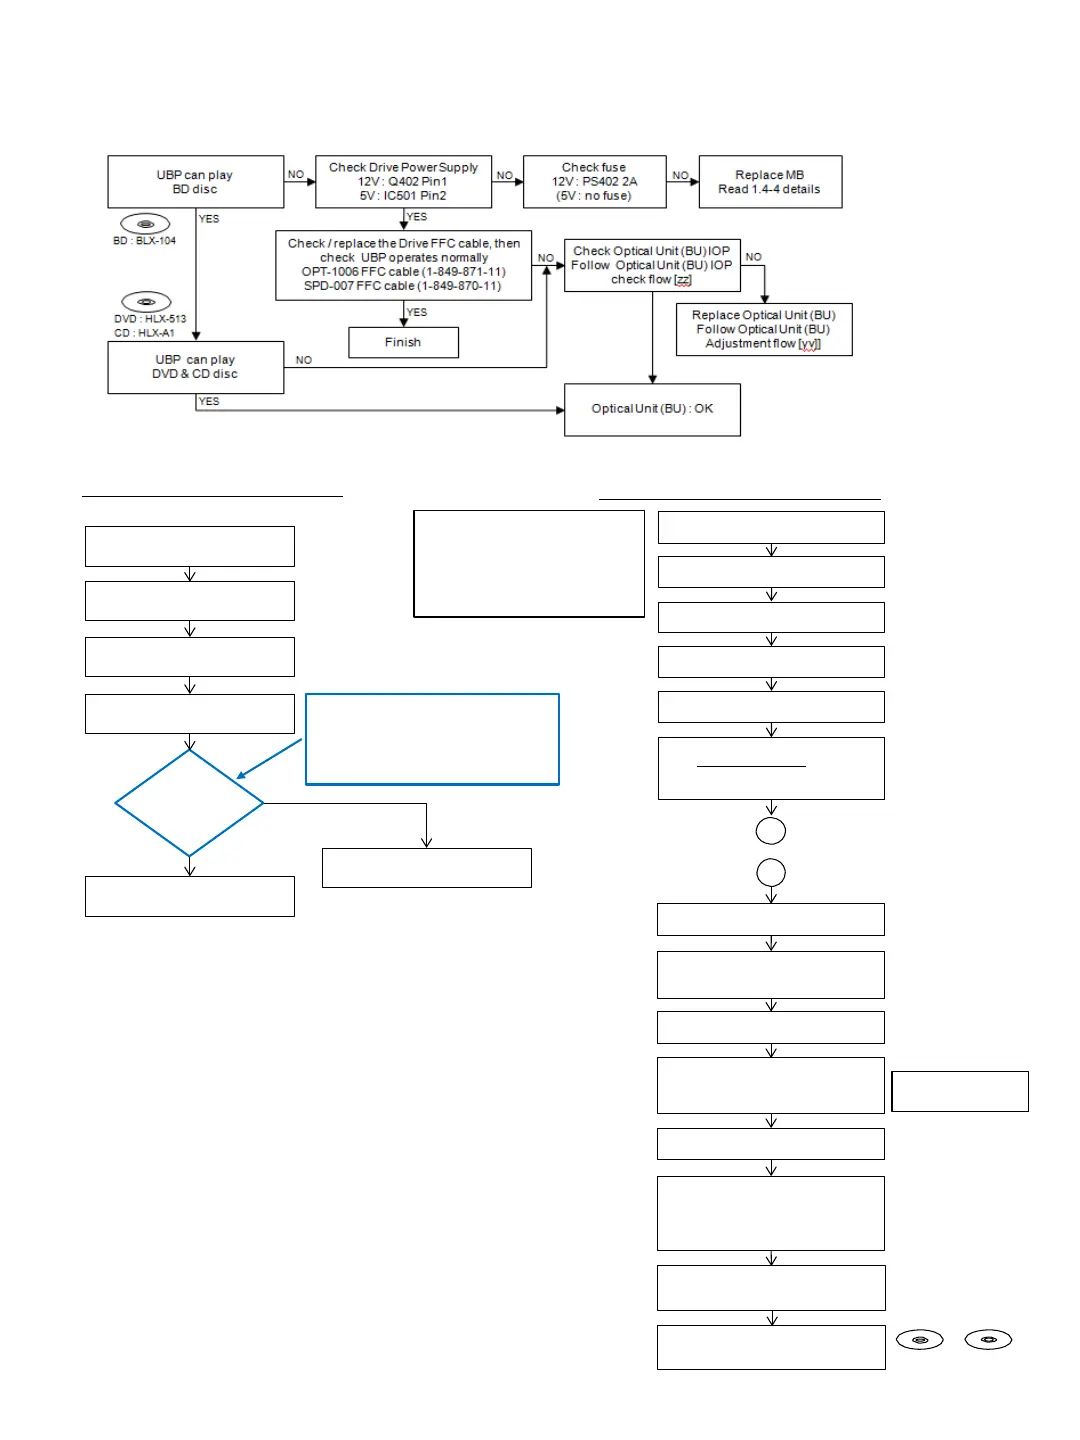
6-7. Drive Flowchart
Optical Unit (BU) IOP check flow [zz]
~ Before BU Replacement
Optical Unit (BU) Replacement flow [yy]
Enter Service Mode (HOME)
Press
<STOP><DISPLAY><PAUSE><↑>
*Service Mode Menu
Select - [8] Drive
*Drive
Select - [7] OP Check Menu
Select - [3] dIOP
Press <ENTER>
AC Po wer OFF
IOP
judge
Optical Block Unit (BU) replacement
(Flowchart yy)
YES
NO
[3] dIOP
BD : aa [DD] spec aa = ±6mA
DVD : bb [EE] spec bb = ±9mA
CD : cc [FF] spec cc = ±9mA
TEMP : xx.x deg
Remove defective BU assy from Loading
Assy
Unpack new BU and take OP Data
barcode photo by camera
Assemble BU insulator and weight
(tigthen screw with 1.3kgf.cm)
Decode the OP Data Barcode photo
using UHDBUDEcode.exe
and save the
data in txt file to USB memory
(File name: BuData.txt)
B
Remove insulator and weight from
defective BU
Assemble BU assy into Loading Assy
(tigthen screw with 1.3kgf.cm)
The following cases need
OP Data Write:
(1) Replace BU (MB is original)
(2) Replace MB (BU is original)
(3) Replace b oth BU and MB
Insert USB memory to
Set USB conn ector
AC Power ON HOME
Enter Service Mode
Press <STOP><DISPLAY><PAUSE><↑>
*Service Mode Menu
Select - [8] Drive
*Drive
Select - [1] Drive OP data write
Select mode : 2
Press <ENTER>
After Finishing OP data write
Turn AC Power OFF
AC Po wer ON
HOME Enter Service Mode
Select [8] Drive
Select [7] OP Check Menu
Select [3] dIOP
Check dIOP for BD, DVD and CD
dIOPin specification
Turn AC Power OFF
AC Po wer ON
Check playback performance
BD, DVD and CD
Explanation :
Mode 1 : BDV set
Mode 2 : UBP set
BD : BLX-104 DVD : HLX-513
CD : HLX-A1
B
6-6